Introduction
This is a web question, it seems to be linked to the one before corCTFmsfroggenerator, haha
corCTF Flag was mentionedshould have rendered client side, but this time it was finally implemented
All in all, this question tests your familiarity with various browser features and back-end services. The overall ability is relatively strong, I will give it a hundred hits.
Overview
First look at the source code docker-compose.yml , we will find that it runs four services separately
| 1 2 3 4 5 6 7 8 9 10 11 12 13 14 15 16 17 18 19 20 21 22 23 24 25 26 27 | services:YAML |
apiis the main backend, isnodebotIt is to simulate a browser access environment, and it is alsonode+puppteertraefikacts as an intermediary proxy so thatopenrestycan access these two services (important points to be tested later)openrestyis a reverse proxy withluaadded. It opens a port to the outside world and is the first one accessednginx
Then let’s take a look at the configuration of nginx
| 1 2 3 4 5 6 7 8 9 10 11 12 13 14 15 16 17 | server {NGINX |
Anyone outside /api/ and /report will access its static files, that is, the front end
then< /span>Both of these are set is an absolute match where are routed to api/ and reporttraefik/reportHost
Then the more important thing is that/report there is one under the interface set_by_lua, I looked for this ngx.var.arg_xx, it is directly Used to read query parameters, and only query. So this is equivalent to concatenating a string and parameters, and then passing them to the back.
Then the url parameter obtained later can actually only start with http://openresty:8080/?id=, which is a bit outrageous
Let’s see againtraefik
| 1 2 3 4 5 6 7 8 9 10 11 12 13 14 15 16 17 | http:YAML |
It’s very simple to send it to different services based on the host sent by nginx.
Then the back-end code is too long to put in. Basically it provides four interfaces
- GET /api/get
- POST /api/create
- GET /api/reports/get
- POST /api/reports/add
The first two interfaces are related to the front-end functions. Basically, they save the canvas information and have strict verification.
The last two interfaces are to save the screenshot information transmitted from the bot. And anyone can access it
There are no loopholes here, it’s very sound
The only thing I noticed is that it reads the flag header used to verify add report, so the flag is required to add screenshots
I have also read the front-end code many times, and there are no obvious bugs. The konva library used is also very good, and basically does not involve any possible xss dom operations.
Then the key point lies in this bot.
Put the first piece of code first
| 1 2 3 4 5 6 7 8 9 10 11 12 13 14 15 16 17 18 19 20 21 22 | import { createServer } from 'http';JAVASCRIPT |
There are very few, but there are several important information. First, the server is created, and then when the request is obtained, the request is parsed again, and the query parameter url is taken out, and then Call bot .js and pass it the url.
Stage 1 Reverse Proxy Exploit
The first thing I noticed here is the paragraph in the first line used to parse URL, because it is not used searchParams.get, but CalledObject.fromEntries. The difference is that searchParams can be traversed because there may be list parameters, that is, multiple values and one key. Object.fromEntries will compress multiple items into one and always get the last one.
The picture below illustrates this very well

experiment
In other words, if there are two url that I pass in, then it will give priority to the latter one
At this time, let’s review the configuration of nginx:
| 1 2 3 4 | {NGINX |
These two lines can be simplified to
url = "http://traefik:8080/?url=http://openresty:8080/?id=" + query_id
Did you find anything? This means that if we use query_id = "&url=任意链接", we can spoof, and
can directly bypass the restrictions of http://openresty:8080/?id= and pass any URL!
Just splice it together
url = "http://traefik:8080/?url=http://openresty:8080/?id=&url=你需要的链接""
In this way, you can get it directly here during subsequent analysis~
Have fun, then just go experiment
The result will not work
Why? Because & is a reserved word! If you use & directly, it will be treated by nginx as another parameter at the beginning and will not read you!
For the line, we use its url-encoded form, %26.
Unfortunately, %26 doesn’t work either, because ngx.var.arg_xx does not perform urldecode, restore it.
This will only allow the following parameters to be accepted in parallel with id
After being stuck for more than a day, I finally found what I needed in an issue.
Traefik >= 2.7.2 changes “;” to “&” in URL request string #9164
So some things may seem useless to you, but they are actually of great use, such as Traefik. Without it, nginx can route normally, but you cannot.
So we structure it like this~
/report?id=;url=你的链接
This allows the bot to turn it into any link you want when it receives the link later, because Traefik automatically replaces the ; symbol for you.
Stage 2 Chrome Explore
Since any URL can be passed, let’s look at the centralbot.js
| 1 2 3 4 5 6 7 8 9 10 11 12 13 14 15 16 17 18 19 20 21 22 23 24 25 26 27 28 29 30 31 32 33 34 35 36 37 38 39 40 41 42 43 44 45 46 47 48 49 50 | import puppeteer from 'puppeteer';JAVASCRIPT |
Our old friend Puppeteer is used here to control a chrome browser. Note that it is not headless, but has an interface, because screenshots are required
It first accepts parametersURL, then accesses the main sitehttp://openresty:8080/ and then inserts a flag into localStorage .
Then go to the customized URL and wait 5 seconds and then take a screenshot and send it to report interface. Thereport interface requires flag , so it reads immediately from localStrage
Okay, it doesn’t seem difficult to see a bunch of them here. We just need to take out from localStorage and that’s it! Actually, it’s more difficult hereflag
First of all, localStorage follows strict cross-domain access blocking in the specification. The protocol, host, and port number must be the same to access, and even subdomain names cannot be accessed.
This means that if we want to read localStorage then we must use some type of XSS injection script into the interface to steal the content of localStorage< /span>
As mentioned above, this front end is almost impeccable, and the CSP is also very strict.
My second thought was, what if we use url = javascript:代码 to make it stay on the current page and execute the code?
Unfortunately, puppteer this can’t be done
This road doesn’t work anymore. so what to do
I’m stuck here, mainly searching for some exploitable vulnerabilities that break chrome’s isolation. However, the one used here is too new (Chrome Version == 111.0.0), so no usable POC was found.
Okay, then since we can’t read from localStorage, we read directly from its source! Read its file!
Stage 3 Chrome %Any% URL Exploit
As you can see from the above, we can let the browser access any URL! Whatever!
So we can specify different Schemes for it to access, such as data, blob, javascript, or evenfile!
According to the previous docker-compose.yml, we know that the flag is stored in /flag.txt
, that is to say, it can be accessed using file:///flag.txt it!
It is indeed possible to experiment with the browser, but how do we send the Flag back?
First of all, I have to introduce Chrome’s strict cross-domain mechanism, and it also has a unique protection mechanism for the file scheme.
For things that directly obtain information such as fetch, cross-domain is not possible, and file is in a special place, it and < a i=3> also uses as and cannot access each other. datanullorigin
If external access to the content of file will be directly blocked by chrome and say Not allowed to load local resource
In other words, I cannot use anything other than file to directly obtain the content of file, even open Neither iframe nor can access file, and this is indeed done for security. Otherwise, any website can read your local data, I’m really scared
However,chrome is lax in one place, that is, file is not subject to this restriction when accessing file . Because sometimes you really need to open a local html to debug and so on.
It should be noted that when accessing from file, we cannot use cross-domain methods to directly obtain information, such as and return object. But and can be used normally. filefetchopenopeniframe
And this thing is a real browser, the same one you use! Then there will be writing to the file system, that is, saving the file.
After experiments, it runs as Root in this system, so our files will eventually be written to the /root/Downloads/ directory. This is a definite and decisive conclusion.
Okay, then I thought about it all morning and summarized a set of attack procedures as follows:
- The first request first saves a file locally through the
datadomain, which contains our payloadhtml - The second request opens the file we saved, so that we gain access to a
filedomain, that is, we can freely nest and open new local files - Finally, the timing is stuck at the moment of taking the screenshot. The screenshot is taken to
flagand jumps tohttp://openresty:8080at the same time. Let the next code send the screenshot. We You can seeflag.
Okay, now comes the happy payload construction time
Stage 4 Build Payload
For speed I choose to use data to deliver the web page and save the downloaded file
| 1 2 3 4 5 6 7 | <body></body>HTML |
This code is a very classic saving mechanism, which saves files by triggering a click event.
Then the downloaded file needs to be displayed first flag for screenshot, and then quickly jump to the main page to complete the return
| 1 2 3 4 5 6 7 8 9 | <iframe src="file:///flag.txt"></iframe>JS |
This iframe is responsible for displaying the content of the flag, and the following setTimeout is responsible for timing jumps
You ask me why I added a random number? When we want to get stuck, of course we have to make the timing random and let it crash! ! ! Just hit the middle of two function calls~
Okay, let’s construct the URL
/report?id=;url=data:html/text,第一段payload/report?id=;url=file:///root/Downloads/flagger.html
The second request is written in a loop and sent continuously. Finally, we check the screenshot results at the end point~
/api/reports/get
Final result~
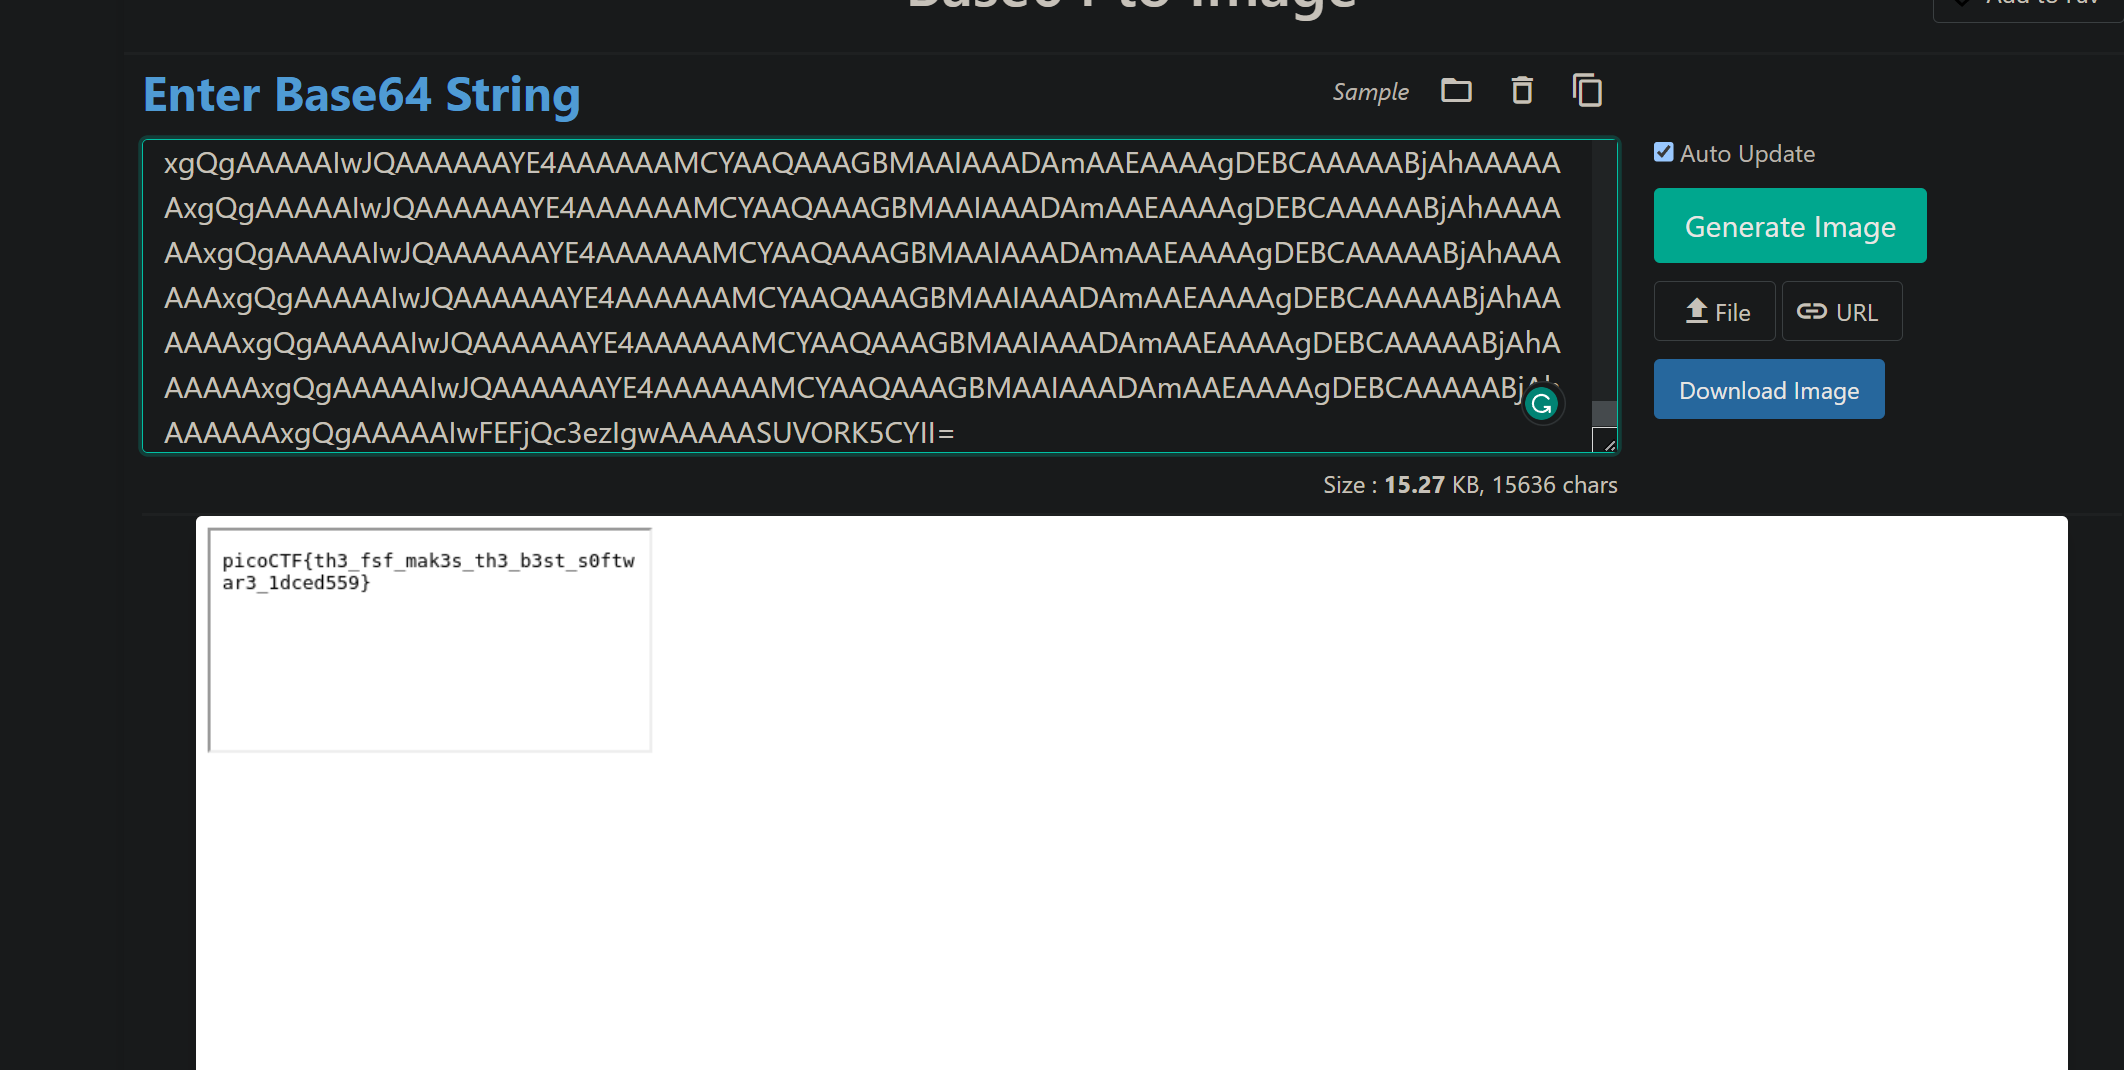
Explode gold coins
FinishpicoCTF 2023 msfroggenerator2
This time is really meaningful, and I learned a lot in the process of solving problems. Thank you to my friends who participated with me!