Introduction
In this post, You will learn what is dumpcap and we will be seeing how to capture packets using the dumpcap tool.
Below is the video format of the post, please check it out.
Wireshark Lesson 1 [Click here]
Wireshark Lesson 2 [Click here]
Wireshark Lesson 3 [Click here]
Wireshark Lesson 4 [Click here]
Wireshark Lesson 5 [Click here]
Dumpcap [Download]
Video
What is dumpcap ❓
Dumpcap is a packet capturing tool and while installing Wireshark you will install a lot of other tools too and one of them is the dumpcap or you may have installed the tcpdump.
In Wireshark, there is a pre-installed tool that captures the packet and it is called the NPCAP.
The dumpcap and tcpdump are CLI (command-line interface tools) that come along with the Wireshark installation.
Advertisement
Why do we use dumpcap or tcpdump
You may be thinking we have an inbuilt tool in Wireshark to capture packets but why do we use dumpcap or tcpdump.
Firstly the dumpcap and tcpdump is CLI tool and the NPCAP is a GUI. Compared to GUI dumpcap and tcpdump is really very easy to use.
So, You got the answer CLI tools such as dumpcap and tcpdump are really very easy to use.
Capturing packets using tcpdump or dumpcap is the raw of capturing packets.
What’s the difference between wireshark, tshark, dumpcap and tcpdump?
Wireshark – a powerful sniffer, with a GUI, which can decode lots of protocols, lots of filters.
tshark – command-line version of Wireshark
dumpcap (part of Wireshark) – can only capture traffic and can be used by Wireshark / tshark
tcpdump – limited protocol decoding but available on most *NIX platforms
Advertisement
How to use Dumpcap ????
Just follow the below steps and I am sure by end of the post you will be familiar with the post. If you have any doubt comment down below or watch the youtube video I made.
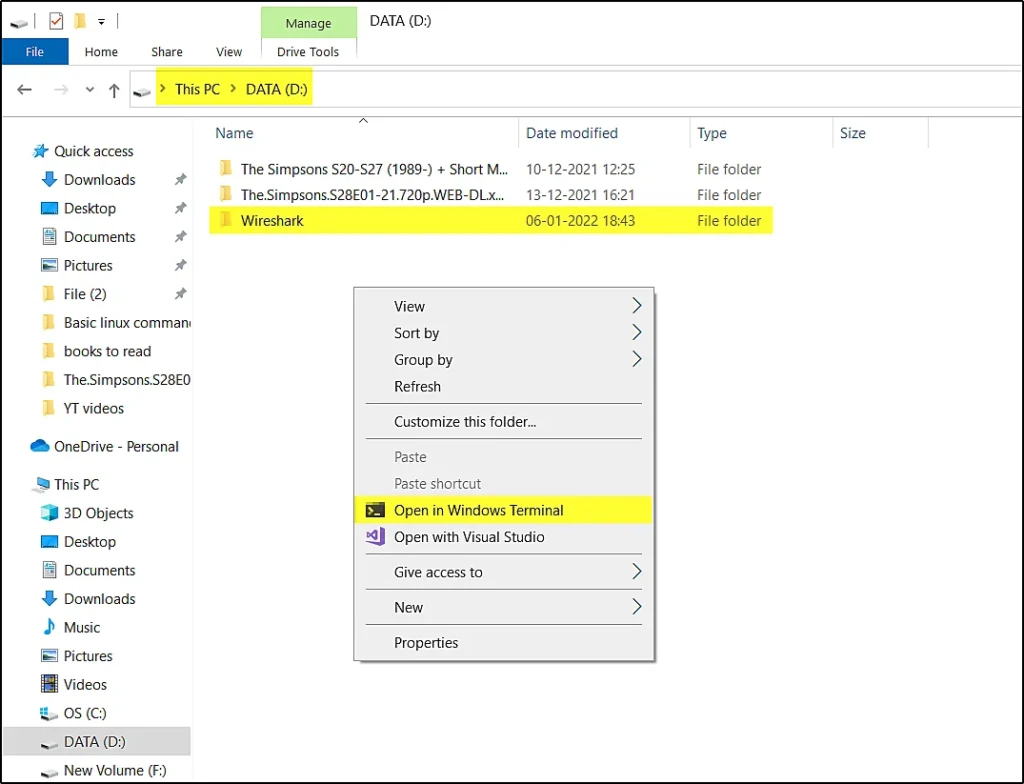
Opening dumpcap
To open dumpcap just go to the Wireshark file location and do a right-click and open in terminal.

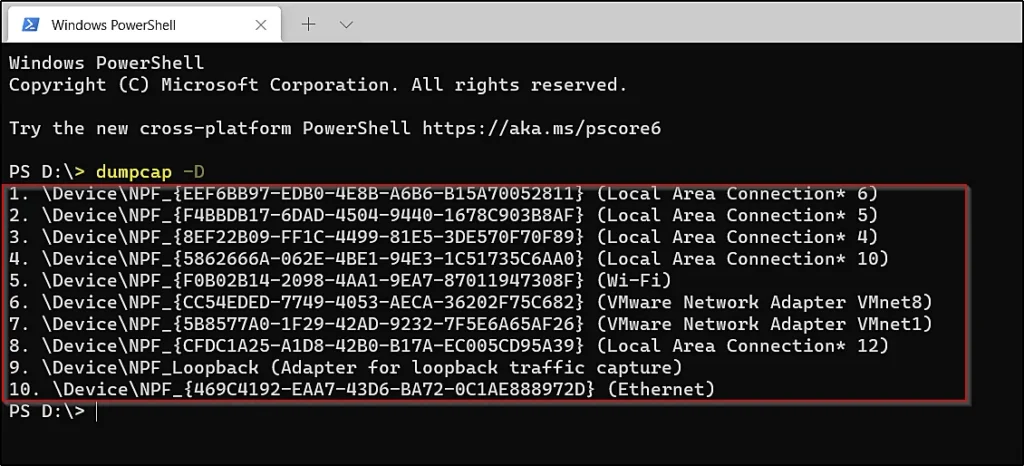
Finding network interface
To find the network interfaces just do
dumpcap -D
Capturing packets using dumpcap
To capture packets using dumpcap just enter this command
dumpcap -i 5
-i: Interface
Once you enter -i then specify the network you wanna capture packets. I have entered the no 5 which is wifi.
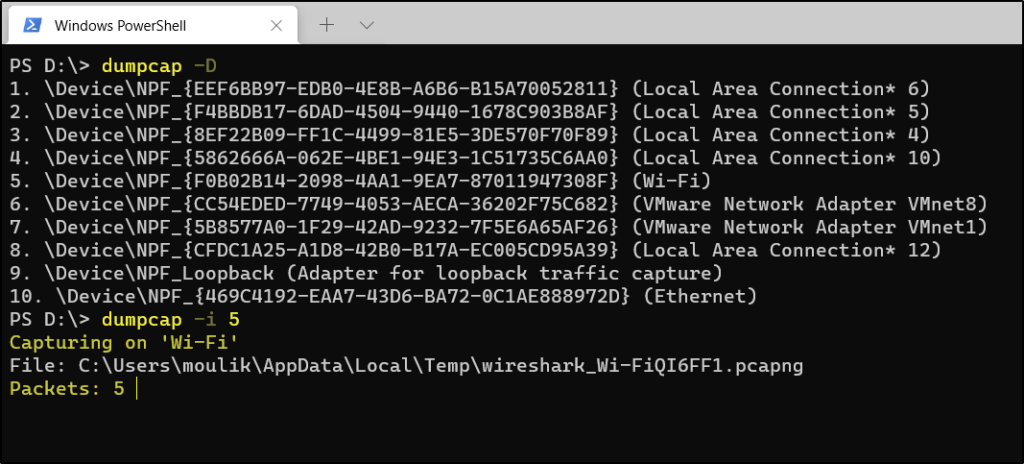
You can see it is saying capturing on WiFi.
Saving the captured packets
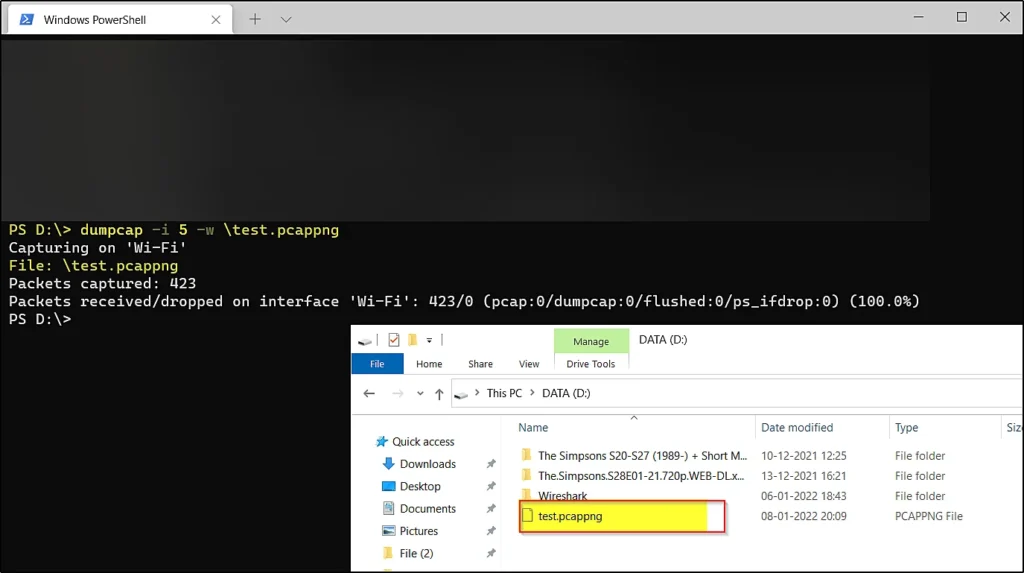
To save the captured packets we just enter this command.
dumpcap -i <Network Interface> -w \test.pcappng
dumpcap -i 5 -w \test.pcappng
You can specify the output format, It can be in the form of pcap or pcappng.
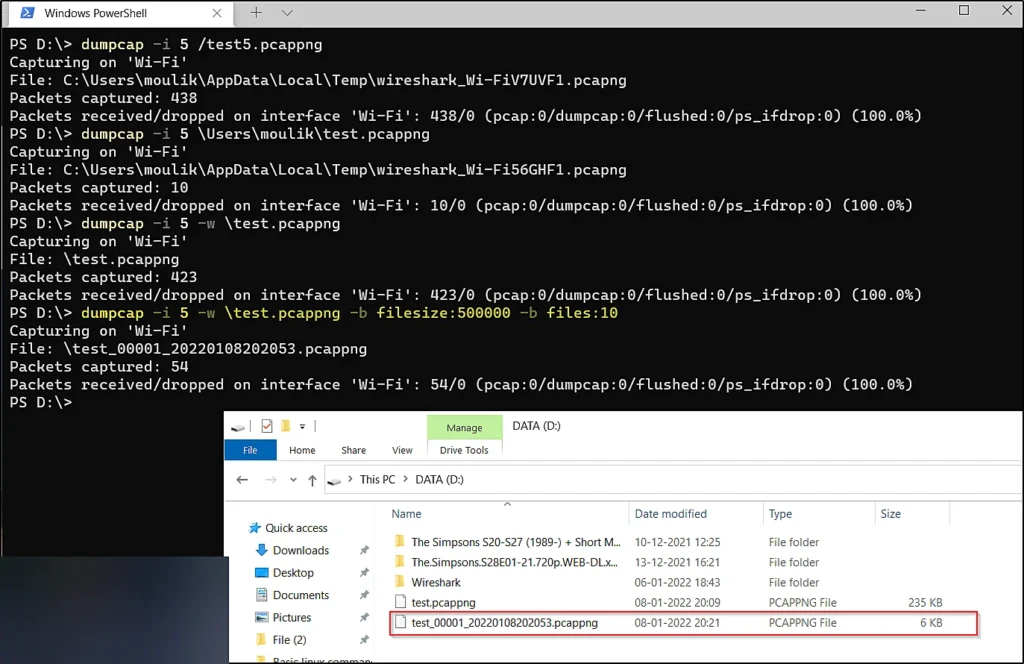
Setting up ring buffer
Firstly what the hell is ring buffer. The ring buffer is like a stop limit. Once you set the ring buffer at 500 MB, Then for every 500 MB file a new file will be created and you can also set how many 500 MB files to be stored if you set it as 10 then after 10, 500 MB file the packet capturing will be stopped.
dumpcap -i 5 -w \test.pcappng -b filesize:500000 -b files:10
-i: Interface
-w: save file
-b: ring buffer
After entering the -b command we are saying how much the filesize to be, I have entered 500MB and then again we are entering -b and specifying how many times the 500 MB files to be captured. I have mentioned 10.
Advertisement
So, After 10 files of 500 MB, the packet capture will be stopped.
Conclusion
In this post, we have seen an alternate tool to capture packets and this is the raw way of capturing the packets.