Introduction
The is the second lesson in Wireshark, If you didn’t read the first lesson please [Click here] to read.
Below is the video format of the post, check it out. In this post, we will be seeing how to capture traffics in Wireshark.
Wireshark Lesson 1 [Click here]
Wireshark Lesson 2 [Click here]
Wireshark Lesson 3 [Click here]
Wireshark Lesson 4 [Click here]
Wireshark Lesson 5 [Click here]
Video
Wireshark Lesson 2 How to capture network traffics
Just follow the below sub-items and I am sure you are going to master the Wireshark tool. If you have any doubt comment down below or watch the video I made.
Installing capture driver
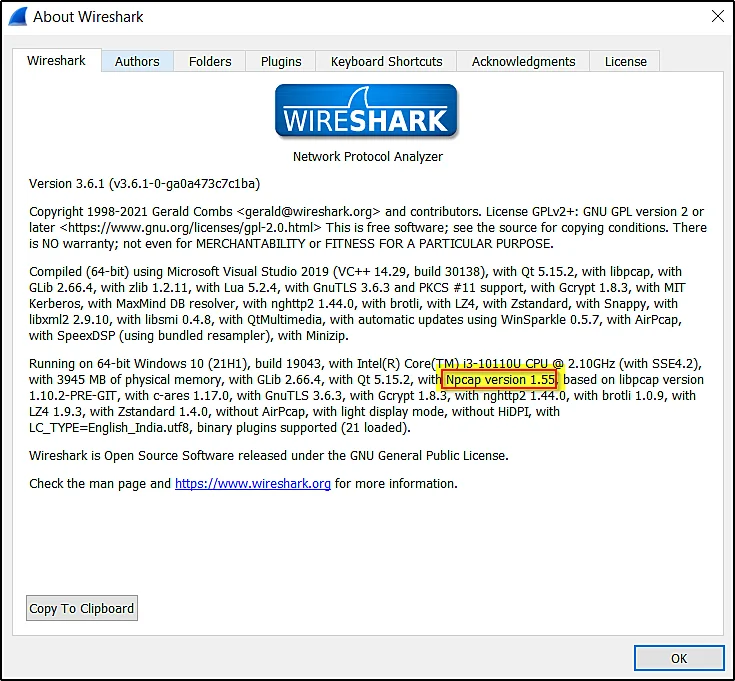
In order to capture traffics, Wireshark needs a capture driver. In simple words, Wireshark is a packet analyzer, but it can’t capture the packets without drivers.
To know which packet capture driver you are using, Just go to Help > Click About Wireshark
Advertisement
The capture interface
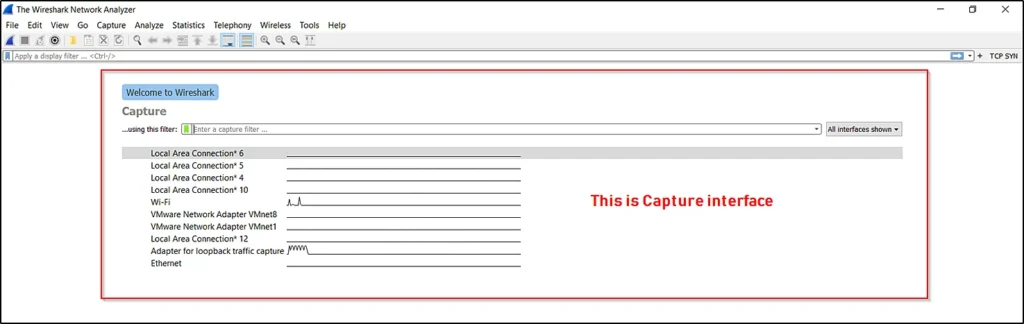
You will be seeing the capture interface as soon as you open Wireshark. If you didn’t see anything captured then make sure you run as administrator
Configure capture options
To configure the capture interface go to capture option > Click manage interface
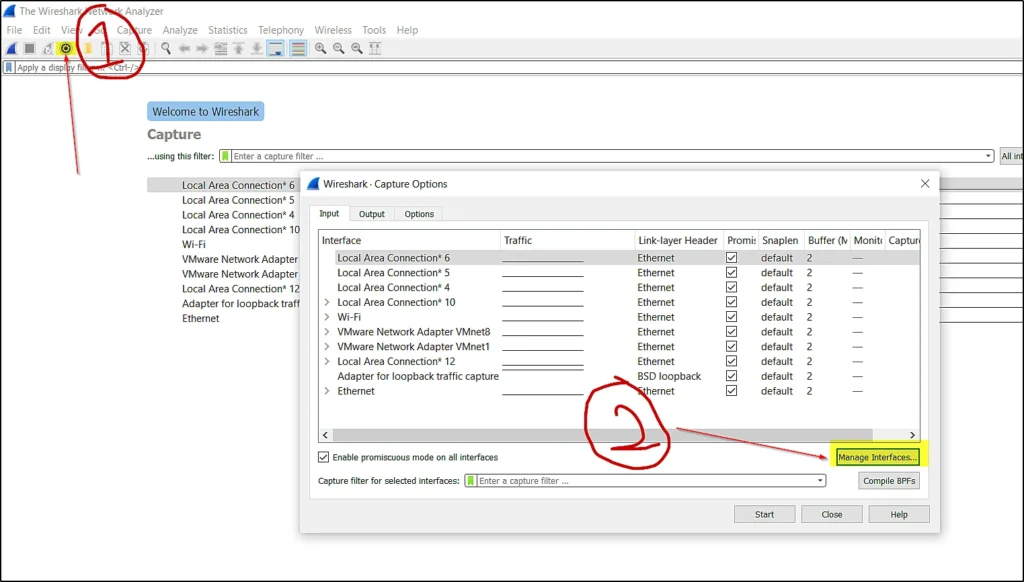
You can see at the capture interface there are many networks to configure that we are going to manage the interface.
As soon as you click manage interface you can see the below window.
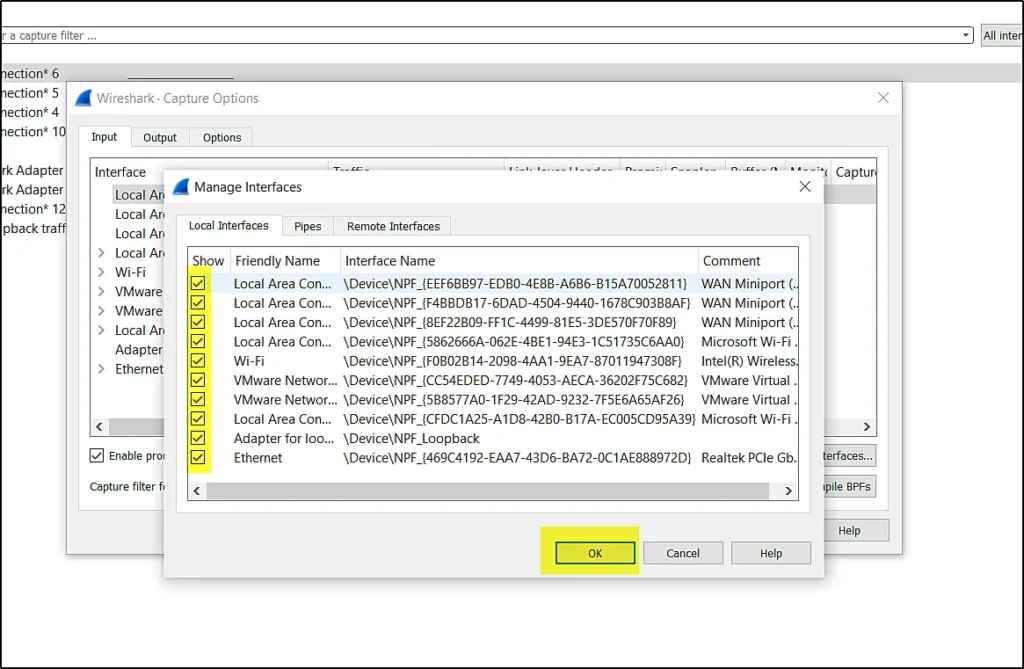
You can now unwanted networks, For eg, I don’t need the local area connection so, I will just uncheck them and click ok and then you will not see the local area connection network.
Make sure your capture interface is clean when you work.
Advertisement
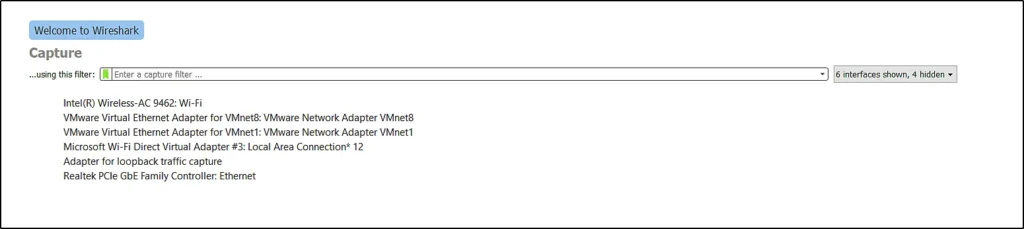
You can see I have removed local area connection networks.
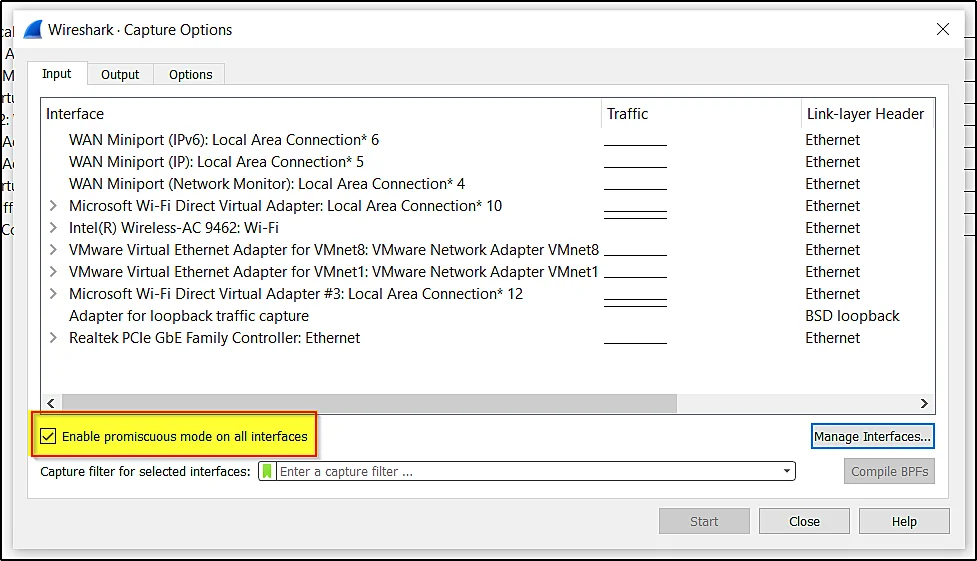
Promiscous mode
The promiscuous mode allows all the traffics and to learn what exactly is promiscuous mode [Click here]
You can enable the promiscuous mode in the capture option
Configure long term filter
When you are working in Wireshark you will be capturing tons of packets that may exceed your hardware limit, To reduce it let’s do some configuration.
I prefer 250 MB is great if it is more than 250 MB then your Wireshark will take a lot of time to load it. So, the max packets to capture at one time is 250 MB. You can go beyond 250MB but it is going to take a long time to load.
Now, You can set the capture limits at the capture option > output
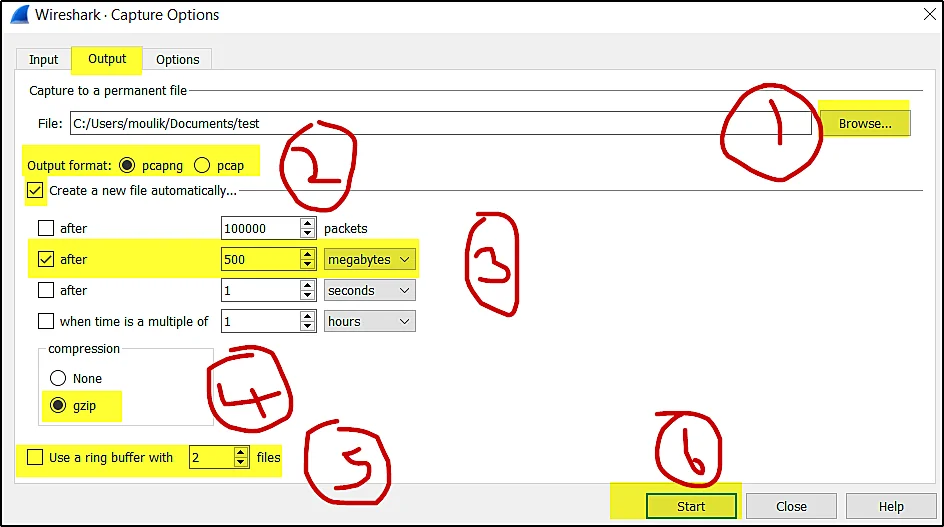
The first thing we are doing is clicking the output menu and choosing the file where you wanna save the packets.
The second choose the output format as pcappng or pcap.
Then, the third step is to click on create a new file automatically and choose the 500 MB and check it.
In the fourth step choose how the file is to be saved, it can be in a normal file or compressed file. I prefer the compressed file gzip.
Don’t skip the fifth step because if you didn’t check it then your hardware is going to fill up with lots of data.
So, Check the ring buffer and choose how many files to be store. For eg, if you want five files to be stored and the ring buffer will stop the capture once the five files are captured.
At last you can start the capture.
I know it is a little complicated to learn in blogposts that is why I made a YT video on Wireshark. Check it out.
Advertisement
Conclusion
In this post, we have seen how to configure the capture interface and seen how to set our environment in Wireshark.
At last, we have seen how to capture the packets.
There is a Lesson 3 in Wireshark, to read it [Clickhere]