Introduction
Wireshark Lesson 1: In this post, You will learn what is Wireshark and we will be seeing some basic features in the tool.
To download the tool [Click here]
For Linux users, the tool is already pre-installed. So, Linux users don’t have to worry about installation.
For the Wireshark Lesson 1, we will be using the sample trace file [Click here] to download
Wireshark Lesson 1 [Click here]
Wireshark Lesson 2 [Click here]
Wireshark Lesson 3 [Click here]
Wireshark Lesson 4 [Click here]
Wireshark Lesson 5 [Click here]
To open the file in Wireshark, Click file > open > load the downloaded file
Video
What is Wireshark ❓
Wireshark is a “Network protocol analyzer” tool. This is one of the very popular tools among hackers and pen testers. According to my knowledge, it is one of the best Network scanning tools.
The tool analyzes packets and in a network and the favourite part is the tool can deeply inspect individual packets.
Wireshark was invented by Gerald combs in the year 1988. At the time the name was Ethereal and later the name changed.
Advertisement
Getting started with wireshark
Now, You should have an idea of what is Wireshark after reading the above paragraph. Just continue reading and try side by side with the sample trace file.
Configure Profile
The first thing we are seeing in Wireshark is the profiles. So, the profile says where you are working.
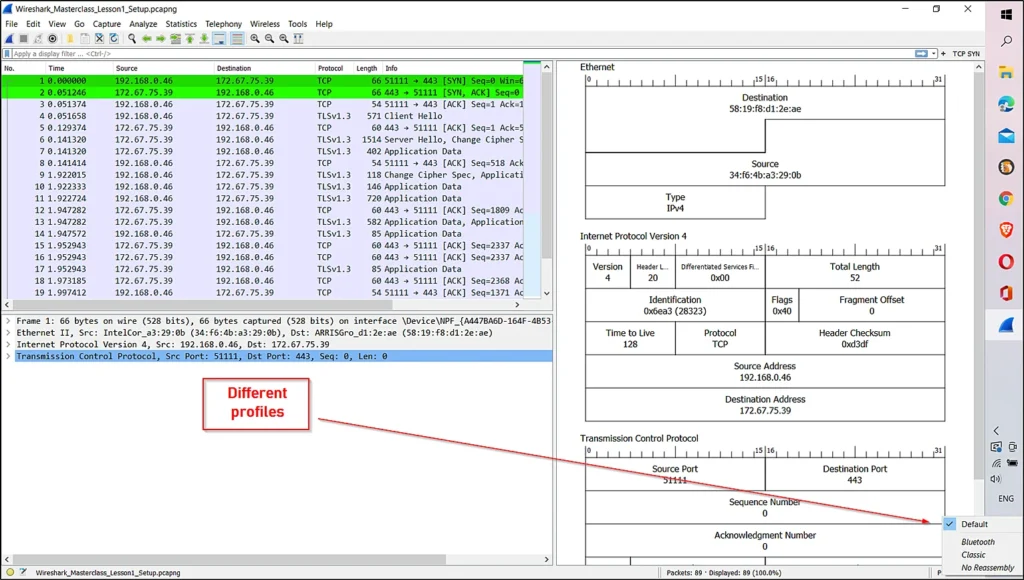
For different projects, you can use different profiles. If you are at defaults no problem. For different profiles, you can have different configurations for eg: Custom columns, Colouring rules and so on…
You can find and change the profiles at the down right corner.
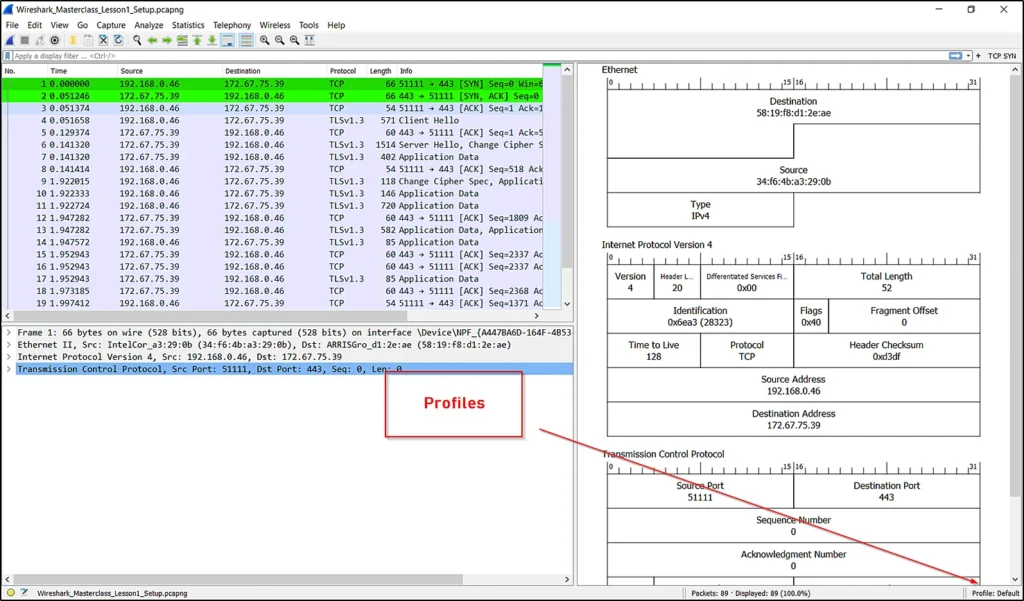
Just click on the profiles to find other profiles.
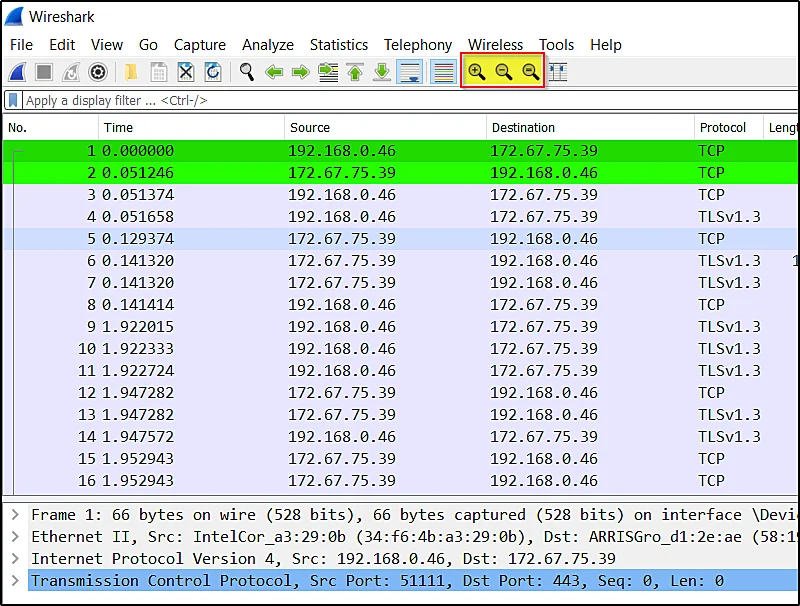
Increasing and decreasing the text sizes
To increase or decrease the text sizes you can just do ????????
ctrl + shift + + ???????? To increase the text size
ctrl + shift + – ???????? To decrease the text size
Or
You can see the magnifying glass at the top bar to increase and decrease the text size or even neutralize the text size there is a button.
Resize packet list columns to fit content
You can find this resize content button next to the magnify button. Once you click on the resize content button it fits all content in a single frame.
Before ????????

After ????????

Changing Layout
To change the layout we have to move to Edit > preferences
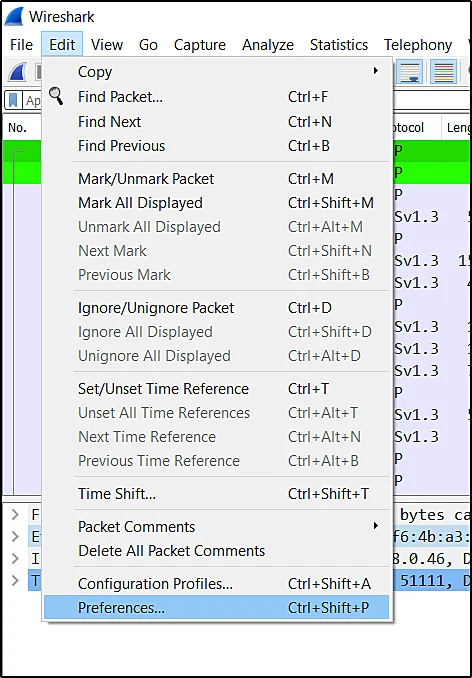
Once you have clicked preferences under appearance click layout. Now you can select the layout you want.
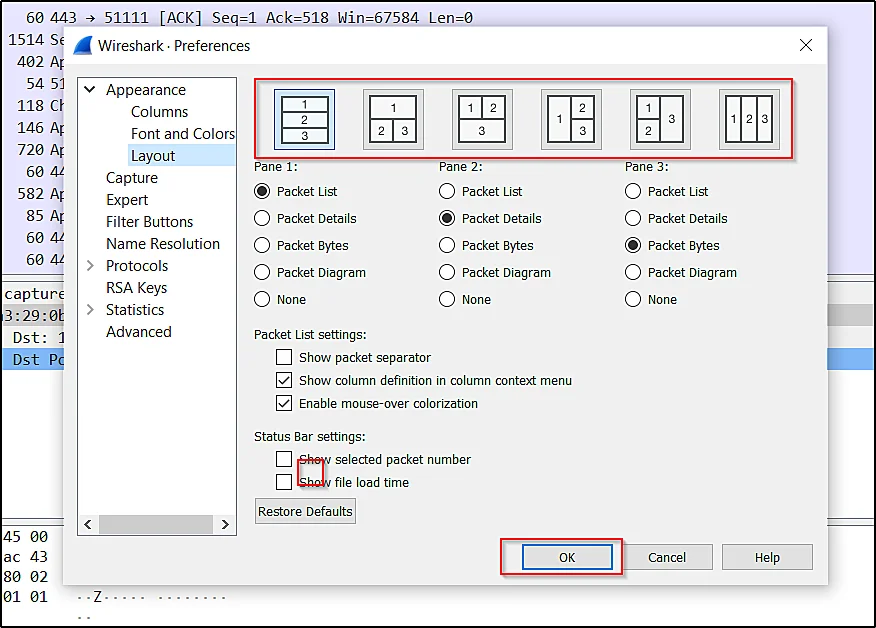
Select the layout and click ok and your layout will be changed, For eg, I am selecting 5th one
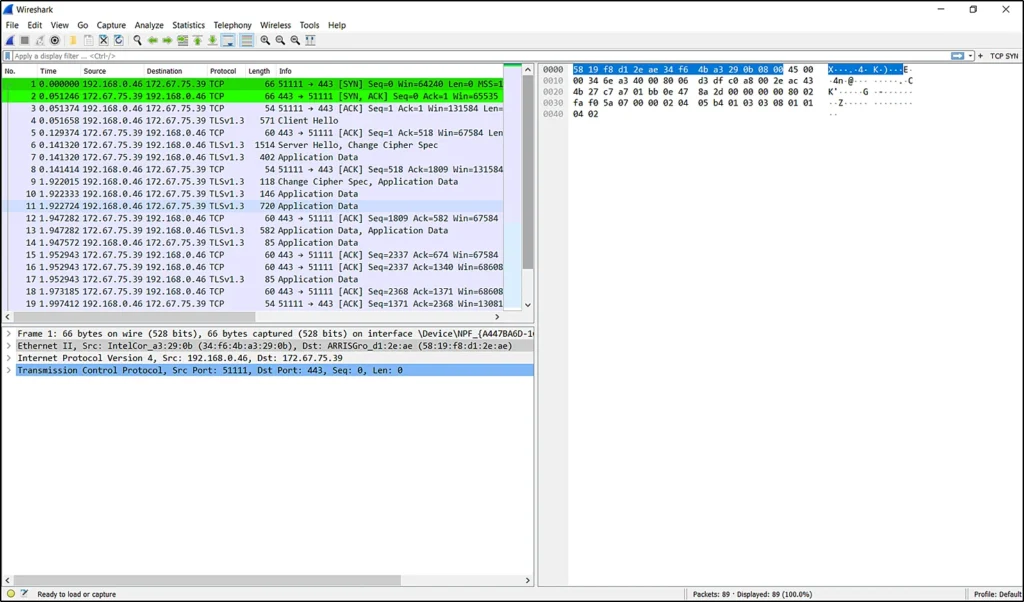
Changing packet byte to packet diagram
From the packet byte, you are not getting much information but if you use a packet diagram. You can see and analyse each packet.
From the above diagram, On the right side, we can see some numbers where you can’t understand anything because it is in bytes. But if it is in diagrams you can easily identify it.
Advertisement
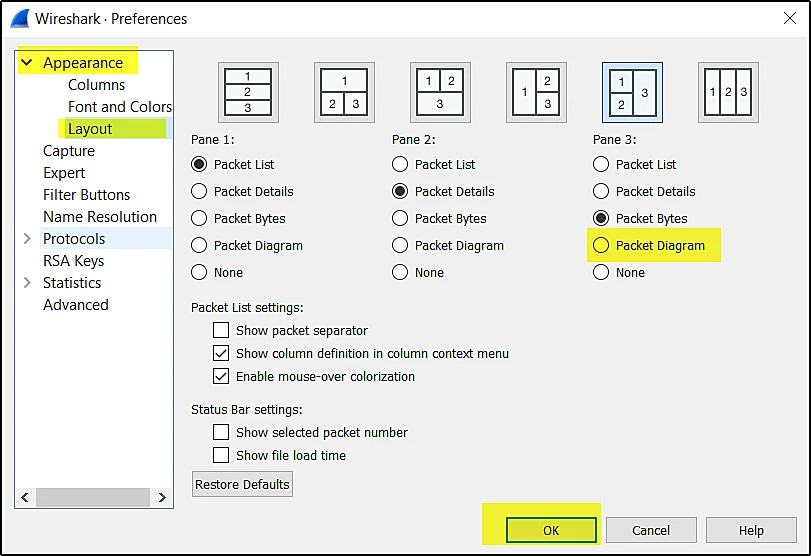
The output will be something like this ????????
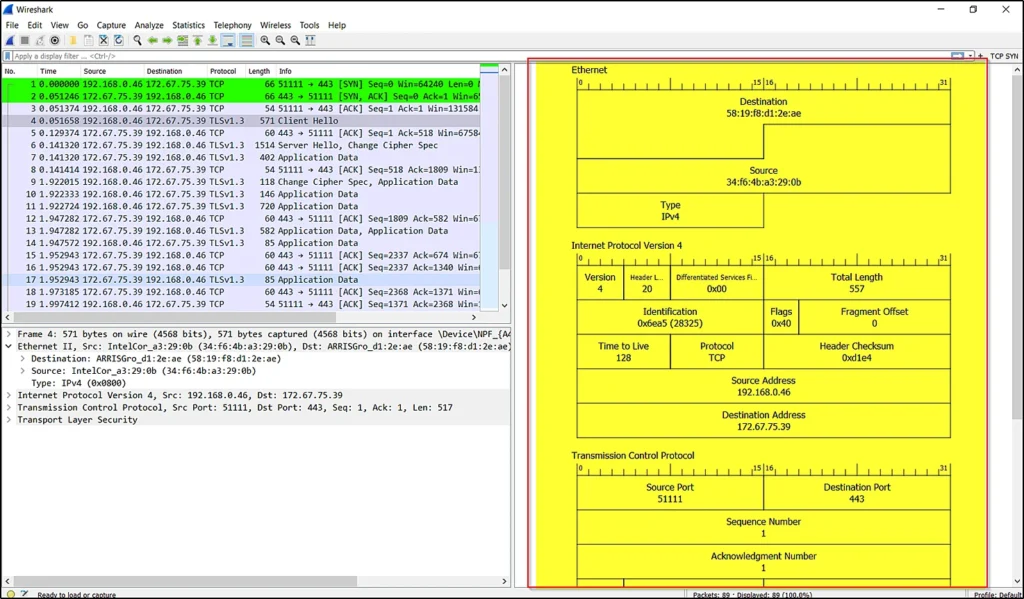
On the right side diagram, you can just do a right-click > show field values to see more information.
Adding Columns (Very Important)
Everyone who works in Wireshark should know how to add columns, The columns are nothing but the headers. Take a look at the below pic…
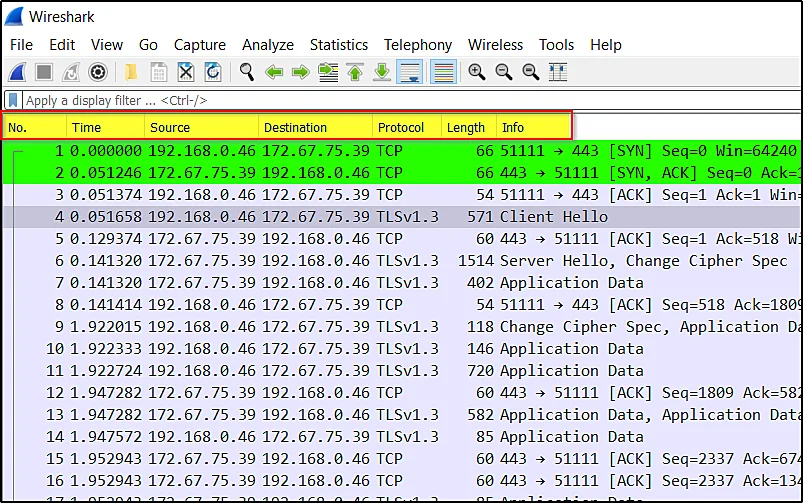
The highlighted area is the columns, The No. , Time, Source, Destinations, Protocol, Length, Info all these are the columns.
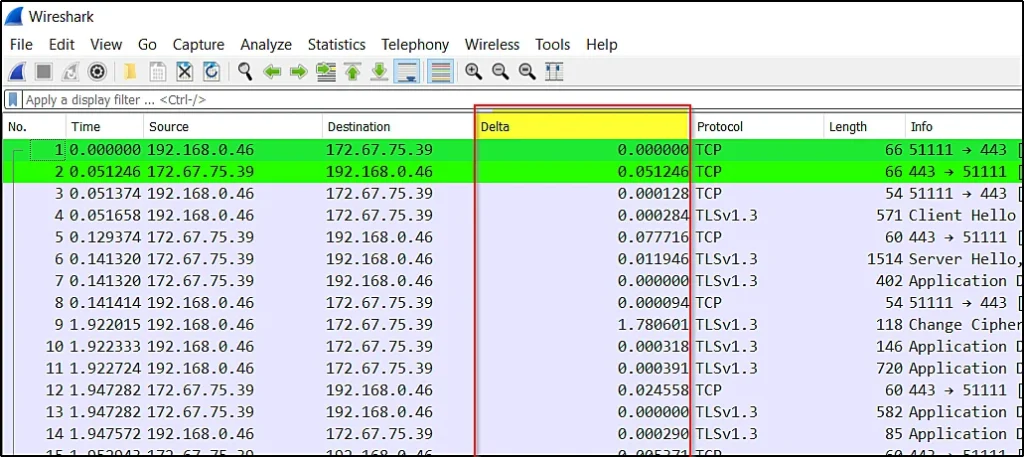
We are going to add another column called delta time.
To add another column go to edit > preference
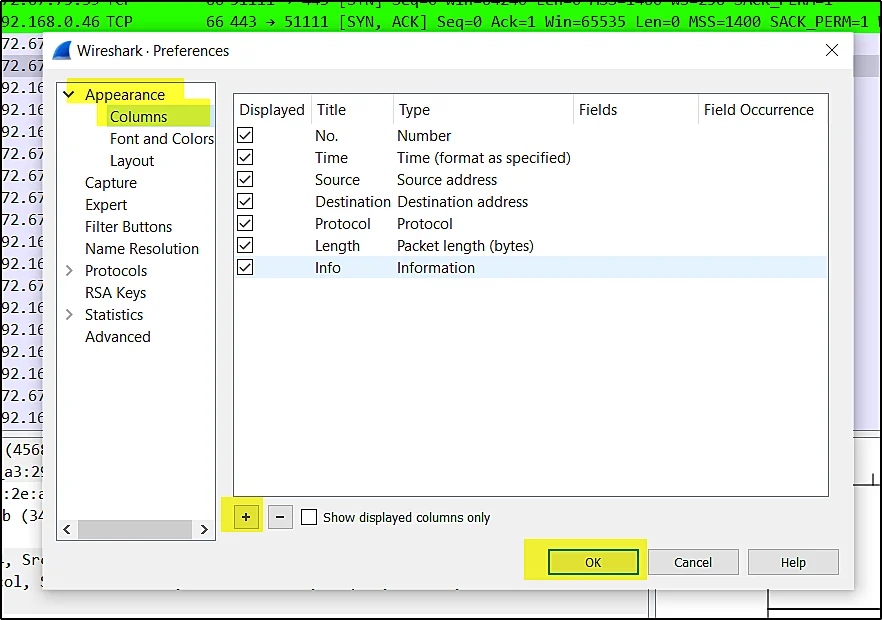
Click the + to add columns and – to delete created columns.
You can do a double click to edit the name and click on the type to change what you wanna set.
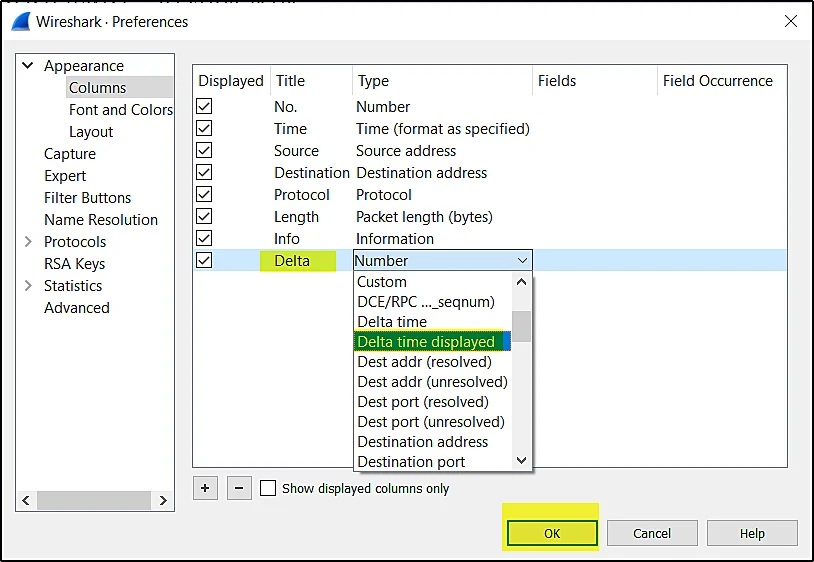
The final result will look like ????????
Colouring the packets
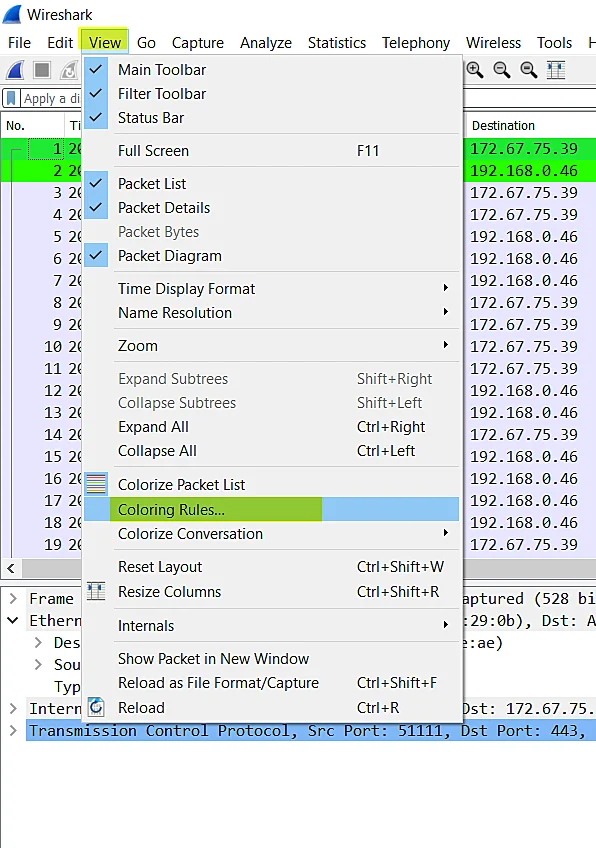
To colour different packets go to view > colourize rules
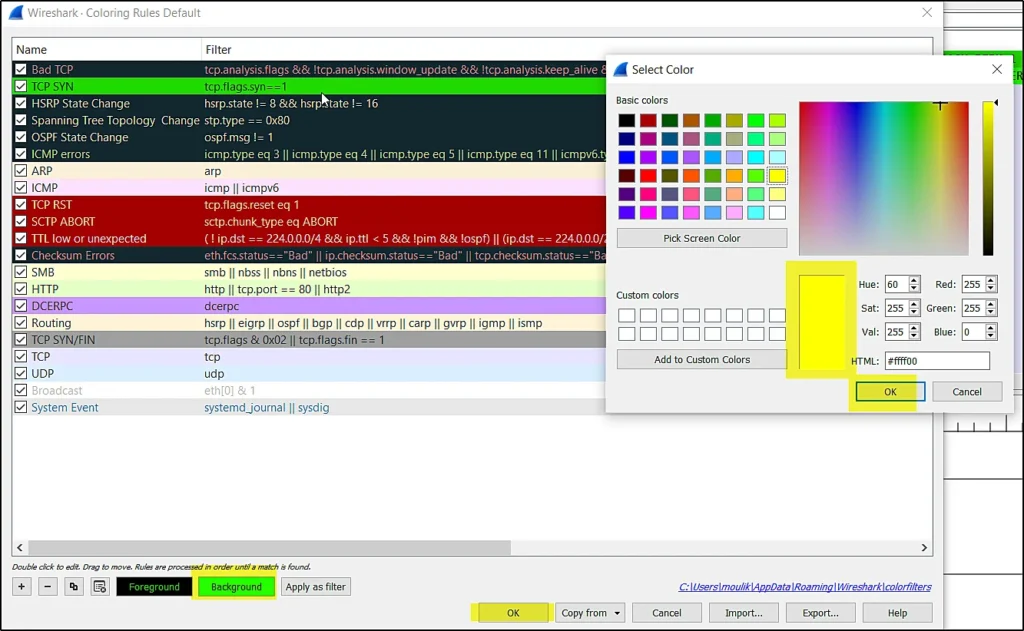
Once you click the colouring rule you can see the below interface

Conclusion
I think let’s end the blog post here, Let’s see ie Lesson 2 and there is a video format of the post, Check it out. If you have any doubt comment down below.
Advertisement


