Introduction
In this post, you will learn what is legion and a full tutorial on the legion tool and also below ???? is the video format of the legion tool check it ????.
Video
What is Legion tool
Legion is an OSINT tool used for mapping and information gathering and this is the best tool for beginners to do network mapping.
The favourite part is the tool is in GUI format and why not everyone will like to work with GUI format…
Also Read: Zenmap full tutorial for noobs to become a pro
Advertisement
Who developed the legion tool ❓
The tool was developed by a NY based company called Govanguard and the source code is available on GitHub here is the link and also the link to the Govanguard company and their contact page.
Features in legion tool
- Automatic recon and scanning with NMAP, Shodan, whataweb, nikto, Vulners, Hydra, SMBenum, dirbuster, sslyzer, webslayer. Got a lot of tools twisted ito the tool…
- GUI (grahical user interface) Very easy to use this tool.
- Easily customizable and can load own scripts against target.
- Highly customizable stage scanning for ninja-like IPS evasion.
- Automatic detection of CVEs (Common Vulnerabilities and Exposures)
- Realtime result saving.
The feature above is really ❤ Awesome and let’s see the commands in the tool…
Advertisement
Wait a min there is no command in the tool because the tool legion is in GUI format. ????
How to work in legion tool
Just follow the below examples by end of this video you will be a pro in working with this tool cheers
Example1: Installing Legion
To install the tool just enter, I am on root so I am not entering sudo…
sudo apt-get install legion

Example2: Load Legion
To load the tool enter legion on terminal
Example3: Interface
Click on the red marked area
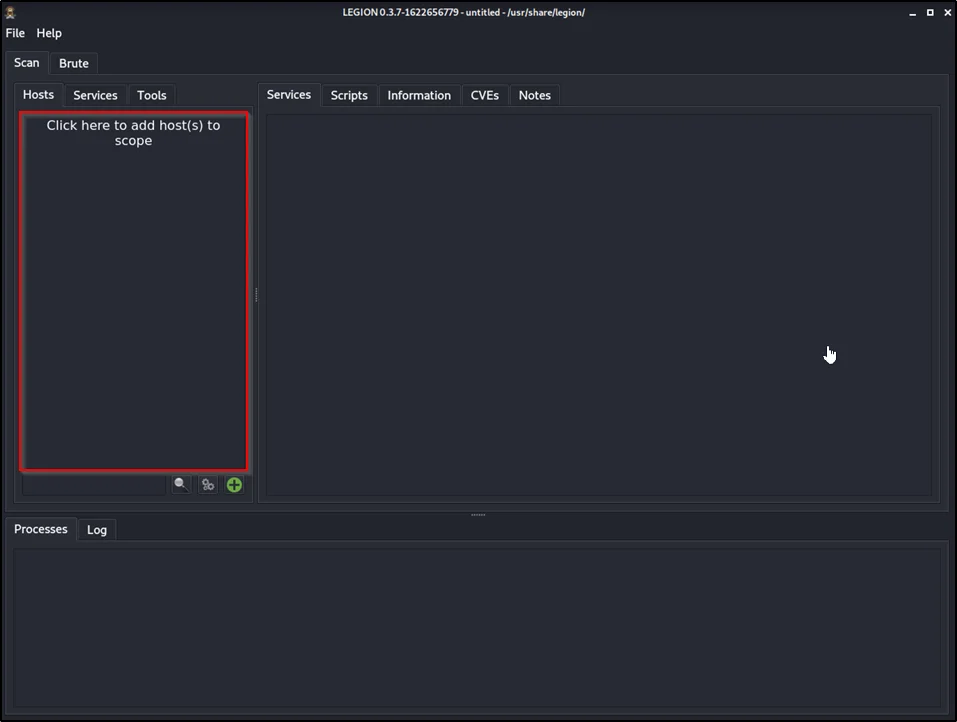
Once you click you will see GUI like this

In the above image we are going with easy mode, Firstly enter IP or domain name on the target, Next, choose the mode I selected easy. Only if you select easy mode the easy mode option will be chosen.
Now select the host discovery and staged Nmap scan.
Next, select the time speed of the scan, I am going with normal use drag to set the time speed.
Once you click on submit
The scan will run and display the info

So, this is how to do a scan using legion tool and top you could find various features just go through it which are pretty simple.
Advertisement
Example4: Scanning
Doing hard scan,
To do a hard scan just enter the target in the box, you can also enter multiple targets and then choose hard as the mode.

Once you select hard you can choose the scan you wanna scan, An amazing feature and also down below you can enter your custom nmap command.
Then give submit ✔
This is how to do a hard scan in the legion tool
To learn more about the tool watch the video I made on Legion the video will be at the top of the post.
Conclusion
According to my knowledge, this is an amazing tool for beginners and this tool is dependent on others so, better learn here and move to advance tools like nmap.
I have already made a full tutorial on nmap [click here]
Advertisement
Also Read: Network mapping using Nmap
Also Read: The 7 popular commands in NMap
Our name is GoVanguard (not Vanguard). 😉
Nice write up.
Thank you and it is great tool ❤